Bel t -p ack transmitter m w233 uhf, Inst alla tion of ba tteries, Operating the d ynamic wired microphone w arning – Paso Sound WPCS50 User Manual
Page 9: Operation of system with cd player module
22
7
Operating
the
d
ynamic
wired
microphone
W
arning
:
There
is
a
M
IC
IN
jack
with
dedicated
volume
control
for
this
portable
sound
unit.
To
use
a
cable
microphone
(
d
ynamic
only
),
just
p
lug
in
the
end
with
a
phone
jack
plug
into
MIC
IN
.
Rotate
the
volume
control
knob
clockwise
and
amplified
sound
could
b
e
heard
when
voice
is
spoken
into
the
cable
microphone.
This
operation
is
valid
for
version
of
WPCS50
with
built-in
CD
player
.
To
operate,
turn
on
the
CD
/
T
APE
power
cum
volume
control
switch
a
little
until
L
ED
next
to
it
g
low
.
The
LCD
panel
on
the
CD
player
will
be
lighted
up
and
normal
operation
is
ready
.
To
insert
a
C
D,
just
push
it
into
the
CD
slot
and
the
mechanism
will
suck
it
in
automatically
.
Rotate
the
T
APE
/
C
D
volume
control
knob
to
adjust
the
volume
of
the
CD
player
.
For
Bass
and
T
reble
setting,
adjust
the
T
O
NE
control.
C
lockwise
from
center
line
o
f
the
T
O
NE
control
is
to
boost
T
reble
and
counterclockwise
direction
from
center
line
is
to
boost
Bass.
For
more
details,
please
refer
to
the
explanation
on
CD
controls
and
functions.
There
are
two
versions
of
CD
player
in
of
fer
,
namely
the
normal
CD
player
and
the
second
is
the
CD
cum
MP3
player
.
For
the
normal
CD
player
,
it
only
a
ccepts
commercially
recorded
CD
with
normal
recording
format.
CD-
R,
CD-R
W
and
MP3
format
which
are
recorded
or
downloaded
from
your
computer
will
not
be
accepted
and
the
no
CD
or
Read
Error
will
be
shown
in
LCD.
For
CD
cum
MP3
player
, it
reads
commercially
recorded
CD
as
well
as
CD
recorded
in
MP3
format.
Operation
of
MP3
module.
For
details,
please
refer
to
explanation
of
MP3
player
controls
and
functions.
Operation
of
system
with
CD
player
module.
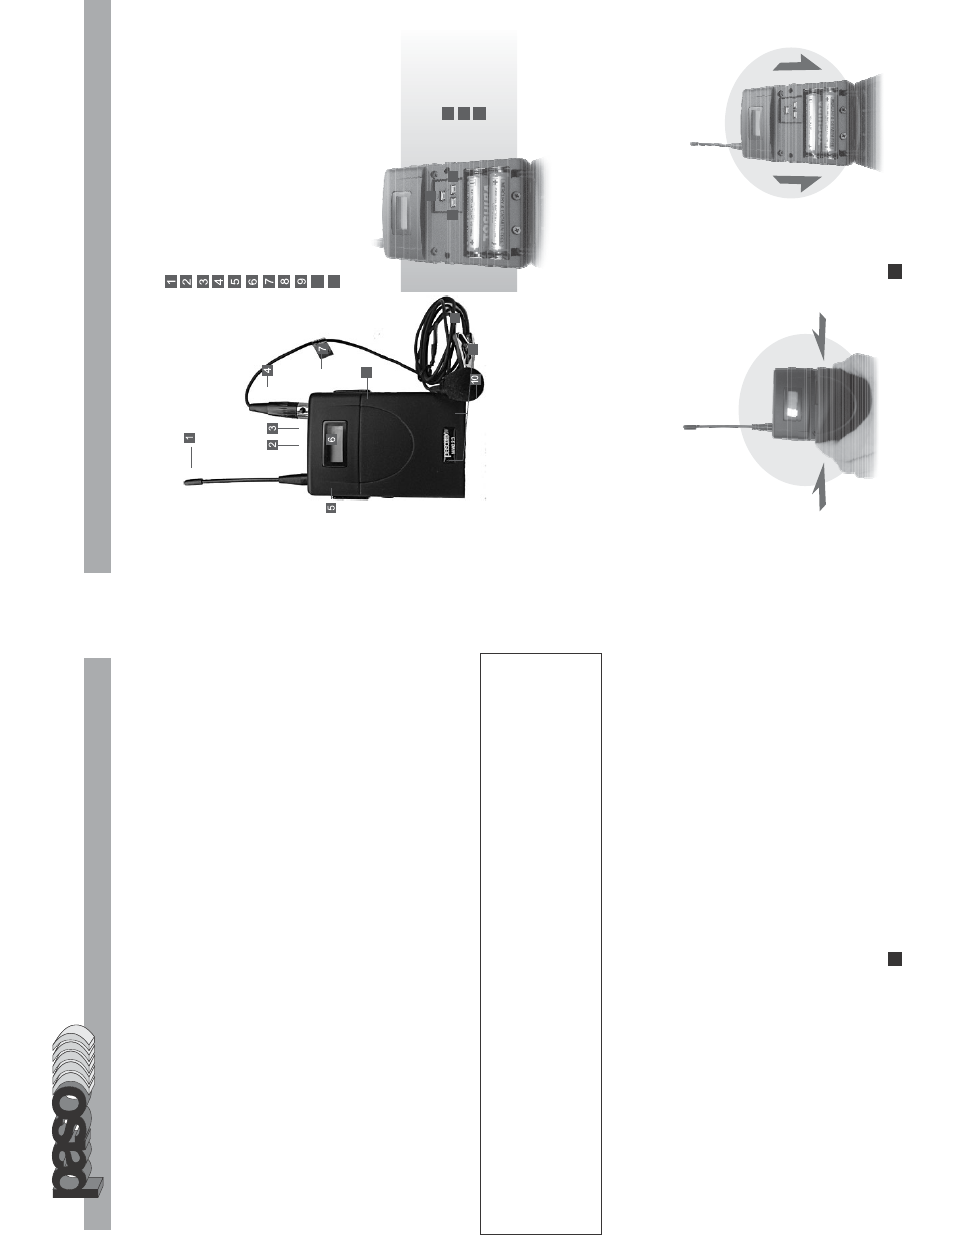
BEL
T
-P
ACK
TRANSMITTER
M
W233
UHF
MW
233
uses
2
pieces
of
"
A
A
" size
batteries
(Alkaline
battery
is
recommended
).
To
install
or
remove
the
batteries,
press
the
release
buttons
at
the
edges
of
the
transmitter
to
open
or
close
the
cover
as
illustrated
(
Fig.1
).
When
installing
the
batteries
with
the
cover
open
toward
you,
the
cover
might
block
your
hand.
It
is
thus
recommended
that
while
inserting
or
removing
the
batteries
please
hold
the
transmitter
in
such
a
way
that
the
cover
open
away
from
you.
(
Fig.2
)
INST
ALLA
TION
OF
BA
TTERIES
8
9
11
10
11
Antenna
Battery
weak
/
a
udio
mute
indicator
Audio
mute
switch
Mini-XLR
c
onnector
Power
ON
/
O
FF
switch
LCD
display
Mini
USB
p
ort
Cover
release
button
Charging
contacts
Lavalier
microphone
Mic
c
lip
12
13
14
Fig.2
Fig.1
14
13
12
SET
UP
DOWN
PROFESSIONAL
AUDIO
&
SOUND
®