Dacor Epicure User Manual
Page 10
88
WARNING:
To avoid electrical shock or burns, turn off
all controls and ensure the cooktop is cool
before cleaning.
IMPORTANT:
Do not use harsh or abrasive cleaning
agents, waxes, polishes, or commercial
cooktop cleaners to clean the cooktop.
Read and follow the
CARE AND CLEANING
INSTRUCTIONS to ensure that proper cooktop
operation and appearance will be maintained
throughout the lifetime of the product. Several
materials and finishes are used in the
cooktop. Each material and finish must be
properly cleaned according to the following
recommendations. Failure to follow these
recommendations may result in permanent
damage to the cooktop.
Cleaning Tips
WARNINGS:
1. Before cleaning the cooktop, ensure
that all burners are turned off and that
all components are cool enough to
safely touch.
2. After cleaning, reassemble all
components before attempting to
operate the cooktop.
Proper cleaning is necessary to maintain
cooktop performance and appearance, while
also ensuring safe operation. The cleaning
effort necessary to maintain the cooktop varies
according to the type and amount of cooking.
For example, more frequent cleaning is required
if the cooktop is used often for frying or other
high temperature operations.
Clean the cooktop thoroughly prior to operating
it the first time. For initial and everyday cleaning,
use a soft cloth or sponge lightly dampened with
a solution of warm water and hand dishwashing
liquid to clean all components.
IMPORTANT:
1. To keep the cooktop looking its best,
clean it after every use as soon as all
components are cool enough to safely
touch. Also, quickly wipe up spills that
occur while cooking, being careful
not to touch any hot areas. Spills that
remain on hot burner components will
be very difficult to clean, especially if
allowed to burn on. Spills of certain
foods, such as tomatoes, citrus
juices, vinegar, alcohol, and milk, are
very harmful if allowed to stand for
any length of time. Therefore, save
time while also maintaining a new
appearance by cleaning regularly and
shortly after spills occur.
2. Use the mildest cleaner or procedure
available to perform the cleaning
operation.
3. Use only a sponge, soft cloth, fibrous
or plastic brush, and nylon pad for
cleaning. Avoid the use of abrasive
cleaners such as steel wool.
4. Always dry components completely
before using the cooktop.
5. The use of brand names is intended
only to indicate a type of cleaning
agent or cleaning implement. All
products listed by name must be used
in accordance with the manufacturer’s
recommendations. Use of a brand name
does not constitute an endorsement,
nor does omission of a particular brand
imply that a product is inferior.
Recommendations for cleaning specific cooktop
components are summarized below:
IMPORTANT:
The grates, burner caps, and spill-over
areas on the cooktop, unlike other porcelain
enamel appliances in your home, are
exposed to extremely high temperatures
in a matter of seconds. In addition to
this extreme thermal shock, the grates
are subjected to mechanical shock when
utensils are placed on or slid across them.
Finally, spillovers introduce foods with high
acidity to all of the porcelain components.
Due to these severe operating conditions,
all porcelain enamel components on the
cooktop will undergo an inevitable change
in appearance with use. Meticulous care
and cleaning will slow but not eliminate this
natural and expected aging process.
Treating the porcelain components with care will
slow the natural deterioration that takes place
with cooktop use. Please follow these guidelines
to keep the porcelain parts looking their best:
1. Do not use utensils having rough bottoms,
as this can result in permanent damage
to the top surfaces of the porcelainized
grates.
2. Do not drop utensils onto the grates or
drag heavy pots across the tops of the
grates.
1. Use low or medium flame heights when
cooking in utensils that are poor conductors
of heat, such as glass, ceramic, and cast
iron cooking vessels. Reduce the flame
height until it covers approximately 1/3 of
the utensil diameter. This will ensure even
heating within the utensil and reduce the
likelihood of burning or scorching of food.
2. Reduce the flame if it is extending beyond
the bottom of the utensil. A flame that licks
along the sides of the utensil is potentially
dangerous.
3. Reduce the flame height, to the minimum
level necessary, to perform the desired
cooking process. Remember that food
cooks just as quickly at a gentle boil as it
does at a vigorous, rolling boil. Maintaining
a higher boil than is necessary wastes
energy, cooks away moisture, and causes
a loss in food flavor and nutrient level.
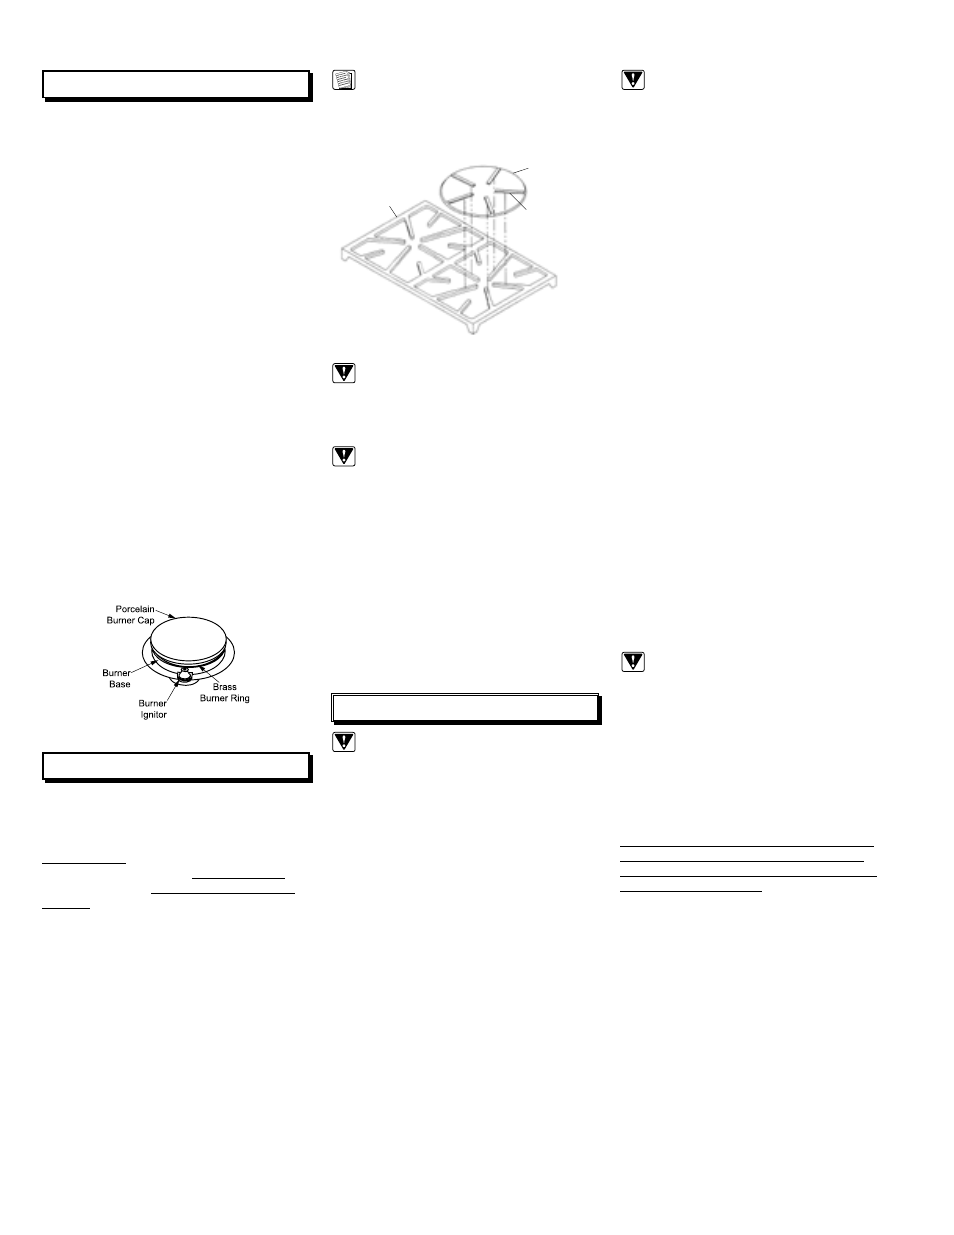
Sealed Burner Assembly
Using the Simmer Plate
The Simmer Plate has been specifically
designed for simmering and holding food at the
lowest safe temperature.
The Simmer Plate
is to be used by setting the burner to its
lowest setting. The Simmer Plate has been
specifically designed for simmering only.
The Simmer Plate must be removed when
cooking.
To install your Simmer Plate locate the five feet
on the bottom, align with the five longest fingers
on the cooktop grate then set the plate on top of
the grate. When correctly installed, the Simmer
Plate will rest about 1/2 inch above the top
surface of the grate and will be locked in place
to prevent turning.
Your Simmer Plate has a non-stick coating for
easy cleaning. Take care in using abrasives on
the non-stick coating, as it will scratch. Some
wearing may occur on top of the Simmer Plate
offset fingers, this is normal with use.
Simmer
Plate
Grate
Stabilizer
Feet
Simmer Plate
NOTE:
Non-stick coatings if used at high
temperatures can be harmful to birds. Avoid
keeping pets (birds) in your kitchen during
cooking.
Setting the Burner Flame Heights
Epicure™ Range burners are all rated at a
maximum output of 15,000 BTU/HR.
All burners are sealed to the cooktop by gaskets
around the underside of the burner bases,
thereby preventing any liquid spills from getting
below the cooktop frame.
Setting the proper burner flame height for the
desired cooking process and selected utensil
will result in superior cooking performance,
while also saving time and energy. Follow these
recommendations for best results: