Rear panel connections usb operation – NewHank Roommate User Manual
Page 4
1
2
2
1
2
2
1
2
2
2
2
3
3
4
5
6
7
8
8
9
10
NEWHANK
- www.newhank.com -
MATE Instruction Manual Page 4
ROOM
QUALITY AV PRODUCTS
1. Turn on your computer and the ROOMMATE.
2. Use a USB cable to connect one or both ports of the ROOMMATE
to your computer.
3. Windows will immediately recognize the mixer as a "USB Audio
Device”or "USB Audio CODEC”and will automatically install
any required system components.
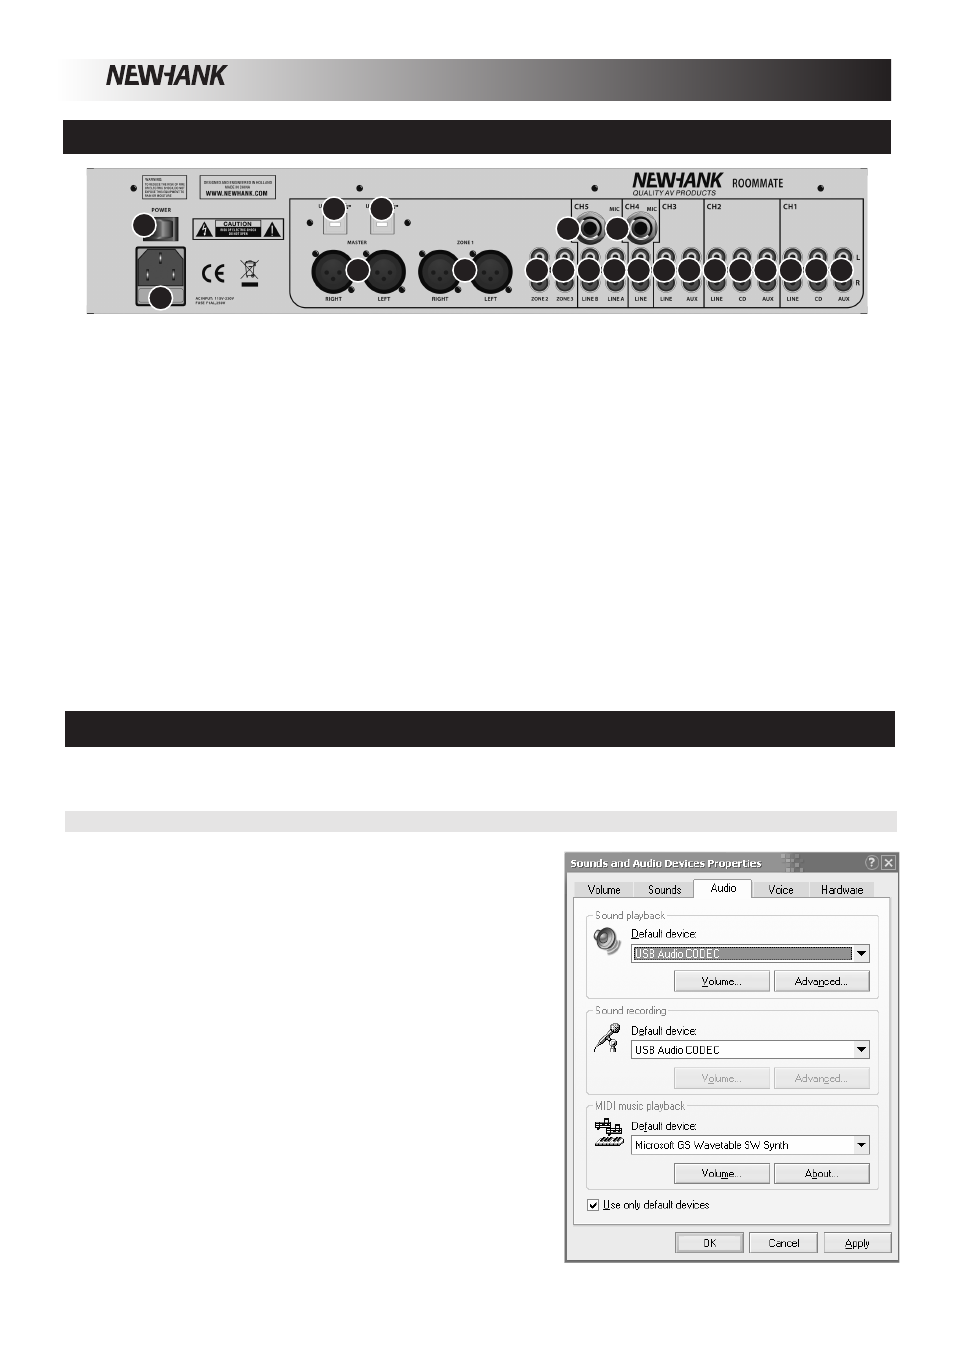
REAR PANEL CONNECTIONS
USB OPERATION
The
is equipped with two USB ports that allow you to play content from your computer through the mixer,
The USB interface on your mixer works with your computer just like a standard USB “plug and play” sound card.
ROOMMATE
WINDOWS CONFIGURATION
To change system audio preferences in Windows, you will need toa-
ccess the Sounds and Audio Devices properties, located in the
Control Panel.
The first time you connect the Mixer to your computer, the mixer
will be automatically assigned as the default or "preferred" device
for sound playback on your computer. All of your computer's sounds
will be now sent to the mixer channel indicated above the USB con-
nection.
If you have connected both USB ports to your computer, the
ports will be numbered in the order they were connected. For exa-
mple, if you connected USB A before USB B, USB A will appear as
"USB Audio CODEC” and USB B will appear as "USB audio CO-
DEC (2)".
Note:
1. AUX INPUTS (RCA) --
The red colored RCA jack represents the right channel input and the white represents the left
channel input.
2. LINE INPUTS (RCA)--
3. MIC INPUTS --
4. ZONE 3 OUTPUT (RCA) --
5. ZONE 2 OUTPUT (RCA) --
6. ZONE 1 OUTPUT (BALANCED) --
7. MASTER OUTPUT (BALANCED) --
8. USB Ports --
9. POWER SWITCH --
10. POWER IN --
CD, DVD- players, Tape Decks and other line level devices may be connected to
these jacks.
CD, DVD players, Tape Decks and other line level devices may be connected to
these inputs.
Connect microphones to these inputs.
Connect this output to an extra amplifier, powered monitors or a lighting console.
Connect this output to an extra amplifier, powered monitors or a lighting console.
Connect this output to an extra amplifier, powered monitors or a lighting
console.
Connect this output to an extra amplifier, powered monitors or a lighting
console.
These connections receive audio from a connected computer.
Turns the mixer on and off.
Use the included IEC power cable to connect the mixer to a power outlet.