Connection to the hardware, Start to use ladibug – Lumens Technology Ladibug 3.0 User Manual
Page 9
8
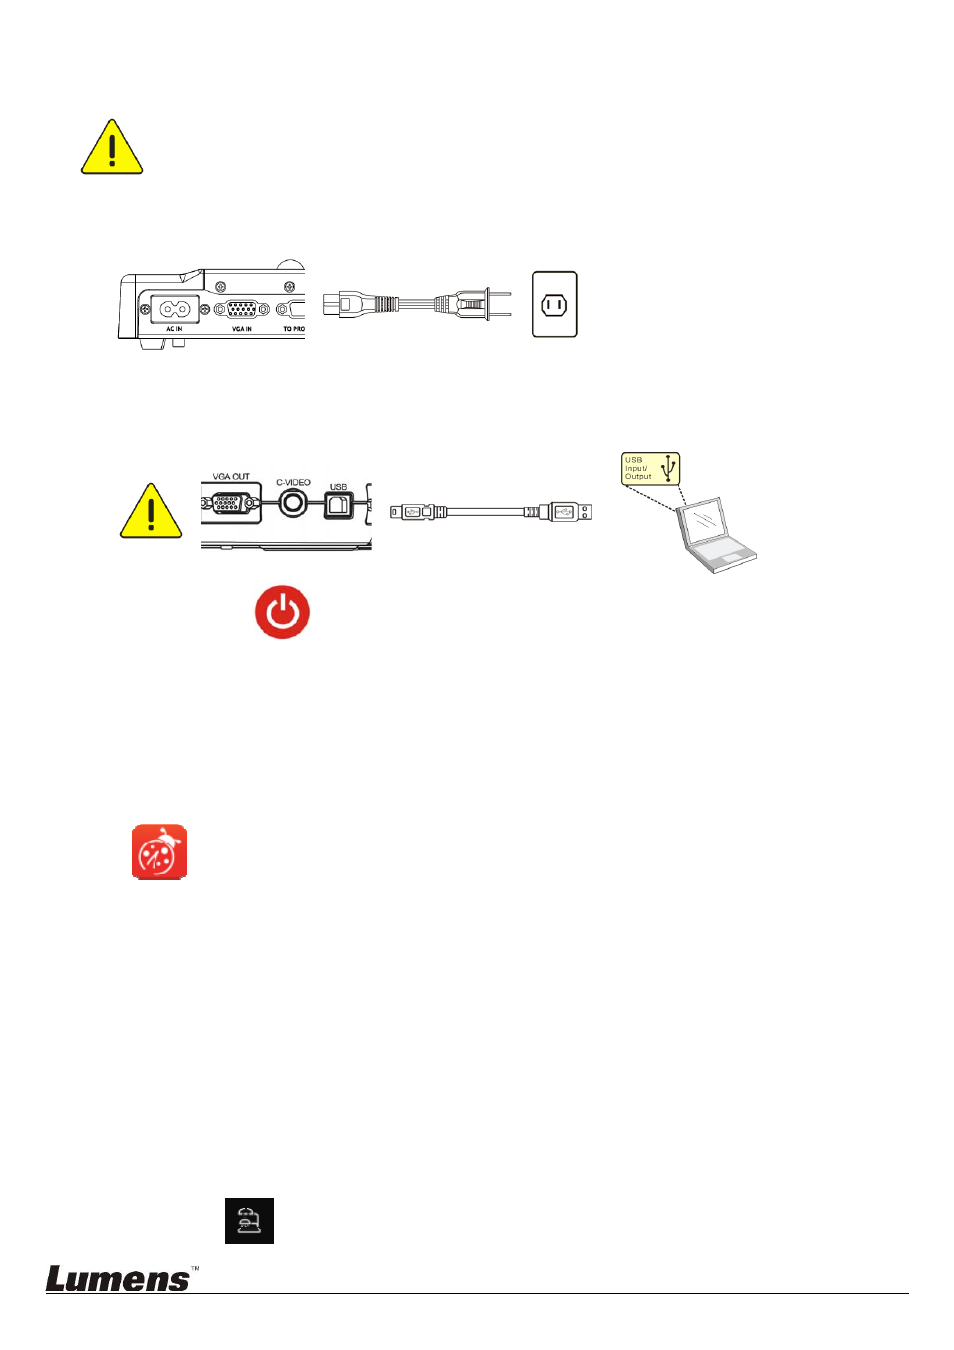
4. Connection to the Hardware
following steps.
4.1. Connect the power cord of the Document Camera.
AC outlet
4.2. Connect USB cable to the Document Camera and your computer.
4.3. Turn on Power
.
5. Start to Use Ladibug™
Instructions for connecting Ladibug to the camera are provided below:
5.1. Use the USB cable to connect the camera to the computer
5.1.1.
Double-click the [Ladibug] icon to launch Ladibug™.
5.1.2.
If firewall warning occurs in the first use, please check the [LAN] and then press [Allow
to Access]
.
Safety Alert: Click [Unblock].
POWER Frequency setting page, please complete the settings following the instructions
on the screen.
A live image is displayed when the setting is finished.
Note: You are advised to confirm the local voltage/frequency before setting the POWER
Frequency. For example, 60 Hz is applicable for America, Taiwan, Japan, etc; 50 Hz is
applicable for Europe or other regions.
5.1.3.
Start Using.
Note: If no image is displayed, follow the instructions to establish a connection:
Click
,
open [Search Window], and select [USB Document Camera].