Lacava llc 5 – Lacava 1545 User Manual
Page 5
LACAVA LLC
5
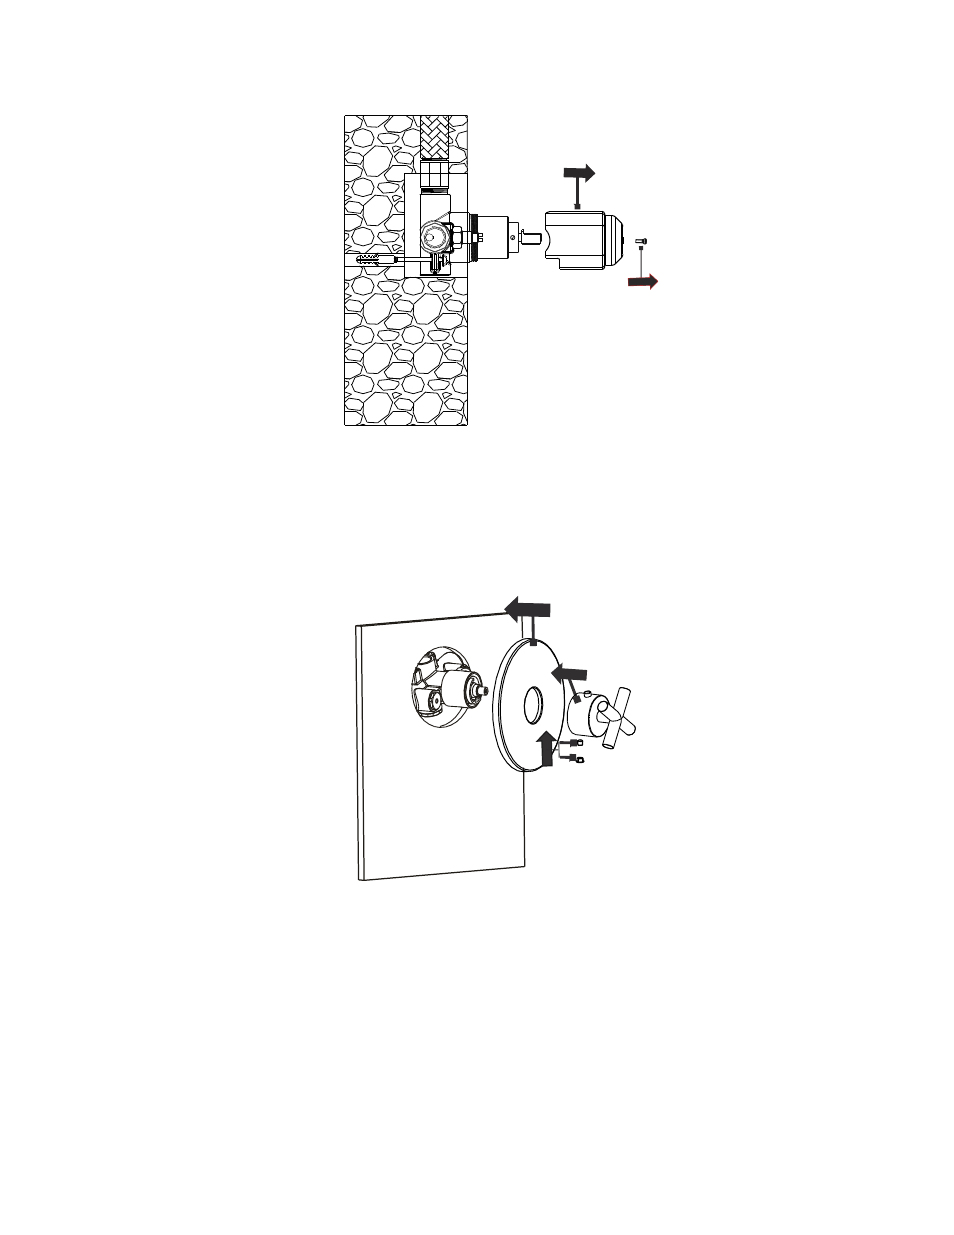
8. Provide a hole in the wall material flush with the plaster guard. Please take note of the rough-in depth indicated
in the specifciation drawing on page 2 of this booklet.
9. Once surrounding wall is finished, remove the plaster guards from the valve.
10. Apply a bead of silicone sealant onto the back edge of the backplate and slide into place over the cartridge
body. Using a clean rag, wipe off any excess silicone.
11. Loosen the set screw on the control handle and place on the cartridge stem. Then tighten the set screw using the
provided wrench and place the cap cover over the screw hole.
See also other documents in the category Lacava For Home:
- 2895 (9 pages)
- 2895 (10 pages)
- 1495 (9 pages)
- 0112 (9 pages)
- 4558 (10 pages)
- 4288 (11 pages)
- 2982 (7 pages)
- DE200 (10 pages)
- 1595 (10 pages)
- 7000 (10 pages)
- 6972 (9 pages)
- 0140SP (10 pages)
- 5054-42A (8 pages)
- 4500P (1 page)
- EX11 (9 pages)
- 0640 (10 pages)
- 4500G (7 pages)
- 12340 (8 pages)
- TUB07 (6 pages)
- 13010 (8 pages)
- 0475 (10 pages)
- EX03 (11 pages)
- W1001 (8 pages)
- TUB04 (9 pages)
- W1010 (8 pages)
- W1001H1 (8 pages)
- W1030 (9 pages)
- W1065 (9 pages)
- 0142 (9 pages)
- 0142 (9 pages)
- 0142 (9 pages)
- 2840 (9 pages)
- 1910 (10 pages)
- 2840 (9 pages)
- 0142 (9 pages)
- 2840 (9 pages)
- 1460 (9 pages)
- 2860 (9 pages)
- 0660 (9 pages)
- 0621 (8 pages)
- 0620 (8 pages)
- 1414 (9 pages)
- 0470 (9 pages)
- 0146 (9 pages)
- 1420 (8 pages)