Replacing diverter cartridge, Lacava llc 4 – Lacava W1030 User Manual
Page 4
LACAVA LLC
4
Installation Instructions/Instrucciones de Instalación
1. Attach the rough-in plate onto the bottom half of the rough-in assembly by screwing the provided screws through
both the holes along the edge of the plate and rough-in box.
2. Place the entire rough-in assembly into the wall and connect the water supply to the bottom inlets (Hot on the
left/Cold on the right). The rough-in assembly must be installed so that side A is level horizontally. This is how the final
trim will be oriented. Once rough-in is installed adjustments to the trim cannot be made.
3. Insert a brass ring into the center hole of the trim-shelf and then tighten the locking nut.
4. Attach the flexible supply lines from the rough-in to the extensions on the back wall of the trim-shelf.
5. Position the trim-shelf on the wall against the rough-in assembly by placing the holes in the trim over the ceramic disk
cartridges extending from the wall.
6. Carefully tighten the trim with the brass rings (WARNING: DO NOT OVERTIGHTEN, overtightening may deform trim).
7. Tighten the escutcheon rings over the brass rings.
8. Loosen the set screws and slide the control handles onto the cartridge extensions. Tighten the set screws to secure
into place.
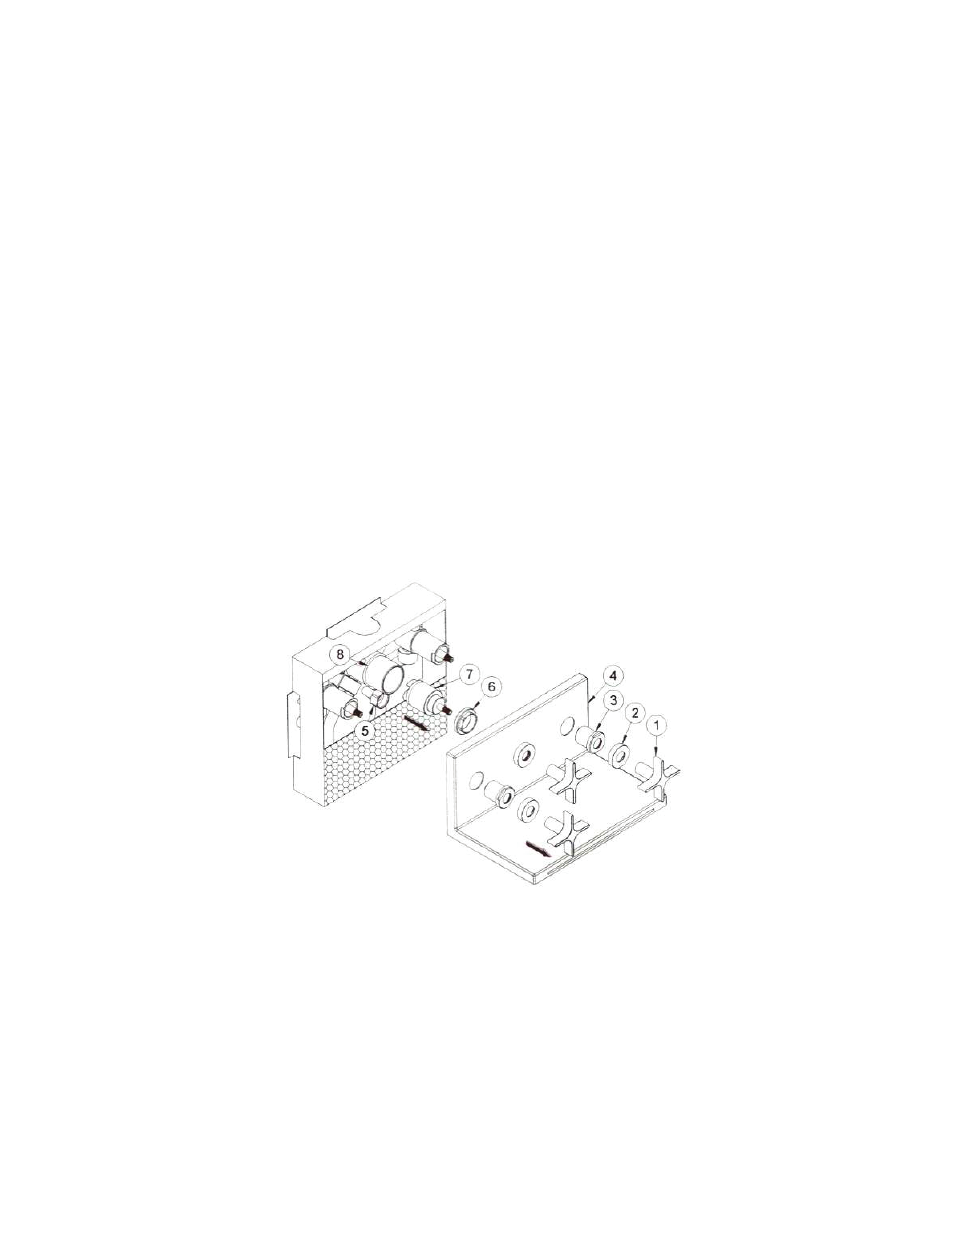
Replacing Diverter Cartridge
1. Close the water supply lines.
2. Loosen set screws and remove the control handles (1), unscrew the escutcheon rings (2) and then unscrew the brass
rings (3).
3. Remove the trim (4) by detaching the flexible supply lines (5) from the back of the trim.
4. Unscrew the ring (6) and remove the diverter cartridge (7) from the body (8).
5. Clean the rear seal area and install the new cartridge (PART: RCMB135).
6. Reassemble by reversing steps 2-4.
7. Open the supply lines and check for any leaks.