Installation instructions – Lacava 4500G User Manual
Page 3
LACAVA LLC
®
Page 3 of 7
Installation Instructions
1. In order to provide proper support for wall-mounting a sink, it's usually necessary
to remove a small section of drywall so you can access the wall studs and attach
blocking between them.
2. Based on the sink’s dimensions and mounting height (usually 30-33 inches above
floor), decide where support will be needed.
3. Remove the drywall in that area and install 2-by-6 or 2-by-8 blocking between the
wall studs. Then using 3 1/2” galvanized common nails, toenail the blocking to
the studs and repair the drywall.
4. If the studs cannot be used then ¾” plywood support behind the finished wall can
also provide the necessary support.
5. Place the sink onto the desired position on the wall and mark the wall through the
mounting holes on the sink. Then drill pilot holes for the mounting bolts, using a
masonry bit if the wall is tile.
6. Screw the wood threaded part of the mounting bolts into the pilot holes so that
the machine threaded portion is sticking out of the wall.
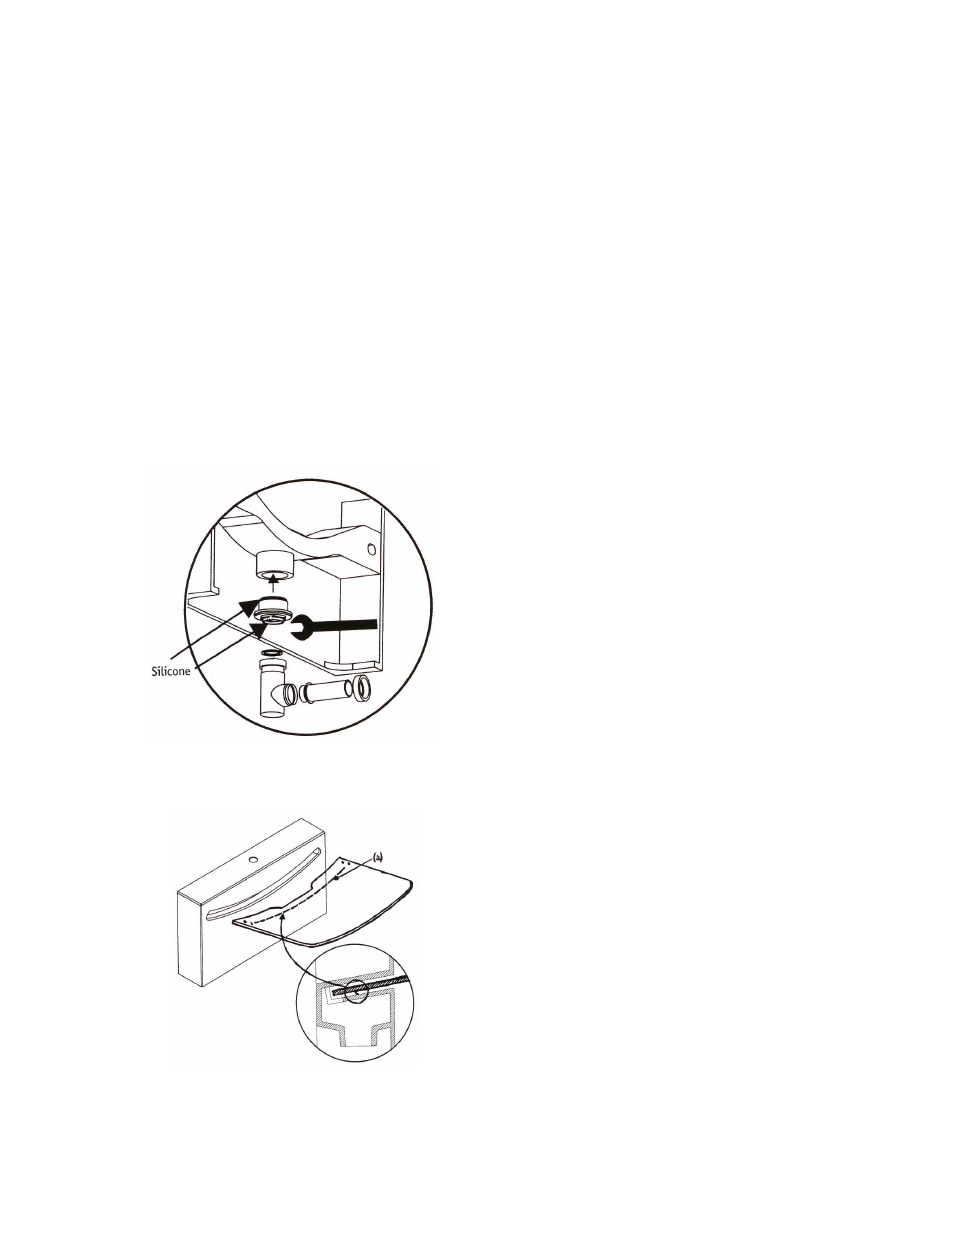
7. Drain and trap assemblies will
come preinstalled by Lacava.
Simply check that the parts are
still sealed and positioned
properly.
8. Place the protective strip along
the bottom of the glass, between
the two mounting holes towards
the rear.
9. Slide the glass through its
designated slot on the ceramic
base so that it sits all the way
back. Note: One person should
hold the glass in place, while a
second installer performs steps
10-12.