Wall-mounted cabinet instructions, Wall-mounted countertop instructions, Lacava llc 2 – Lacava DE142 User Manual
Page 2
LACAVA LLC
2
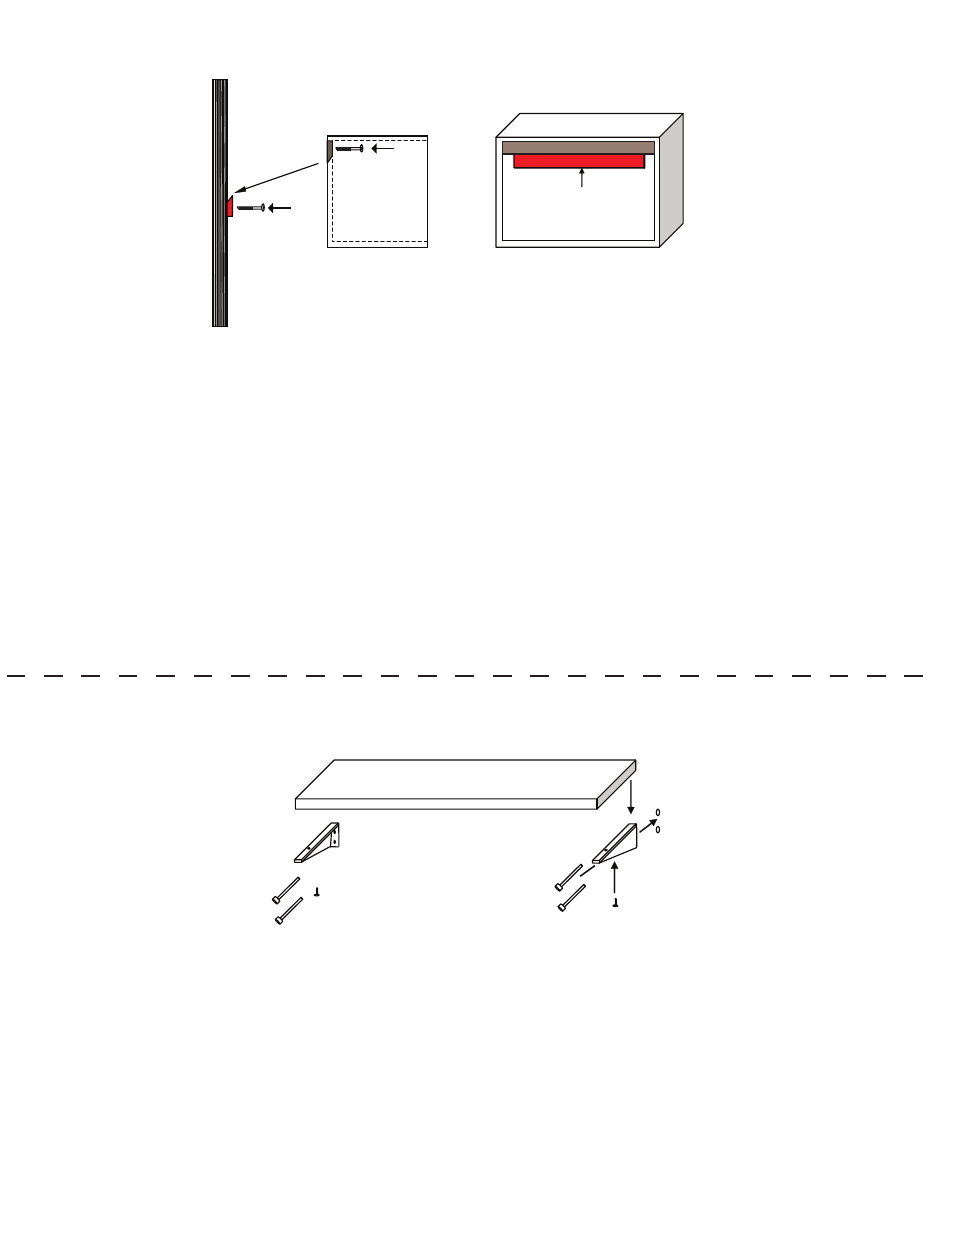
Wall-mounted Cabinet Instructions
side
back
Cleat
1. In order to provide proper support for wall-mounting a cabinet, it's usually necessary to remove a small section of
drywall so you can access the wall studs and attach blocking between them.
2. Based on the cabinet’s dimensions and mounting height, decide where support will be needed. Then remove the
drywall in that area and install 2-by-6 or 2-by-8 blocking between the wall studs. Then using 3 1/2” galvanized
common nails, toenail the blocking to the studs and repair the drywall.
3. If the studs cannot be used, then ¾” plywood behind the wall can also provide the necessary support.
4. Attach the wedged wood bracket (cleat) to the wall by drilling minimum two screws through the cleat directly into
the studs or reinforced wall.
5. Place cabinet onto the wall so that the wood bracket on the back of the cabinet sits on the wall cleat. There will
be some room so that the cabinet can be adjusted left to right once mounted onto the cleat.
6. Once the cabinet is hanging on the cleat in the desired position secure the cabinet to the wall so that it cannot
be lifted off the cleat. Use 2 x 2 1/2” wood screws driven from inside the top of the cabinet into the wall.
Wall-mounted Countertop Instructions
1. Perform steps 1-3 above to determine the proper height and support needed to mount countertop.
2. Measure and drill pilot holes in the reinforced wall for the anchors. Insert anchors and attach the brackets with
provided screws, so that the finished part of the bracket faces outwards.
3. Place the countertop on top of the brackets and attach with the provided screws.
Min. 2X
Min. 2X