Kleenmaid IC57 User Manual
Page 5
5
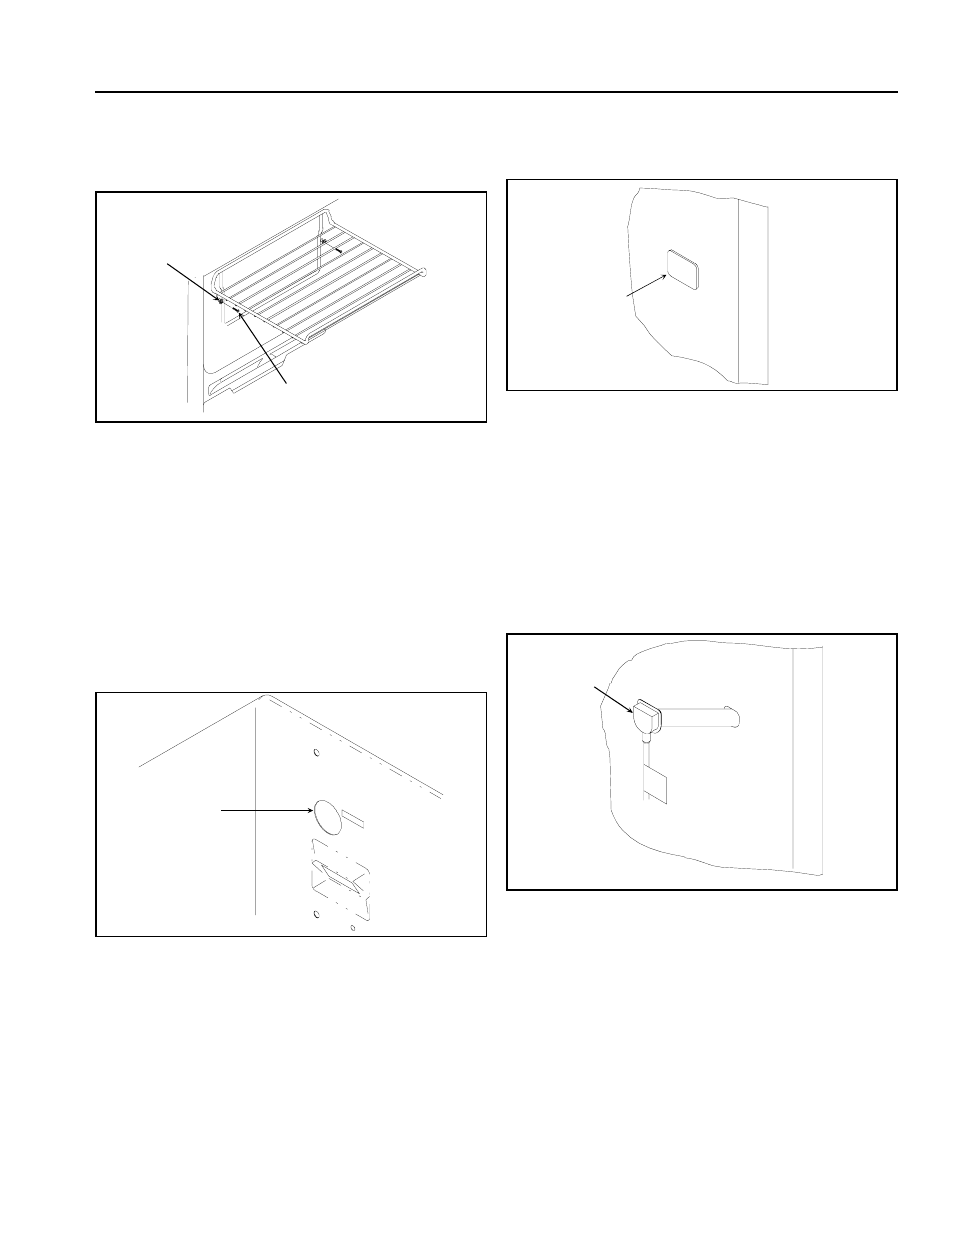
12. Remove ice service rack by lifting rack off plastic
washers then pulling out. Remove screws with a 6.35
mm (
1
/
4
") hex nut driver. Insert button plugs into screw
holes.
A
B
A. Washer
B. 6 mm screw
13. Locate electrical and water connection cover plate on
upper left rear wall of freezer. Remove electrical and
water connection cover plate by removing screw with
a 6.35 mm (
1
/
4
") hex nut driver. Discard electrical and
water connection cover plate and screw.
14. Remove freezer shelf by pulling out. A sharp tug may
be necessary. Remove basket by lifting and pulling
out.
15. Cut out sealing tape from water inlet tube hole located
on back wall, with a knife.
C
C. Water inlet tube hole.
16. Remove water tube inlet hole plug on rear of
refrigerator cabinet with a screwdriver, blade covered
with masking tape.
D
D. Water tube inlet hole plug.
17. Temporarily cover end of water fill tube elbow with
masking tape to prevent insulation beads from
entering water fill tube elbow. Push water fill tube
elbow through “U”- shaped hole on back of refrigerator
cabinet. Pull water fill tube elbow through hole in
freezer. Remove masking tape from end of water
fill tube elbow.
18. Push gently on water fill tube elbow while twisting
elbow slightly until elbow is firmly seated inside “U”-
shaped hole.
E
E. Water fill tube elbow.
19. Remove ice maker from shipping carton. Ice maker is
shipped with arm down. This is correct for ice
production. Do not force arm down or up.