Thermostat, Programmer, Setting the clock – Kleenmaid TO60X User Manual
Page 5
5
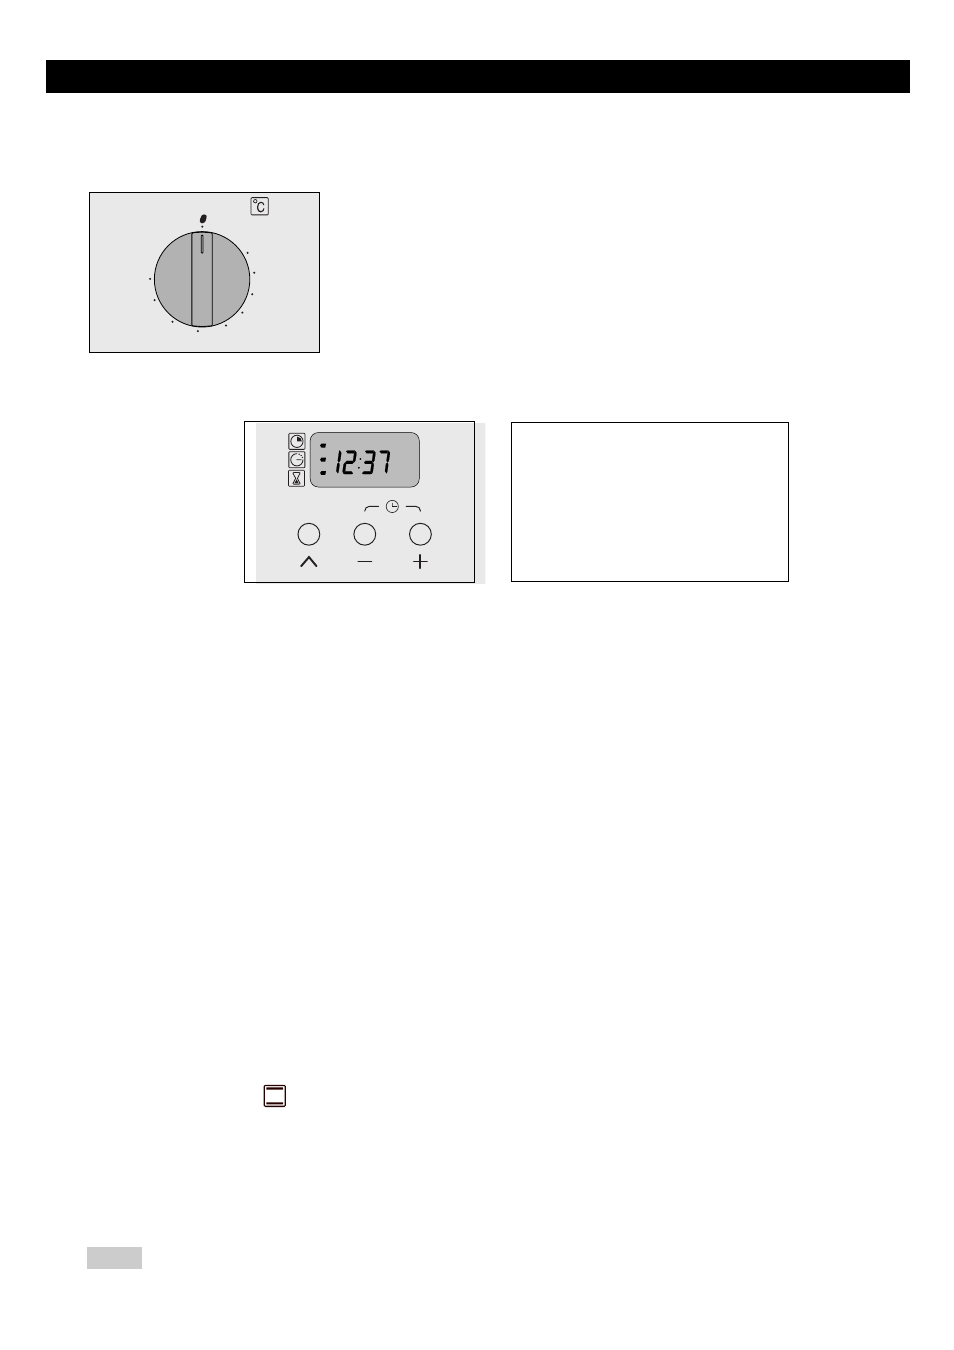
Thermostat
T H E L A Y O U T O F T H E C O N T R O L P A N E L
55˚
100˚
150˚
75˚
180˚
210˚
240˚
265˚
125˚
Turn the thermostat knob to the right to the setting required
(see cooking guide enclosed with the instruction book).
Programmer
1 - Time (display from 0.00 to 23.59)
2 - Cooking time
3 - End of cooking time
4 -Timer (59 min. 30 sec.)
5 - Programming button
6 -Buttons for cooking time (+ or -)
a) When the oven is first connected
•
Adjust the time using the
+
and
-
Buttons (6)
(keep pressing on the button to change the numbers more quickly).
Example : 12h30.
•
Press the "PROGRAMMING"
Button (5)
to validate
NOTE: If the "PROGRAMMING"
Button (5)
is not pressed, the oven will automatically validate the numbers set after a few
seconds.
b) Changing the time on the clock
•
Press the
+
and
-
Buttons (6)
at the same time for a few seconds until the display flashes.
•
Adjust the time indicated using the
+
and
-
Buttons (6)
.
•
Press the "PROGRAMMING"
Button (5)
to validate.
If the "PROGRAMMING"
Button (5)
is not pressed, the oven will automatically validate the numbers set after a few seconds.
Setting the clock
The programmer should only be indicating the time; the figures should not be flashing.
•
Select the cooking method
Turn the cooking selection knob to the position you require.
Example :
"Conventional" position.
•
Select the cooking temperature
Turn the thermostat knob (temperature selection) to the temperature recommended in your recipe.
Example : 200°C temperature mark.
The oven will then heat up and the thermostat indicator will come on.
ALL COOKING IS DONE WITH THE OVEN DOOR CLOSED
After a cooking cycle, the cooling fan keeps working for some time to ensure the reliability of your oven.
Nb :
Cooking straight away
1
2
3
4
6
6
5