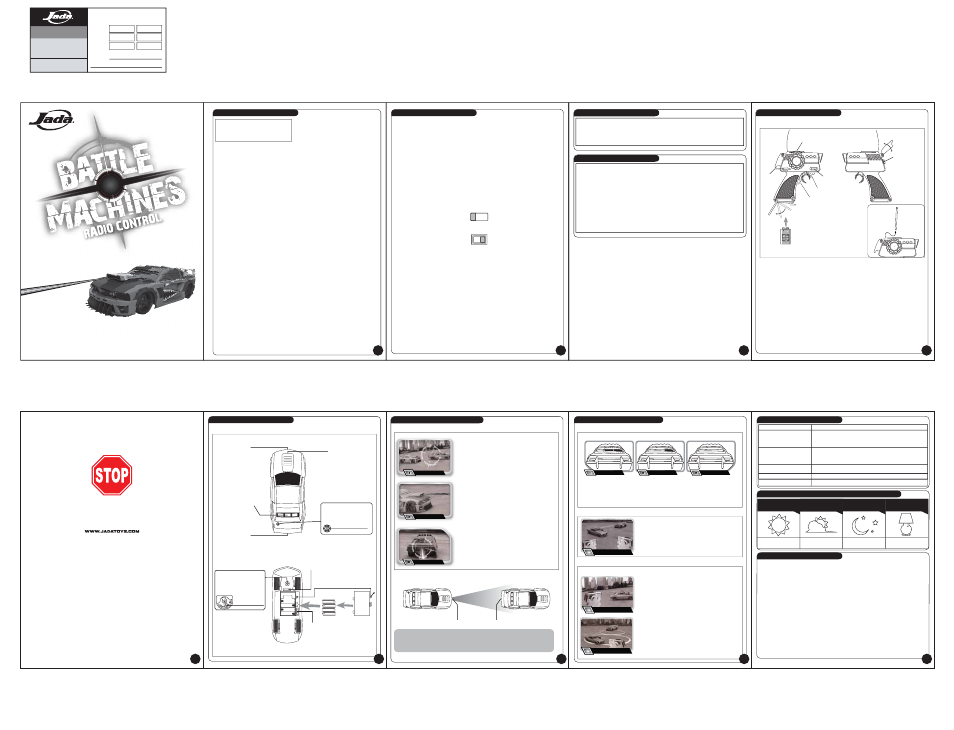
Jada Toys Battle Machine Mustang R/C User Manual
Important, On/off/autopilot, Problems
CONSUMER INFORMATION:
CONSUMER INFORMATION:
TROUBLE SHOOTING
TWO PACK INSTRUCTIONS
©2010 Jada Toys, Inc., City Of Industry, CA 91748
Made in China
JADATOYS.COM
FCC STATEMENT
INFRARED SHOOTING DISTANCE
(based on lighting conditions)
CONSUMER INFORMATION:
AIM, FIRE, & HIT YOUR OPPONENT 3X TO WIN
COMPLIANCE WITH FCC REGULATIONS (VALID IN U.S. ONLY) THIS DEVICE COMPLIES WITH PART 15 OF THE
FCC RULES. OPERATION IS SUBJECT TO THE FOLLOWING TWO CONDITIONS:
1. THIS DEVICE MAY NOT CAUSE HARMFUL INTERFERENCE, AND
2. THIS DEVICE MUST ACCEPT ANY INTERFERENCE RECEIVED, INCLUDING INTERFERENCE THAT MAY
CAUSE UNDESIRED OPERATION.
This device generates and uses radio frequency energy and if not used properly may cause interference to radio and
television reception. It has been tested and found to comply with the limits set by the FCC which are designed to provide
reasonable protection against such interference.
FCC Warning:
CAUTION:
The manufacturer is not responsible for any radio or TV interference caused by unauthorized modifications to this
equipment. Changes or modifications not expressly approved by the party responsible for compliance could void the
user’s authority to operate the equipment.
NOTE: This equipment has been tested and found to comply with the limits for a Class B digital device, pursuant to Part
15 of the FCC Rules. These limits are designed to provide reasonable protection against harmful interference in a
residential installation. This equipment generates, uses and can radiate radio frequency energy and, if not installed and
used in accordance with the instructions, may cause harmful interference to radio communications. However, there is no
guarantee that interference will not occur in a particular installation. If this equipment does cause harmful interference to
radio or television reception, which can be determined by turning the equipment off and on, the user is encouraged to try
to correct the interference by one or more of the following measures:
--Reorient or relocate the receiving antenna.
--Increase the separation between the equipment and receiver.
--Connect the equipment into an outlet on a circuit different from that to which the receiver is connected.
--Consult the dealer or an experienced radio/TV technician for help.
Battle Machines is a registered trademark of Jada Toys, Inc.
Jada oval mark is a registered trademark of Jada Toys, Inc.
©2010 JADA TOYS, INC. CITY OF INDUSTRY, CA 91748
PROBLEM
Car will not START.
Car does not respond
to controls.
Car does not drive straight.
SOLUTION
1. Power switch is “OFF”. Turn “ON”.
2. Batteries are installed with incorrect polarities. Check the + and -
markings to make sure the batteries are properly aligned.
3. Batteries are drained. Charge batteries and/or install new batteries.
1. Transmitter Controller battery is drained. Replace the 9V Controller battery.
2. Vehicle is out of range. Bring Controller closer to the Vehicle.
3. Interference from surrounding electrical machinery. Bring to
a wide open space.
1. Adjust the Steering Dial underneath the front axle, left or right, until the
wheels point straight forward.
1. Release the trigger immediately, and rest your Vehicle for a few minutes.
Car does not move.
1. Batteries becomes weak, time to refresh batteries.
Car reset after being shot.
BATTERY INSTALLATION
A B C
F84713-0000-ISH-EN01A
Important!
Problems?
U.S.A & Canada
30-Day Limited Warranty
Jada Toys Products
Jada Toys, Inc. warrants to the original consumer purchaser that this product will be free of defects in material and
workmanship for thirty (30) days from the date of purchase. Jada Toys will repair or replace the product, at our sole option,
in the event of such a defect within the warranty period.
In the event of a defect covered under this warranty, first call the toll-free number listed below. Many problems can be solved in
this manner. If necessary, you will be instructed to return the product (postage pre-paid and insured by the consumer) to the
address below.
Enclose your name, address, telephone number, copy of dated sales receipt, and a brief explanation of the defect.
Repair or replacement, and return shipment, will be free of charge. Please return the defective part or unit, packed
securely. This warranty does not cover damage resulting from unauthorized modification, accident, misuse or abuse. If the
product is returned without a dated sales receipt, the product may be excluded from coverage under this warranty.
Jada Toy’s liability for defects in material and workmanship under this warranty shall be limited to repair or replacement, at
our sole option, and in no event shall we be responsible for incidental, consequential, or contingent damages (except in those
states that do not allow this exclusion or limitation). This warranty is exclusive, and is made in lieu of any express or implied
warranty. Valid only in U.S.A. and Canada. This warranty gives you specific legal rights and you may have other rights,
which may vary from state to state. Some states do not allow the exclusion of incidental or consequential damages, so the
above exclusions or limitations may not apply to you.
TOLL-FREE NUMBER: 1-800-679-JADA (5232) (valid only in U.S.A. and Canada)
Hours: 9:00 A.M. – 5:00 P.M. Pacific Time;; Monday – Friday. Expect some delay in January following the holiday season.
Please be patient and keep trying the toll-free number.
Address for Returns:
Consumer Relations, Jada Toys, Inc
938 Hatcher Ave.
City of Industry, CA 91748
1. The first hit will lower your opponent’s Shield Levels and jam their vehicle for a short duration.
2. The second hit will lower your opponent’s Shield Levels further and jam their Vehicle once
again.
3. On the third hit, your opponent’s Shield Levels will be wiped out and they will lose control of
their Vehicle.
*Press the RESET button to start over again.
ONE PLAYER TRAINING
2
1
RADIO CONTROL
PLAY PATTERN
TWO PLAYER COMBAT
1
ONE PLAYER MODE
TWO PLAYER MODE
THERE ARE 2 WAYS TO PLAY IN THIS MODE
1. RADIO CONTROL
Play as a standard radio control vehicle.
2. 1 PLAYER TRAINING
In the 1 player mode, switch your Battle Machine RC to the
“AUTOPILOT” position - this will initiate the “Auto Pilot” feature.
Using the other RC Vehicle, you can sharpen your battle skills
while you Aim, Fire, and Hit the moving target.
Note: Auto Pilot feature goes into Sleep Mode after a few minutes.
Switch your Battle Machine RC to the “OFF” position, then
back to “AUTOPILOT” position to restart “Auto Pilot” mode.
1. 2 PLAYER COMBAT
In the 2 player mode, switch both your Battle Machine RC’s
to the “ON” position. Both players drive their vehicle with the
controller and try to eliminate each other.
Note: both RC Vehicles must be on different channels.
A B C
QUICK GUIDE
HOW TO PLAY
Operations Tips:
Car: ON/OFF/AUTOPILOT switch is located on the bottom of the Vehicle.
Transmitter: ON/OFF switch is located on the front of the Transmitter Controller.
When you are ready to run, please make sure to push the ON/OFF/AUTOPILOT switches to
“ON” position on the Vehicles, and Transmitters.
2. FIRE
Press the ‘Fire’ button on the transmitter controller to
shoot Infrared Light from the front of your RC vehicle.
3. HIT
When positioned correctly, the Infrared beam will hit your
opponent’s RC vehicle and reduce their Shield Levels.
The IR Sensor will detect Infrared beam within a limited distance depending on the light source in
play environment. Shoot Vehicle at a closer distance for a more accurate shot.
Infrared Shooter
IR Sensor
AIM
FIRE
HIT!
GENERAL GUIDE
Go Forward
Reverse
Insert 9 volt
battery into
transmitter
Left / Right
On / Off
Fire Button
Flip Switch to
reveal Fire Button
Multi-channel
selector ABC
TRANSMITTER CONTROLLER
Slide Antenna
through Antenna
Sleeve before
operation.
GENERAL GUIDE
FRONT
REAR
4 x AA Batteries
(Not Included)
Steering Dial
Steering Alignment Lever
TO ADJUST STEERING
ALIGNMENT
Adjust the steering alignment
lever on the underside of the
vehicle when the vehicle
doesn’t run straight forward.
ON/OFF/AUTOPILOT
Multi-channel
selector ABC
Weapon with light effect
Shield Levels
Infrared Shooter
RC VEHICLE
IR Sensor
RESET Button
The silver or black RESET
button is located on the top rear
of the vehicle. Pressing the
button will reset vehicle’s Shield
Levels.
RESET button
FRONT
REAR
ON/OFF/AUTOPILOT
Normal Play Mode
,QVHUWFRUUHFWEDWWHULHV
2QWKHIURQWRIWKH7UDQVPLWWHU&RQWUROOHUWXUQWKHON/OFF switch to “ON” position.
2QWKH9HKLFOH¶VFKDVVLVWXUQWKHON/OFF/AUTOPILOT switch to “ON” position.
6WDUWWRSOD\
3RLQW\RXUWUDQVPLWWHUFRQWUROOHUDQWHQQDXS±QRWGRZQWRZDUG\RXUYHKLFOH,I\RXUYHKLFOHJHWV
too far away, it won’t work properly.
'RQ¶WGULYH\RXUYHKLFOHLQVDQGRUWKURXJKZDWHURUVQRZ
'RQ¶WVWRUH\RXUYHKLFOHQHDUKHDWRULQGLUHFWVXQOLJKW$OZD\VWXUQVZLWFKHV2))DQGUHPRYHDOO
batteries for storage.
,IWKHYHKLFOHUHVHWVDXWRPDWLFDOO\WKHEDWWHULHVDUHZHDNDQGQHHGWREHFKDQJHG
Cleaning instruction:
To clean, wipe excess dirt from toy. Remove batteries first. Wipe toy clean with wet cloth using plain
water. Wipe dry. DO NOT IMMERSE IN WATER and DO NOT CLEAN VEHICLE WITH ANY
CHEMICALS. Let the toy completely dry before putting batteries back into clean, dry battery compartment.
FUNCTION DESCRIPTION
Muiti-Channel Operations Tips:
your friends’ transmitters or vehicles. You must play with another multi-channel equipped vehicle for
this feature to work. (race up to 6 cars at once when using both the 27mhz and 49mhz
frequencies).
7KHUH¶VRQHPXOWLFKDQQHOVHOHFWRUVZLWFKRQ\RXUYHKLFOH¶VFKDVVLVDQGDQRWKHURQHRQWKH
transmitter. The vehicle’s switch has 3 positions - one for each multi-channel setting.
7KHWUDQVPLWWHUVZLWFKKDVSRVLWLRQV²RQHIRUHDFKPXOWLFKDQQHOVHWWLQJ
)RUVXFFHVVIXORSHUDWLRQWKHYHKLFOHVZLWFKDQGWKHWUDQVPLWWHUVZLWFKPXVWEHVHWWRWKHVDPH
multi-channel setting. When you’re driving by yourself, you can set the switches to any of the
available multi-channel settings, as long as the setting on the vehicle matches the setting on the
controller.
(DFKYHKLFOH¶VIUHTXHQF\LVSUHVHWQRWDGMXVWDEOHRU0K]%XWLWVFKDQQHOLVDGMXVWDEOH$%
or C. Before playing, make sure your vehicle and transmitter are set to the same channel.
When playing with other vehicles, make sure you have different combination of frequency and
channel than others. For example, 27Mhz A channel can only play with 27Mhz B, C, or 49Mhz A, B,
C;; but it cannot play with 27Mhz A. Up to 6 players total.
:KHQ\RXZDQWWRSOD\KHDGWRKHDGPDNHVXUHWKDWHDFKGULYHUXSWRGULYHUVWRWDOKDVDYHKLFOH
and transmitter set to a different multi-channel setting.
7RRSHUDWH\RXUYHKLFOHZLWKWUDQVPLWWHUWXUQWKHYHKLFOH¶V212))/AUTOPILOT switch to the “ON”
position.
6HWWKH0XOWL&KDQQHOVHOHFWRURQWKHYHKLFOHWRWKHVDPHFKDQQHODVWKHWUDQVPLWWHU
7XUQWKHWUDQVPLWWHU¶V212))VZLWFKWRWKH³21´SRVLWLRQ
vehicle, make sure that vehicle operates under a different frequency than yours.
,I\RXQHHGWRFKDQJHWKHPXOWLFKDQQHOVHWWLQJILUVWPDNHVXUHWKDW\RXUYHKLFOHLVWXUQHG³2))´
Change the switch position as desired, making sure to change both the transmitter and vehicle
channel settings. Then turn your vehicle back “ON” for more playing action.
Note: make sure you’re not using the Transmitter Controller while changing the selector switch
position.
INSTALLING BATTERIES IN THE VEHICLE
1. Push the ON/OFF/AUTOPILOT switch to “OFF” position on Vehicle.
2. Remove battery cover (Use a Phillips screwdriver to remove screw - Not Included) and unclip.
3. Remove the used batteries (if any).
4. Insert 4 (four) “AA” batteries, with polarity (+/-) as shown inside battery compartment.
5. Snap the battery compartment door back into place and replace screw.
INSTALLING BATTERY IN CONTROLLER
1. Open the battery cover.
2. Remove the used batteries (if any).
3. Install 1 (one) 9V battery with polarity (+/-) as shown inside battery compartment.
4. Replace battery cover.
Note: batteries not included
1. AIM
Position your RC vehicle behind your opponent’s RC.
For the IR sensor to detect the Infrared Light, you must aim
towards the rear of their vehicle.
To install batteries,
remove battery cover
(Use a Phillips
screwdriver to remove
screw - Not Included)
and unclip. Insert new
batteries as shown.
TWIN PACK CONTENTS
Vehicle x 2PCS
Transmitter Controller x 2PCS
Antenna Sleeve x 2PCS
Keep these instructions for future reference: they contain important information.
IMPORTANT: Please read all “Consumer Information” before operating your vehicle.
ADULT SUPERVISION REQUIRED.
Surfaces may become hot and cause burns if electronics get wet. Do not operate vehicle through
water or snow.
Consumer Information:
Note to Adults: to ensure that the child’s play is both safe and fun, please review all operating
instructions and safety rules with your child.
Safety Tips
1(9(5SRLQWWKHLQIUDUHGOLJKWDWH\HV
1(9(5GULYH\RXUYHKLFOHRQVWUHHWV7KH\¶UHIRUUHDOFDUV
'2127SLFNXSYHKLFOHZKLOHLQPRWLRQ
$YRLGFROOLVLRQVZLWKZDOORUKDUGVXUIDFHV
.HHSILQJHUVKDLUDQGORRVHFORWKLQJDZD\IURPWLUHVDQGWKHZKHHOKXEVZKLOHWKHYHKLFOHLV
switched ON.
$GXOWVXSHUYLVLRQLVUHFRPPHQGHGZKHQWKLVYHKLFOHLVEHLQJRSHUDWHG
7RDYRLGDFFLGHQWDORSHUDWLRQUHPRYHDOOEDWWHULHVZKHQQRWLQXVH
%HVXUHWRUHVW\RXUYHKLFOHIRUDWOHDVWPLQXWHVDIWHUHYHU\PLQXWHVRIRSHUDWLRQ
3OHDVHDYRLGXQLQWHQGHGSOD\ZLWKHOHFWULFZLUHVRIWDQWHQQDDVLWPD\GHIHFWSURGXFWRUUHVXOW
in strangulation.
BEFORE BATTERY INSTALLATION
Each Battle Machine is designed to work with 4 (four) standard “AA” batteries, sold separately.
Each controller is designed to work with a 9-volt battery, sold separately.
Battery Safety Information
,QVXUHWKDWEDWWHU\SRODULW\LVFRUUHFW
8VHRQO\EDWWHULHVRIWKHW\SHUHFRPPHQGHGRUHTXLYDOHQW
'RQRWPL[ROGDQGQHZEDWWHULHV
'RQRWPL[DONDOLQHVWDQGDUGFDUERQ]LQFRUUHFKDUJHDEOHQLFNHOFDGPLXPEDWWHULHV
5HPRYHXVHGXSEDWWHULHVLPPHGLDWHO\5HPRYHEDWWHULHVLIYHKLFOHZLOOQRWEHXVHGIRUDORQJ
period of time to prevent possible leakage.
'RQRWUHFKDUJHQRQUHFKDUJHDEOHEDWWHULHV
'RQRWVKRUWFLUFXLWWHUPLQDOV
'LVSRVHRIEDWWHULHVVDIHO\'RQRWGLVSRVHRIEDWWHULHVRUSURGXFWVFRQWDLQLQJQRQUHSODFHDEOH
batteries) in fire, as batteries may explode or leak.
QUICK TIPS
:KHQ\RXUYHKLFOHVWDUWVWRORVHSRZHULWPD\ORVHIXQFWLRQVRUSHUIRUPDQFH,W¶VWLPHIRUIUHVK
batteries (or a recharge). Your vehicle’s running time may change depending on your driving style.
5DGLRLQWHUIHUHQFHFDQPDNH\RXUYHKLFOHUXQEDGO\
Interference can be caused by other R/C vehicles running on the same frequency;; electrical
ZLUHVODUJHEXLOGLQJVRU&%UDGLRV7U\WRVWD\DZD\IURPWKHVH
DO NOT RETURN IT TO THE STORE!
First, call our friendly technicians at:
1-800-679-5232
between the hours of 9 am to 5 pm Pacific Time;; Monday - Friday.
or check our websit at:
2
3
Date:
23, Apr, 2010
Prepared By: Lefang
Description:
RC
Instruction Sheet
Scale:
1:16
Material Code:
Art Dept
Approved
Engineer
Approved
QA Engineer
Approved
Signature
Date of approval
Final Output Approval
(Hong Kong Office use only)
Remarks:
F84713-0000-ISH-EN01A
Battle Machine
®
4
5
6
7
8
9
10
Outdoor: Sunny
(30000-130000Lux)
Approximately within
5 Feet | 2.2 meters
Approximately within
13 Feet | 4 meters
Approximately within
99 Feet | 30 meters
Outdoor: Cloudy
(1000-10000Lux)
Outdoor: Night
(0.01-0.27Lux)
Indoor
(200-700Lux)
Approximately within
66 Feet | 20 meters