Assembly instructions – Desa SPC-54PHW User Manual
Page 6
www.desatech.com
114144-01C
6
ASSEMBLY INSTRUCTIONS
Continued
CHECK FOR LEAKS
IMPORTANT:
The heater must be leak tested be-
fore any further assembly is done. Use only a soap
and water solution. DO NOT USE FLAME.
Turn control knob to the "OFF" position. Securely
connect regulator to propane/LP gas cylinder.
Open propane/LP cylinder valve. Apply a soap
and water solution to connections at the manifold,
burner, and control assembly. Bubbles forming
show a leak. In case of any leaks, turn off pro-
pane/LP cylinder valve, remove manifold, check
and clean connection. Reconnect manifold and
leak test again.
Upon completion of leak test, and when there is
no sign of a leak, turn off propane/LP cylinder
valve and disconnect regulator from propane/LP
gas cylinder. Remove propane/LP gas cylinder and
continue to next step.
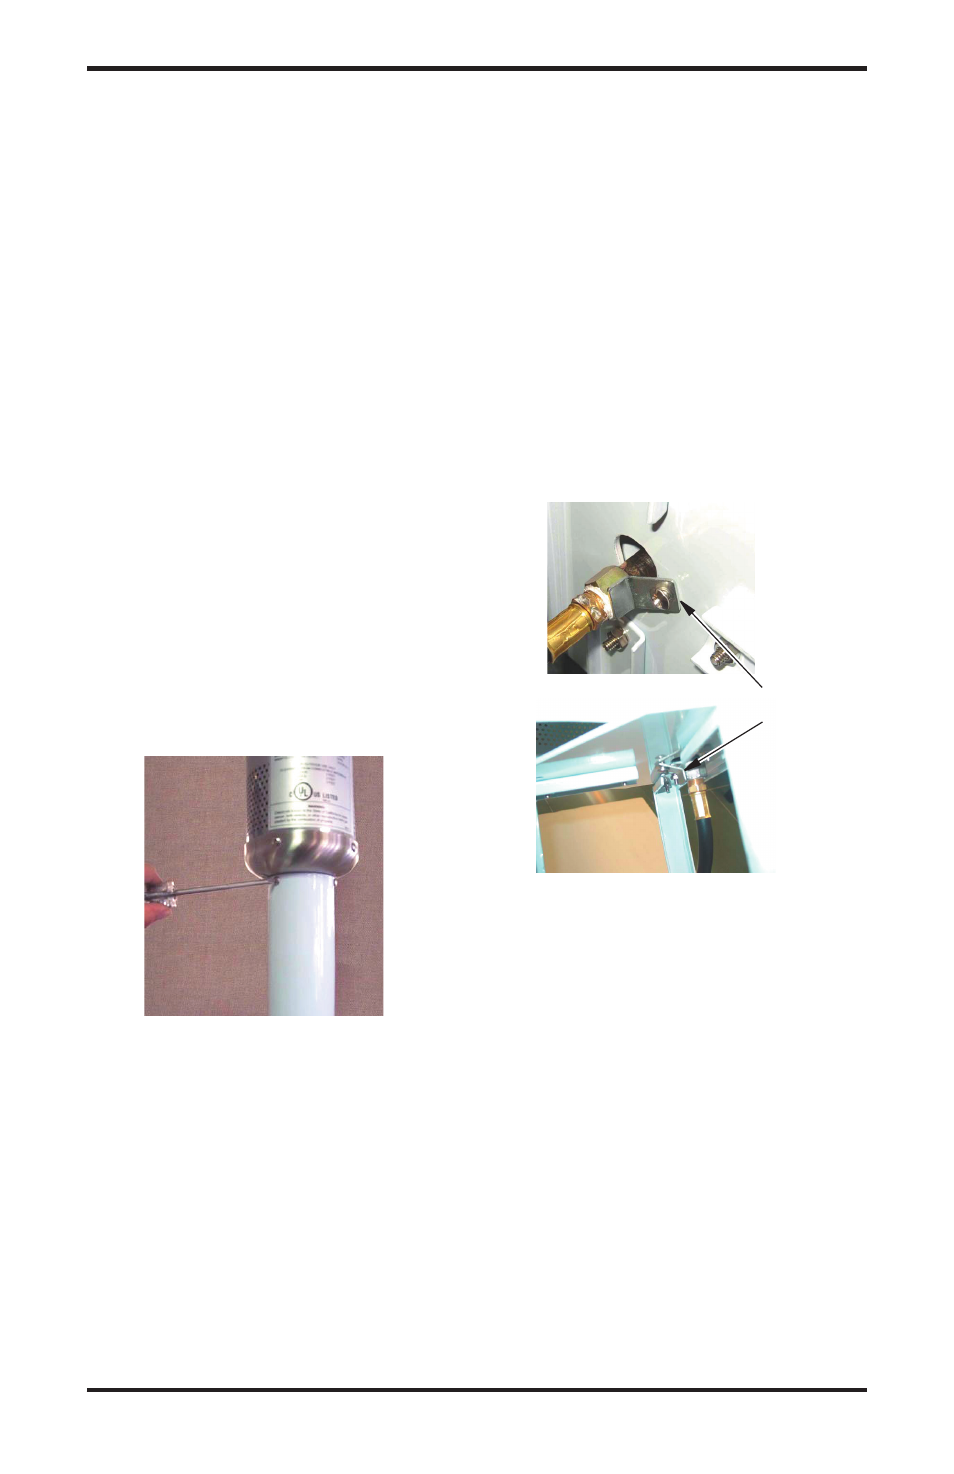
POLE AND BURNER/CONTROL
ASSEMBLY
Attach pole to burner and control assembly (see
Figure 6). Align the three holes. Insert a small
bolt in each hole and tighten using #2 Phillips
head screwdriver.
MANIFOLD FIXING PLATE AND
POLE SUPPORT
1. Locate threaded hole underneath post support.
This hole is for mounting manifold fixing plate
(see Figure 7).
2. Align holes on manifold fixing plate with
threaded holes on pole support.
3. Make sure manifold fixing plate is facing
downward see (Figure 7).
4. Use a bolt to tighten manifold fixing plate to
post support using #2 Phillips head screw-
driver.
5. Turn manifold fixing plate so it will hold
manifold in place.
6. Tighten bolt so manifold fixing plate will not
move.
Figure 6 - Attach Burner and Control
Assembly to Pole
Manifold
Fixing Plate
Figure 7 - Attaching Manifold Fixing
Plate to Post Support