Assembly instructions—workbench (optional), Warning, Workbench use requirements – Gladiator GARS486XBG Cadet 48 x 18 6-Tier Rack Shelf User Manual
Page 8: Unpack, Bottom frame assembly
8
ASSEMBLY INSTRUCTIONS—WORKBENCH (OPTIONAL)
NOTES:
■
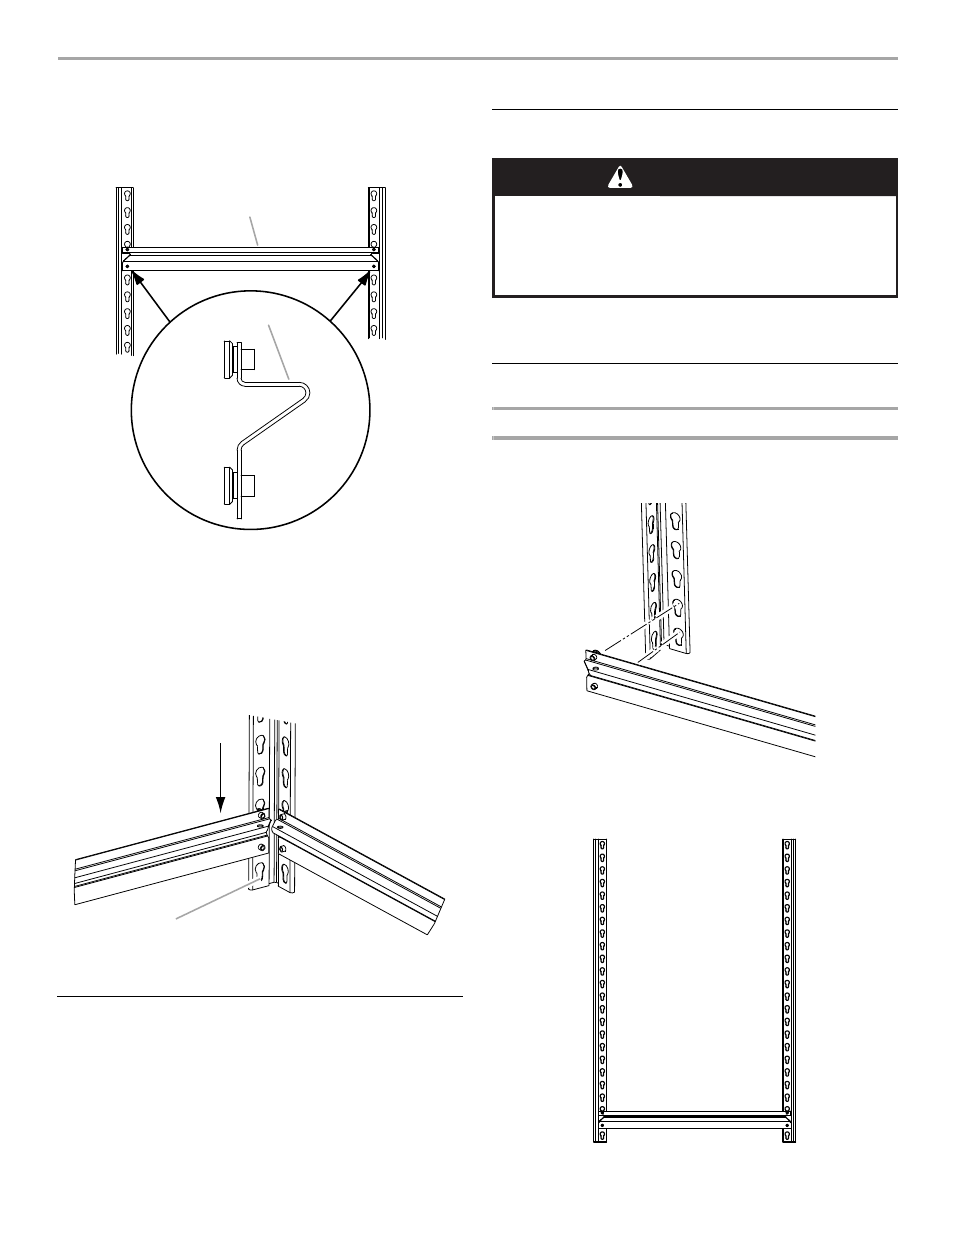
As you assemble the unit, check that all long and short Z beams
are assembled in the upright position.
Z Beam Upright Position
■
When assembling all long and short Z beams, press the beam
rivets to the bottom of the keyhole slots.
■
Check that the beam rivets are fully seated in the slots.
■
If necessary, a rubber mallet may be used to seat the beam rivets
in the slots.
■
To avoid damage or bending of the beam, gently tap the beam
with the rubber mallet.
Workbench Use Requirements
■
Intended for use in a garage.
■
Maximum weight limit is 500 lbs (226 kg) for each shelf.
Unpack
NOTE: Use two or more people to move and assemble shelving.
1.
Remove and verify the contents. See “Parts.”
2.
Dispose of/recycle all packaging materials.
Bottom Frame Assembly
Assemble 2 End Frames
NOTE: To assemble, use P1 or P5 upright posts.
1.
Insert the rivets of the short Z beam (P3) into the bottom keyhole
slots of an upright post (P1 or P5).
2.
Insert the rivets on the other end of the short Z beam (P3) into the
bottom keyhole slots of the second upright post (P1 or P5).
3.
Press the beam rivets to the bottom of the keyhole slots making
sure they are fully seated in the slots to lock the pieces together.
4.
Repeat steps 1 through 3 to assemble the other end frame.
A.
Shelf deck
B.
Flat edge of Z beam on top
A.
Downward force to seat rivet in keyhole slot
B.
Bottom of keyhole slot
A
B
P4
P1
or
P5
P1
or
P5
P2 or P3
A
B
WARNING
Excessive Weight Hazard
Use two or more people to move and assemble
shelving.
Failure to do so can result in back or other injury.
P1
or
P5
P3
P3
P1
or
P5
P1
or
P5