Mount locker to wall, Warning, Hollow wall assembly – Gladiator GASL1TAMDG Licensed Collegiate PrimeTime Locker User Manual
Page 3
3
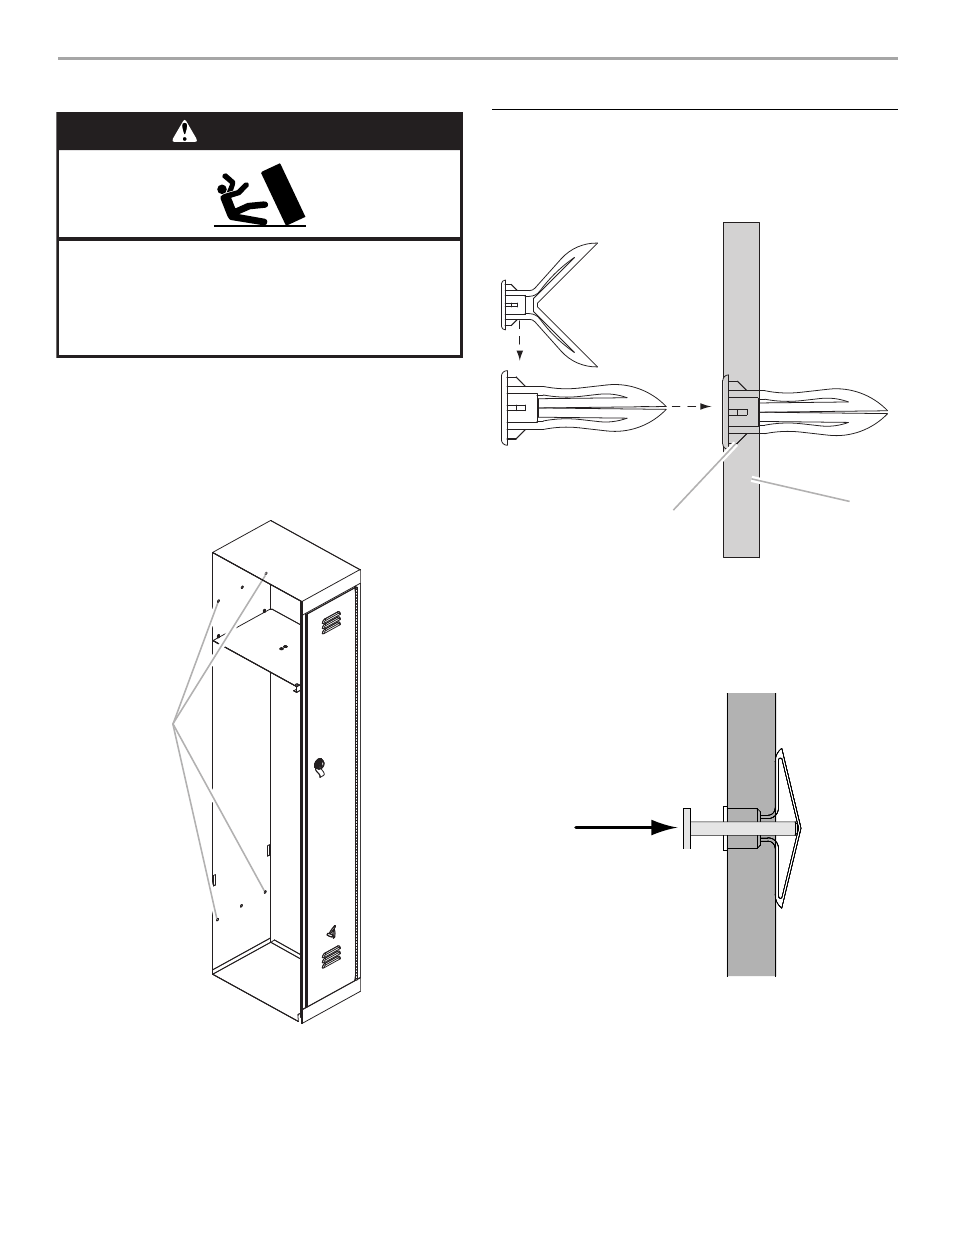
MOUNT LOCKER TO WALL
1.
Unpack and verify that all mounting hardware is included.
2.
Identify locker wall location.
3.
Using 2 or more people, position the locker against the wall at
the mounting location.
4.
Using a pencil, mark the four mounting locations through the
back locker wall.
Wall Anchor Mounting Holes
5.
NOTE: Use of all four mounting holes is required for proper
mounting of the locker.
6.
Move locker away from the wall.
7.
Determine if any of the mounting holes align with a wall stud.
Stud location can be determined with a standard stud finder (not
provided). If mounting holes align with a stud, then assemble
according to section “Stud Alignment Assembly.” If mounting
holes do not align with studs, then assemble according to
section labeled “Hollow Wall Assembly.”
Hollow Wall Assembly
1.
Drill a
⁵⁄₁₆" pilot hole through the wall board at each marked
mounting location (4 holes).
2.
Insert a wall anchor through each pilot hole, as shown.
Fold down (A) and insert into wall (B), as shown.
3.
Using a rubber hammer, tap flush with the wall.
4.
Insert the anchor pin (provided) into the wall anchor hole until it
stops. See the following illustration. Move the pin forward until
you hear a click which is the sound of the wall anchor fingers
opening on the other side of the wall.
5.
If the locker is flush-mounted to the wall, proceed to the section
“Flush Mount to Wall.” If the locker is not flush mounted to the
wall (due to baseboard, etc.), go to the section “Non-Flush
Mount to Wall.”
A. Wall anchor mounting holes
WARNING
Tip Over Hazard
Mount locker to wall, GEARTRACK
®
channels, or
GEARWALL
®
panels according to installation
instructions.
Failure to do so can result in
death or serious injury.
A
A. Folded anchor
B. Anchor inserted into wall
C.
⁵⁄₁₆" pilot hole
D.
³⁄₈" or ¹⁄₂" drywall
A. Anchor pin
B. Hollow wall anchor fingers
B
A
D
C
B
A