Dakota Digital MCL-3K-T User Manual
Page 5
Manual # 650302:B
GAUGE SETUP
The GREEN switch input wire, in the two pin connector, is used to enter setup. If you are only
installing one or a couple Dakota Digital MCL-3K gauges set up may seem a little strange since they are
designed to work as a set, however you’ll simply cycle through a few screens to get to the desired gauge.
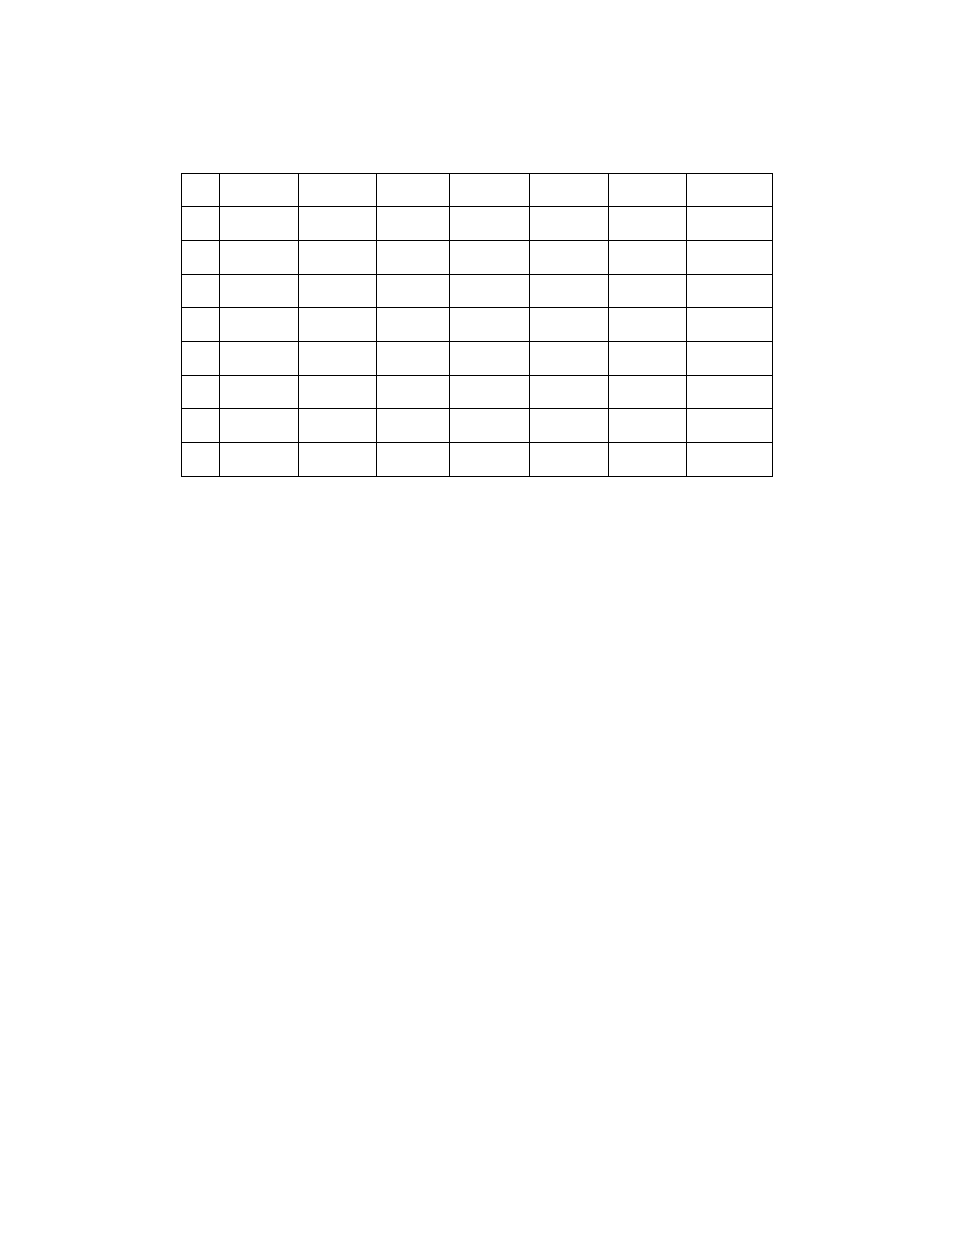
The table below shows what will be on the gauge with each button press, or tapping the GREEN wire
high +12V.
Speed
Tach
Oil psi
Oil temp
Fuel
Volt
Air Temp
1
st
- 1 -
CL
- 1 - - 1 - - 1 - - 1 - - 1 -
2
nd
SPd
- 2 - - 2 - - 2 - - 2 - - 2 -
- 2 -
3
rd
- 3 -
tCH
- 3 - - 3 - - 3 - - 3 -
- 3 -
4
th
- 4 - - 4 -
PSI
- 4 - - 4 - - 4 - - 4 -
5
th
- 5 - - 5 - - 5 - F or C - 5 - - 5 -
- 5 -
6
th
- 6 - - 6 - - 6 - - 6 -
FUL
- 6 -
- 6 -
7
th
- 7 - - 7 - - 7 - - 7 - - 7 -
uLt
- 7 -
8
th
- 8 - - 8 - - 8 - - 8 - - 8 - - 8 -
AIR
Please note that the word “switch” in the setup instruction is in reference to the GREEN wire, you
can install any momentary push button switch and use that or simply strip the wire back and hold or tap
the GREEN wire to a +12V source for set up. Once setup is complete, cover the end of the GREEN wire
and secure it so it cannot accidentally be shorted.
To enter setup:
•
Press and hold the switch while turning the key on, the gauge should light and show “
d
xx” (xx is
the software code and may be used for tech support).
•
Release the switch and
“
-1-”
should be displayed. Looking at the table, above, press and
release the switch and scroll through until you see “
AIR
” on the display; this is the screen you
need to get to in order to enter the air temperaure setup.
•
Press and hold the switch until “
vnt
” is displayed, release the switch and the current temperature
unit will be displayed.
•
Press and release the switch to change between Fahrenheit “
F
FF
F
” and Celsius “
C
”.
•
When the desired unit is displayed, press and hold the switch until “
---
” is displayed to save
changes.
•
Turn off key. Setup is complete.