Flowserve TSQVIOM Durco Mach 1 Severe Service Valve IOM User Manual
Page 9
9
SECTION V
VALVE ASSEMBLY 1”-6” TSQV WITH SLEEVE
NOTE: Part number reference is shown
in Figures 1-3, Sec III.
1. Mount body (Part 1) on arbor press
or table vise holding one flange.
Weld-in bodies are repaired in-line.
Place sleeve (Part 2) in position in
body. Align sleeve ports with body
ports. (Figure 5)
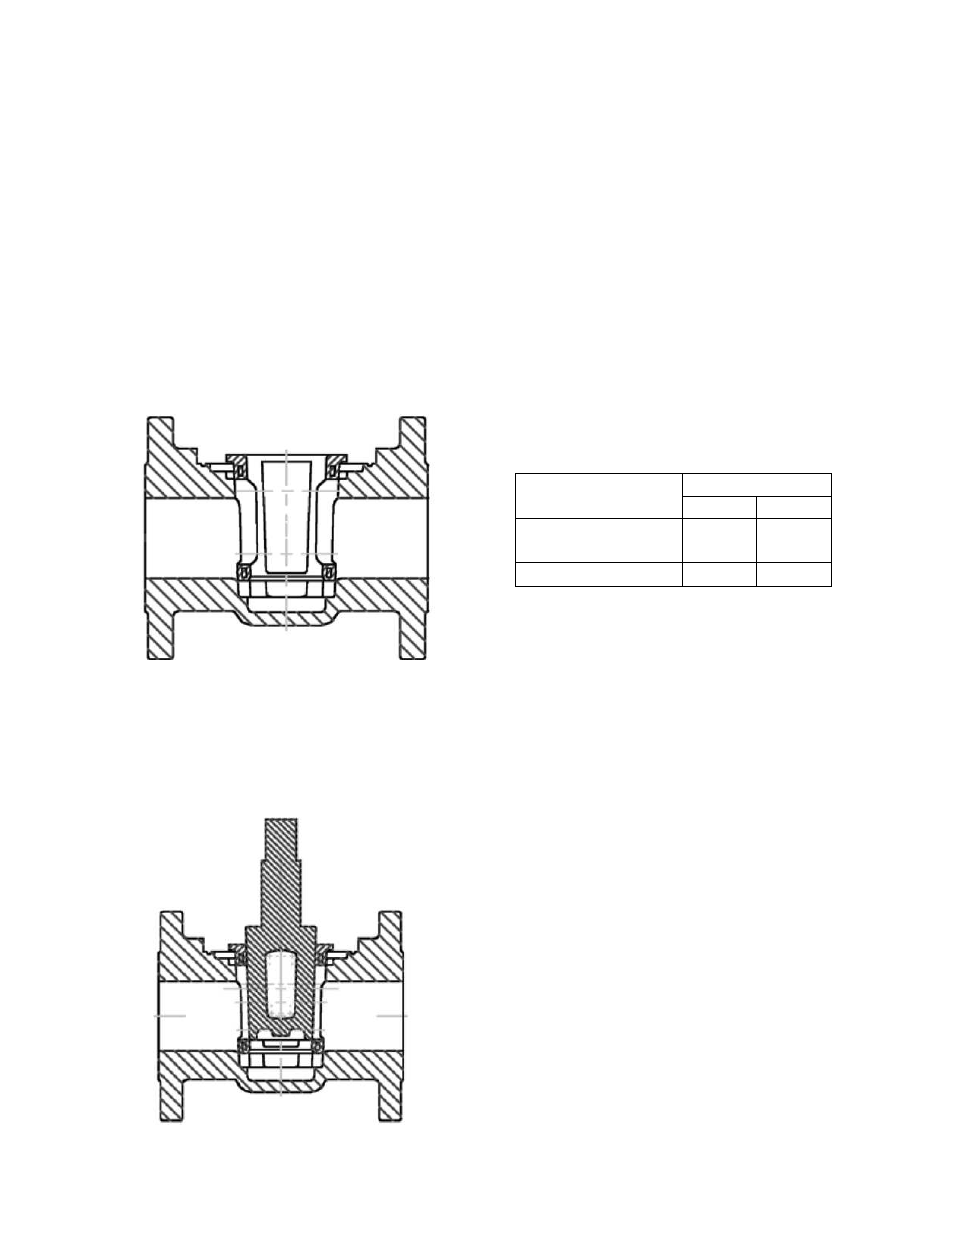
Figure 5
2. Apply a thin film of lubricant on the
plug (Part 2). Then place the plug in
the closed position into the sleeve
which is in the body. (Figure 6).
Figure 6
3. Check that the top seal of the sleeve
is seated into the body counterbore. It
may be necessary to tap sleeve with
soft mallet. Push the plug downward,
while still in the closed position, until
the top of the plug taper is 1/16” above
the top of the sleeve surface. Use an
arbor press or c-clamp. Allow the plug
to remain in this position for time listed
in Table 4. Remove plug.
Table 4
Sizing Time
Sleeve Material
1"-3"
4"-6"
UHMWPE, FEP,
Tefzel
30 sec 60 sec
PFA
5 min
8 min
NOTE: After sizing the sleeve, the
TSQV top works are to be assembled
onto the plug prior to pushing the
plug into the sleeved valve body
4. The plug bearing is to be placed on
the plug as shown in Figure 7. The
plug stem and the stuffing box
counterbore of the top cap must be re-
polished, if necessary, until a surface
finish of 16 RMS is achieved.
5. The top cap is placed on the plug as
shown in Figure 7. Care must be
exercised to insure that the plug stem
is not scratched as the top cap is
lowered onto the plug.