EM Acoustics i-1 ultra-compact satellite loudspeaker User Manual
Page 10
10
i-Series User Manual
www.emacoustics.co.uk
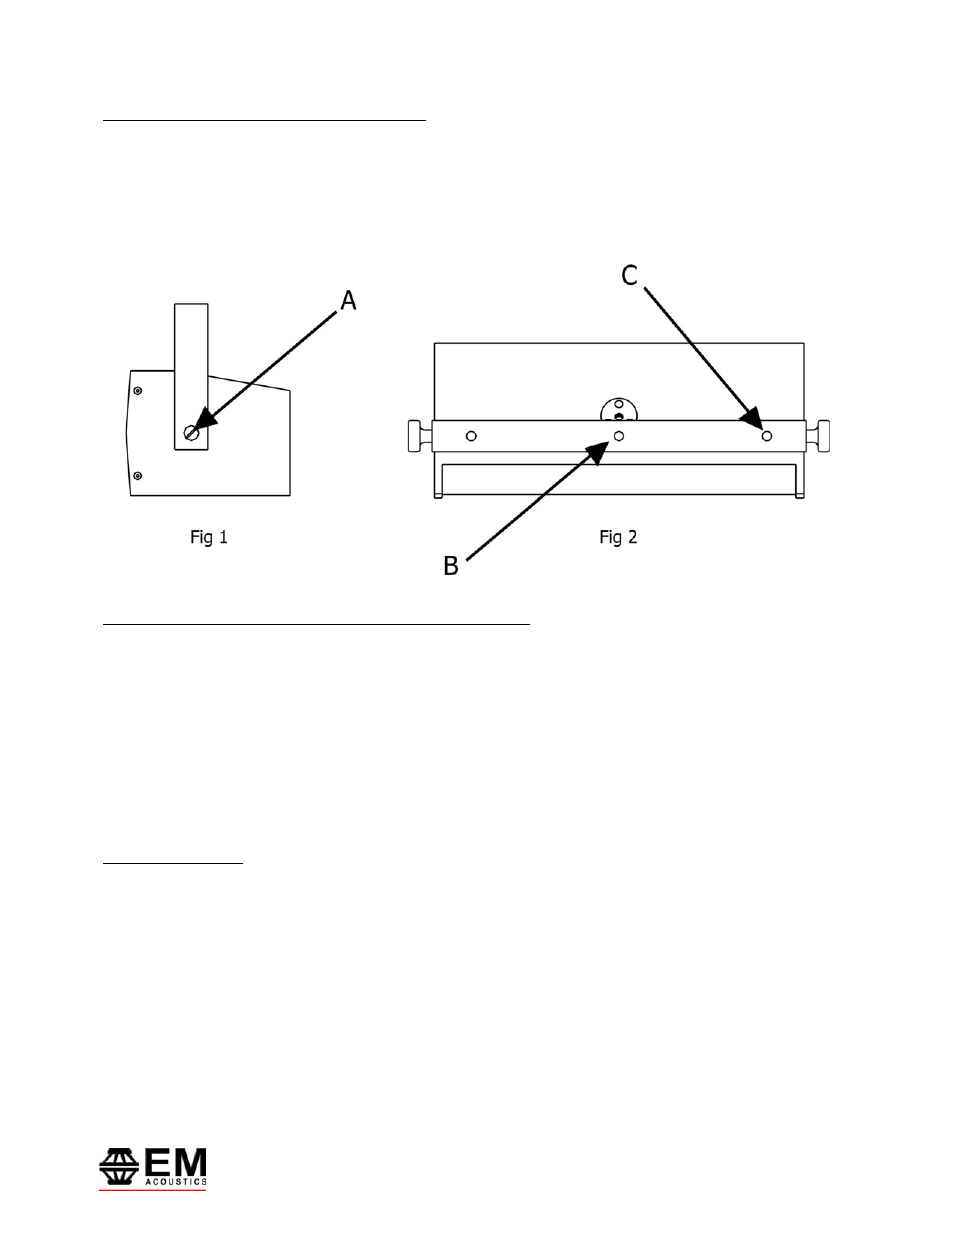
Attachment of the YK-i2h horizontal hanging yoke
With the i-2 lying on its side, remove the two countersunk M10 fixings in the ends of the enclosure (marked “A” in
Fig 1) and put them in a safe place. Position the YK-i2h over the enclosure, insert the knurled plastic knobs into
the holes and tighten securely. There are three possible positions for an attachment device – only the central
point (marked “B”) should ever be used by itself. If using the end points (marked “C”), both should be used to
avoid unnecessary strain on the yoke.
Attachment of Omnimount
TM
or Powerdrive
TM
Installation Brackets
It is strongly suggested that you position your loudspeakers, then mark & drill the holes in the mounting walls
before you attach the bracket to the loudspeaker, as it is much easier to check positioning and fit of the holes
without the weight of the loudspeaker.
The i-2 is designed to work with OmniMount
TM
Series 30 or PowerDrive
TM
Series 75 products.
Lie the enclosure on its front and remove the four M6 countersunk points on the rear of the enclosure. Position
the loudspeaker-side of the bracket as required, reinstate the bolts and retighten. The bracket and i-2 can now be
mounted using the holes you have pre-drilled.
Safety Considerations
When utilising any suspension method, a secondary safety must be used. For the i-1, wrap a safety steel cable
around the yoke and then affix securely to your safety point. For the i-2, when using installation brackets or the
YK-i2, a forged shoulder M10 eyebolt can be fitted into one of the points on the end of the enclosure, and this can
be used to attach a safety. For use with the YK-i2h, use an M8 forged shoulder eyebolt in one of the M8 points on
the sides.