Easy installation – Coloronix SCC3 User Manual
Page 5
EASY INSTALLATION
1.
Mount a miniature electrical box inside the wall
The SCC3 controller can be installed in a standard compact 2.36 inch electrical
backbox.
You can insert the AC/DC adapter inside or outside the backbox.
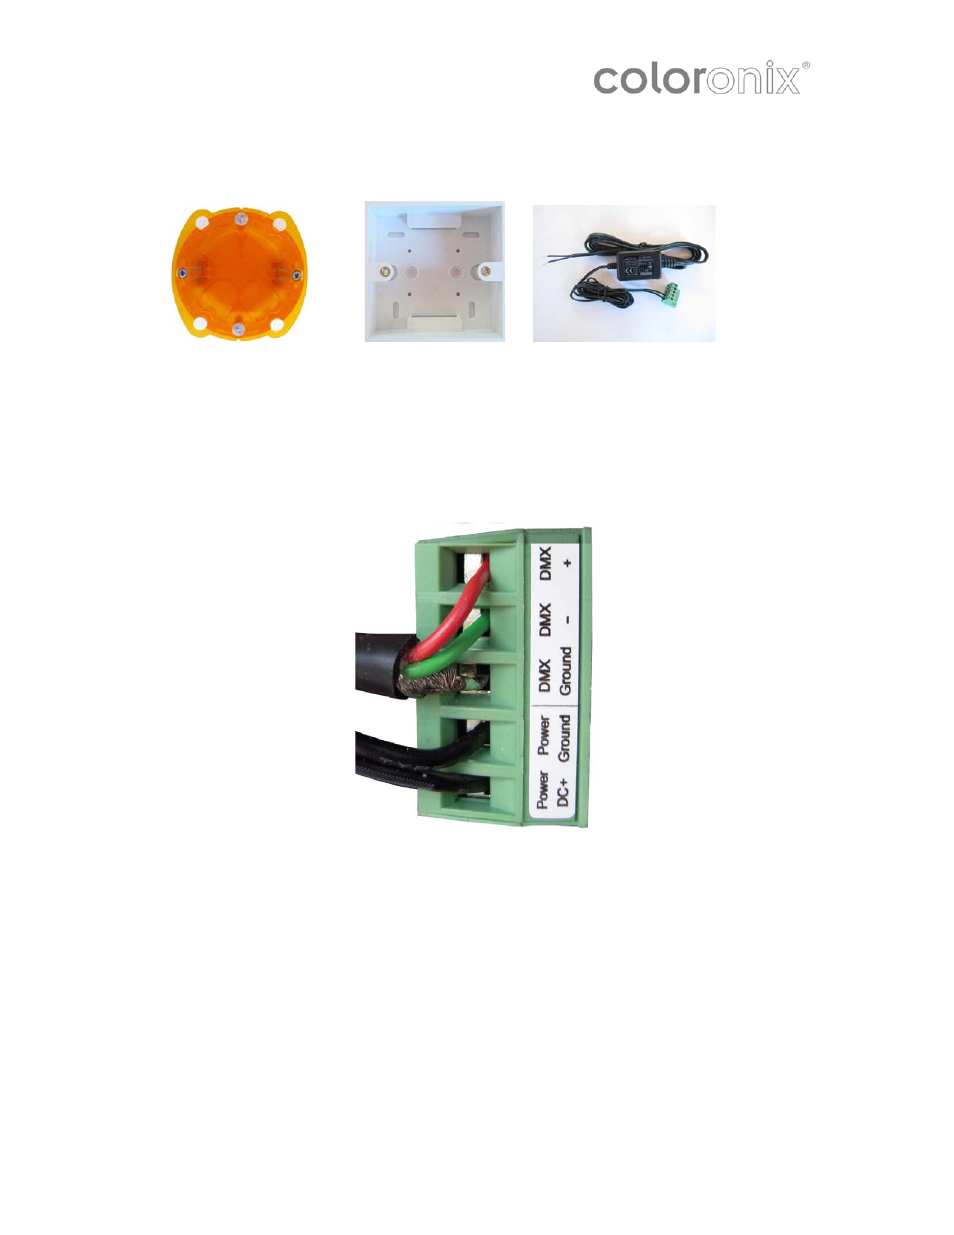
2.
Connect the wires
DMX: Connect the DMX cable to the lighting receivers (Leds, Dimmers, Fixtures..)
(For XLR: 1=ground 2=dmx- 3=dmx+)
POWER: Connect the AC/DC adapter.
Make sure to not invert the + and the ground.
3.
Mount the interface on the wall
First, plug the 2 connectors (green connector block)
Secondly, mount the back side of the interface on the wall with 2 or more screws
Then, close the unit by clipping the front panel onto the back plate
Page 5 of 6 – Coloronix SCC3 Manual V.1.0