Installing the ductwork, Fixing to the wall – Caple AS610BK User Manual
Page 5
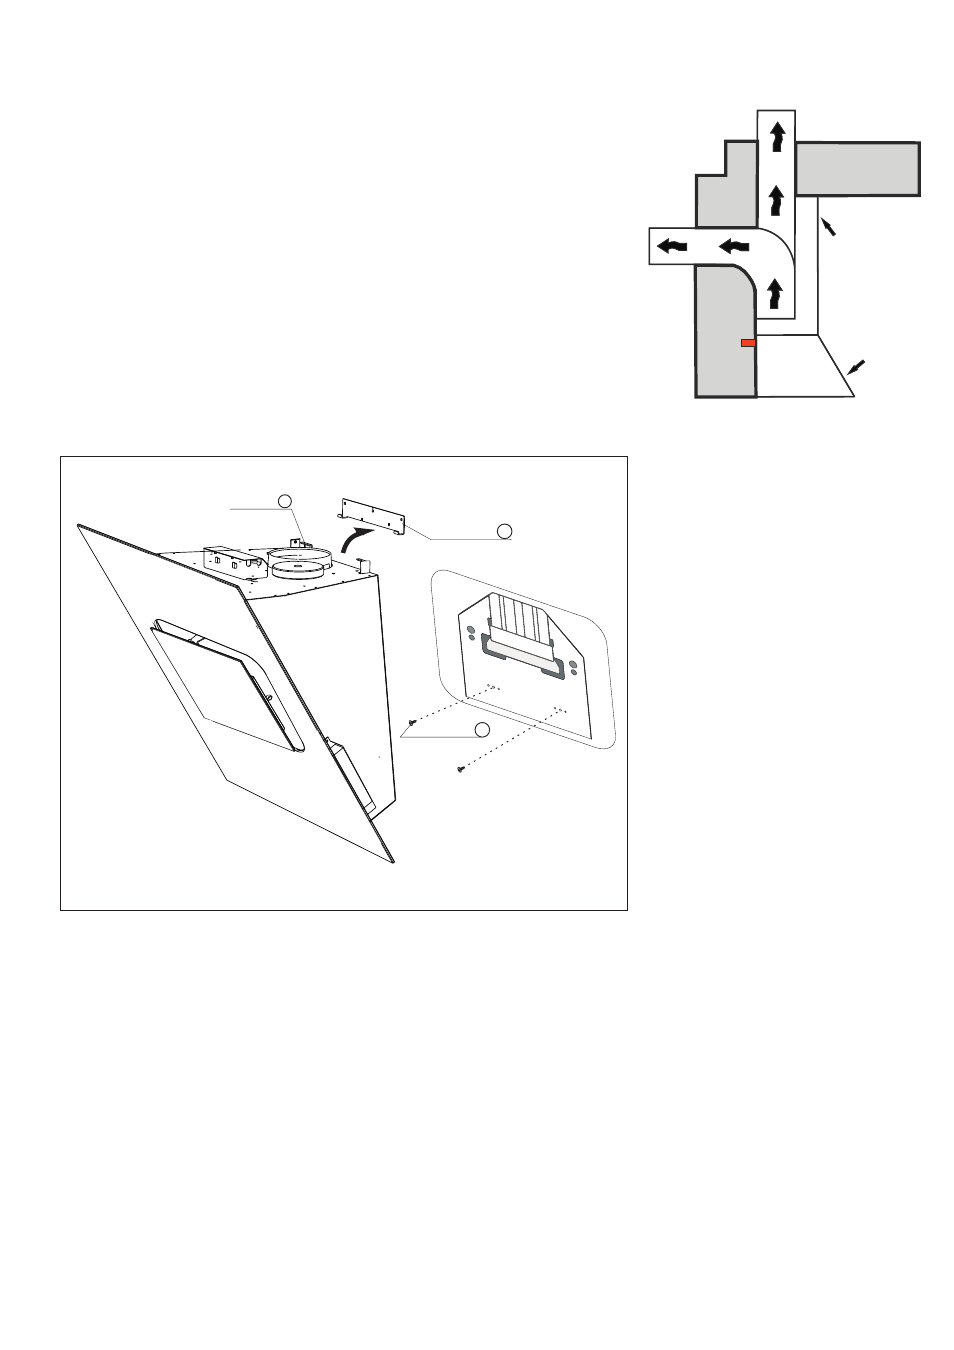
Installing the Ductwork
1. Plan where the ductwork will run between the hood and the outside. The
hoods exhaust vertically but can be ducted to the rear behind the chimney
duct through an outside wall or vertically up through the ceiling to the
roof. A short straight duct run will produce the most air flow. Length and
elbows will reduce the efficiency of the blower.
2. Install a roof or wall cap. Connect a 6 round metal duct to the cap and
work backwards toward the hood. Ensure joints are completely sealed
with duct tape.
Fixing to the Wall
1. Before mounting the hood, plug in and test all functions for correct operation.
2. Remove the filters from the bottom of the hood to pre vent damage during the installation.
3. With assistance, hold the hood temporary in position ensuring the bottom is above the minimum clearance for
the cooking surface. Mark on the wall the holes for the two mounting screws.
4. Drill the holes and install the mounting bracket (1) . Use the appropriate screws and screw anchors for your
wall type (e.g. reinforced concrete, drywall, etc.). If necessary, prepare back wall with cross framing for secure
installation.
5. Mount the hood onto the bracket (2).
Connect a 6 aluminum duct tube (not included) to the exhaust piece using duct tape on all seals. (C)
7.
to roof cap
to wall cap
hood
decorative
chimney duct
38
39
40
Mounting bracket
Hook
1
2
mushroom tapping screw
3
6. Install two
mushroom tapping screw into the wall.