Introduction 3, Preparing for use, 0 introduction to the bluelab ph meter – Bluelab pH Meter User Manual
Page 3: 0 preparing for use, English
English
3
1.0 Introduction to the Bluelab pH Meter
The Bluelab pH Meter has two press buttons; ‘calibrate’ and power. The power button
requires a short press; release in about one second. The ‘calibrate button requires a
long press; hold for at least three seconds and release when the display starts fl ashing.
Turning the pH meter on and off
A short press of the power button will turn the pH meter on. The pH meter
automatically turns off after approximately four minutes if no buttons are pressed.
If the pH meter turns off before the reading is taken, short press the power button to
turn the pH meter on again.
2.0 Preparing for use
The following tasks must be performed before the Bluelab pH Meter is used for the
fi rst time.
Insert batteries.
See section 5.0.
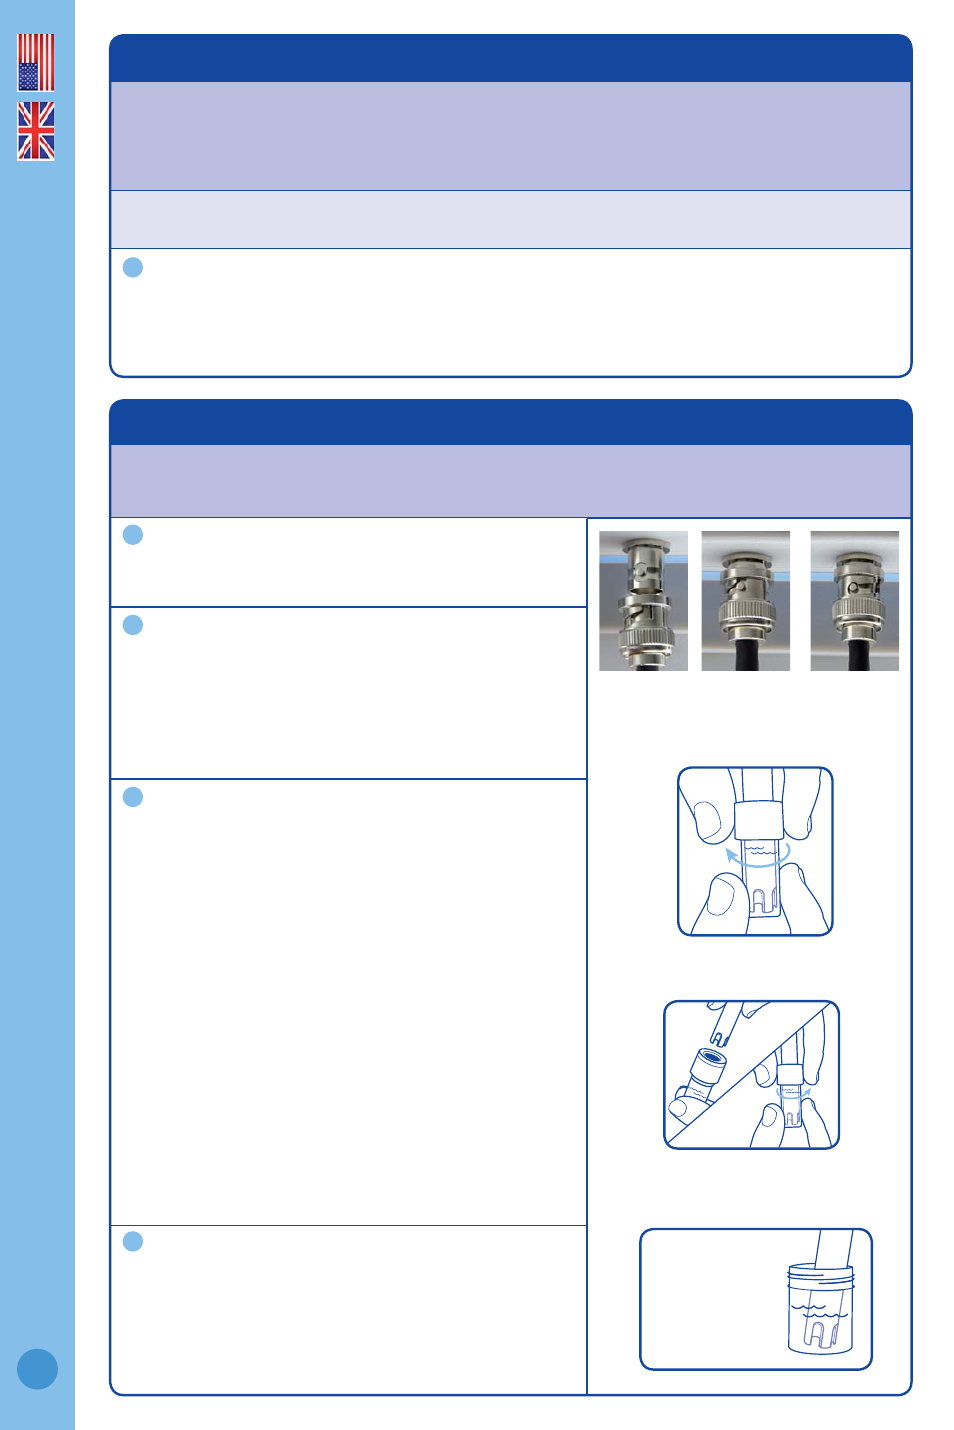
Connect pH probe
Connect the pH probe to the pH meter by lining
up the lugs of the BNC fi ttings. Fasten securely
by pushing the pH probe connector on and
twisting one quarter turn.
Remove the storage cap
Remove the pH probe storage cap by gripping
the top of the cap and gently twisting the base
one rotation clockwise to loosen slightly. Next
slowly slide the cap off the pH probe. DO NOT
completely remove the base of the cap from the
top of the cap.
CAUTION: When the pH probe is not in use, add
enough Bluelab pH Probe KCl Storage Solution to
the storage cap so the probe tip is covered. Then
replace the cap and store in a secure place.
DO NOT use RO (Reverse Osmosis), Distilled
or De-ionized water. Pure water changes
the chemistry in the reference, causing the
probe to die.
Calibrate the pH
Calibrate the pH meter by following the
instructions in section 3.0 of this manual.
This must be done before the
pH Meter is used for the fi rst time.
1
1
2
3
4
Attaching the
Bluelab pH Probe to the Meter
Removing pH probe
storage cap
Ensure probe tip is covered by
the KCl storage solution in cap
Inserting
Twisting
Attached
See section 3.0
for calibration
steps