Installation for undermount basins – Blu Bathworks SA2018 User Manual
Page 3
2
1 866 907 0122 blubathworks.com
2013-07
®
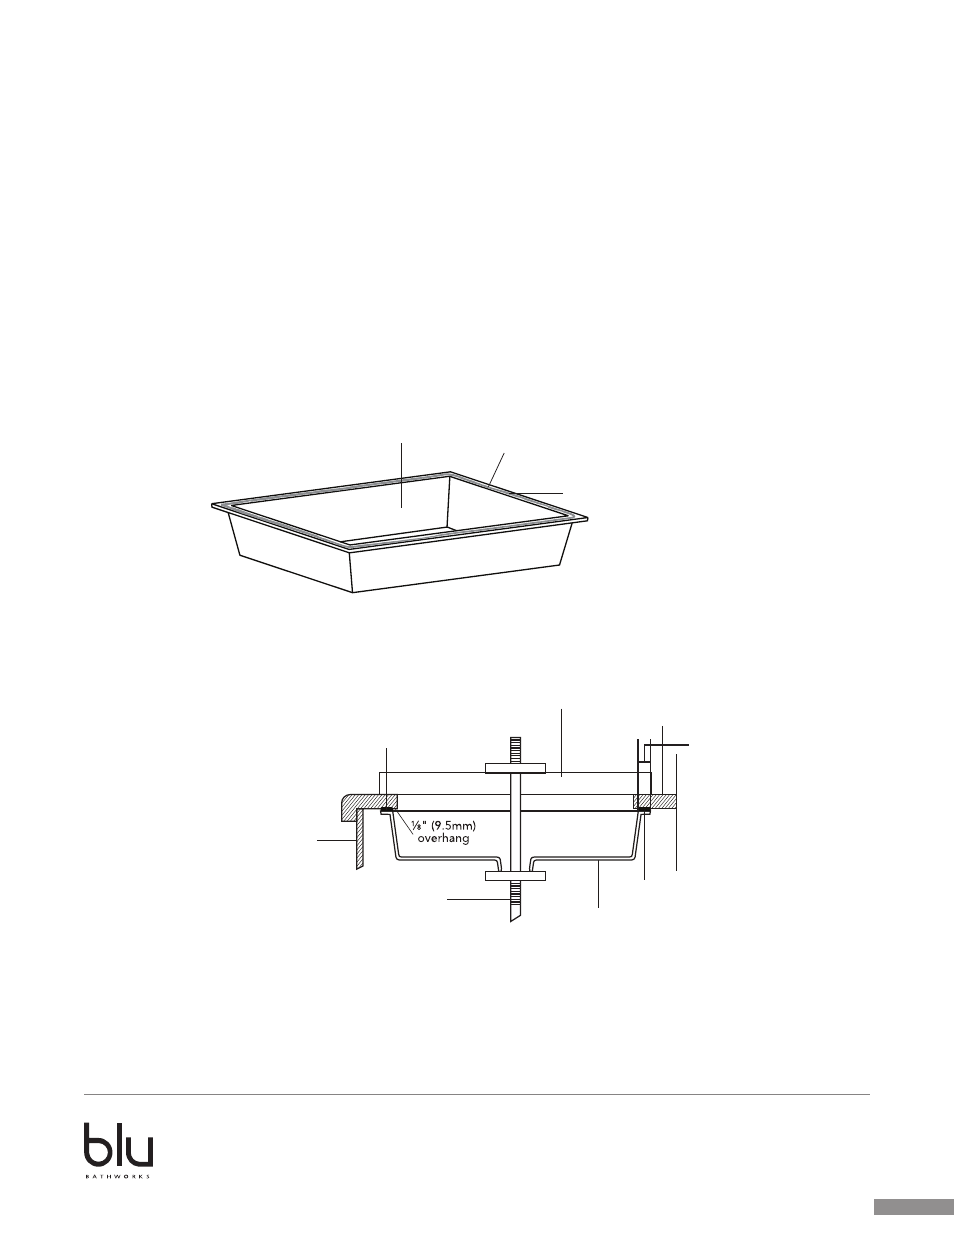
Installation for Undermount Basins
1. Carefully turn the basin upside down and trace the outline of the basin on to
countertop.
2. Measure the basin rim length and width and subtract
3
⁄
8
” (9.5mm) from the measurement.
3. Subtract a further
3
⁄
8
” (9.5mm) for countertop overhang.
4. Redraw a new line inside the first line using the measure from steps 2 and 3.
5. Ensure there is enough clearance for the faucet and trim as well as clearance for the cabinet beneath the counter top.
6. Mark the center line of faucet and mounting screw location if the fixture is deck mounted.
7. Cut out the opening by cutting along the traced line.
8. Install the counter-top if not installed. Drill the faucet hole per manufacturer’s specification.
9. Install the faucet and drain fitting per manufacturer’s instructions.
10. Apply a continuous bead of adhesive (PL400 or equivalent) to the top surface of the lavatory rim where it will contact
the counter-top.
11. Position the lavatory squarely under the cutout and use a ‘C’ clamp to pressure and hold the basin securely to allow
the adhesive to dry.
12. Wipe away excess sealant and fill any voids as necessary. Allow adhesive to set for 24 hours prior to use.
13. Connect the trap to the drain and complete faucet installation per manufacturer’s specifications.
14. Run water into lavatory and check entire installation for leaks.
Basin
PL400 adhesive glue or equivalent
Cabinet
Clamp to hold basin with adhesive for
24 hours or as per adhesive instructions
Countertop
Temporary brace
Basin
Adhesive
Adhesive
Basin rim width varies.
Measure as per step 2.
+
⁄
—
3
⁄
8
” overhang as
per step 3.