Installation, Warning – Dometic 9093100-(X)PR User Manual
Page 3
3
CENTRAL RV VACUUM
SPECIFICATIONS:
INSTALLATION
I. GENERAL INFORMATION
A. This Central RV Vacuum Cleaner is designed to be built
into a recreational vehicle at the time of manufacture;
or, with the use of an external mounting plate, it can be
installed in a recreational vehicle after it has been manu-
factured.
Read Installation and Operating Instructions carefully
before attempting to start your vacuum cleaner installa-
tion.
MODEL NUMBER CODE CHART
9093(X)00-(X)PR
1 = Flush Mount
2 = External Mount
W/Mtg Brkt
C = CREAM
E = EBONY
W = WHITE
Part List:
9093(X)00-(X)PR Vacuum
(4) Wood Screws*
(4) Painted Screws**
(1) Template**
(1) Mounting Bracket*
(3) 3308150.006 Bags
(1) 3308172.000 Motor Filter
(1) 3303170.004 Exhaust Filter
(3) Wire Nuts**
Tools Required:
Screw Driver
Level
1/16” Drill Bit
Awl
Power Drill
Electrical Wire
Drywall Anchors
* Designates supplied with external mount vacuum.
** Designates supplied with flush mount vacuum.
B. LOCATION:
1. External Mount Installation
a.
To reach with vacuum hose as far as possible,
choose a wall or surface that is centrally located
and has an electrical outlet within 6 foot of
vacuum cleaner.
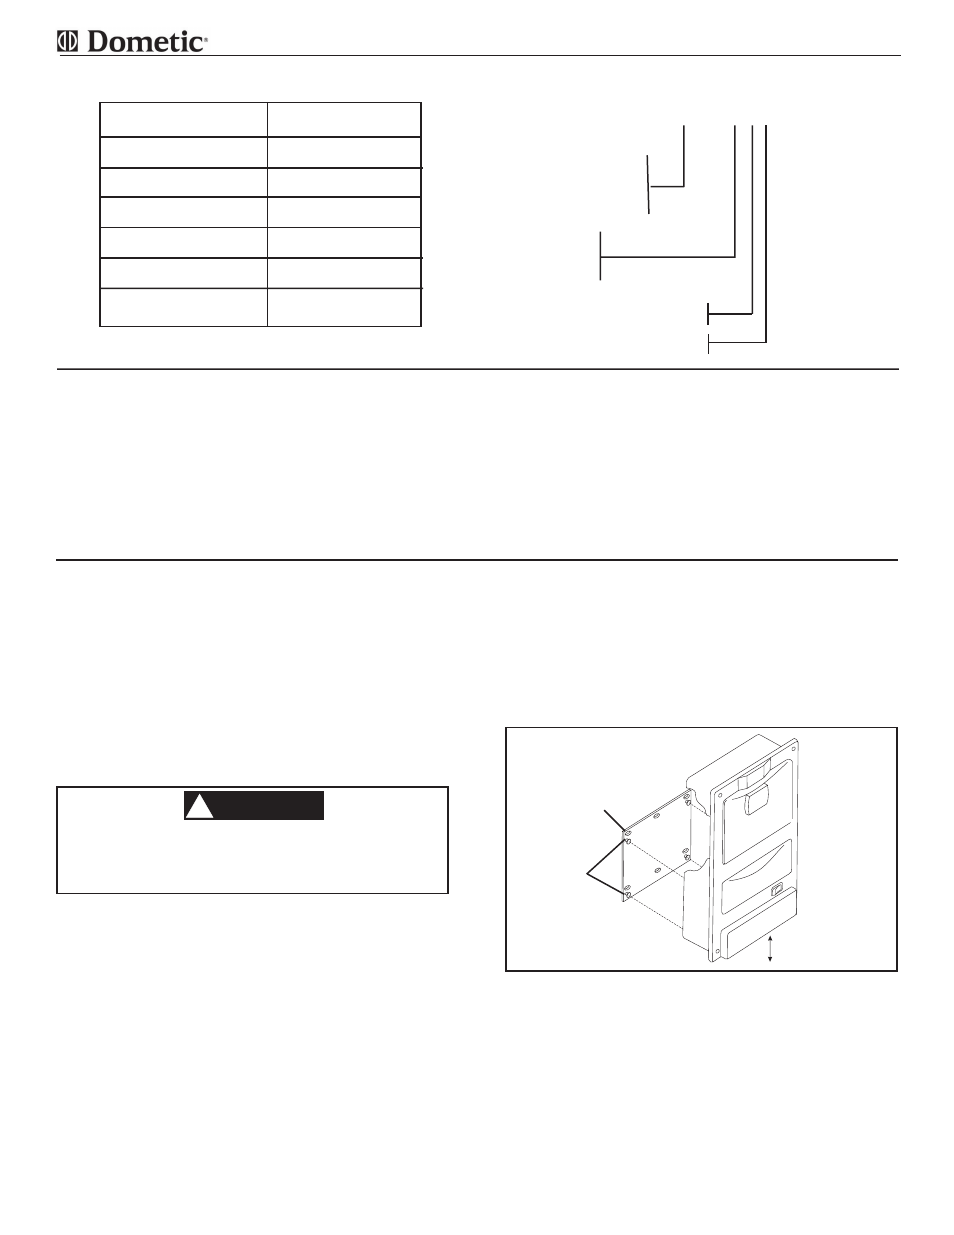
FIG. 1
Attach mounting bracket to wall or surface at a
comfortable operating height or if not possible a
minimum of 6” above the floor. For hard surface
mounting, use the 4 outer holes with wood screws.
For drywall mounting, use 4 outer holes with dry-
wall anchors (not supplied). See FIG. 1.
c.
Attach vacuum cleaner to the mounting bracket,
using the 4 keyholes in the back of the unit to the
4 studs on the mounting bracket, then slide unit
down into locked position.
d.
Before plugging in the electrical cord, check to
be sure vacuum cleaner bag, motor filter, ex-
haust filter, and gate are in place. See Oper-
ating Instructions, Steps D, E, and F.
Note: Never use vacuum cleaner without dust bag
or motor filter in place.
6” MIN
CLEARANCE
INSTALL MOUNTING
BRACKET WITH
SCREW HOLES
ABOVE KEYSTUDS
Electrical Rating
240VAC 50/60 Hz, 1 Ph
Amp Draw
11 Amps
Minimum Wire Size
16 AWG
AC Circuit Protection
7.5 Amp
Installed Weight
12 Lbs.
Hose Length
8’ - 30’
Case
Steel
powder coat
KEYSTUD
P = POWDER COAT
R = RECREATION VEHICLE
Improper installation may damage equip-
ment, could endanger life, cause serious in-
jury and/or property damage.
WARNING
!