Owner’s manual, Service procedures, Continued – Desa RM200T User Manual
Page 9
9
103607
OWNER’S MANUAL
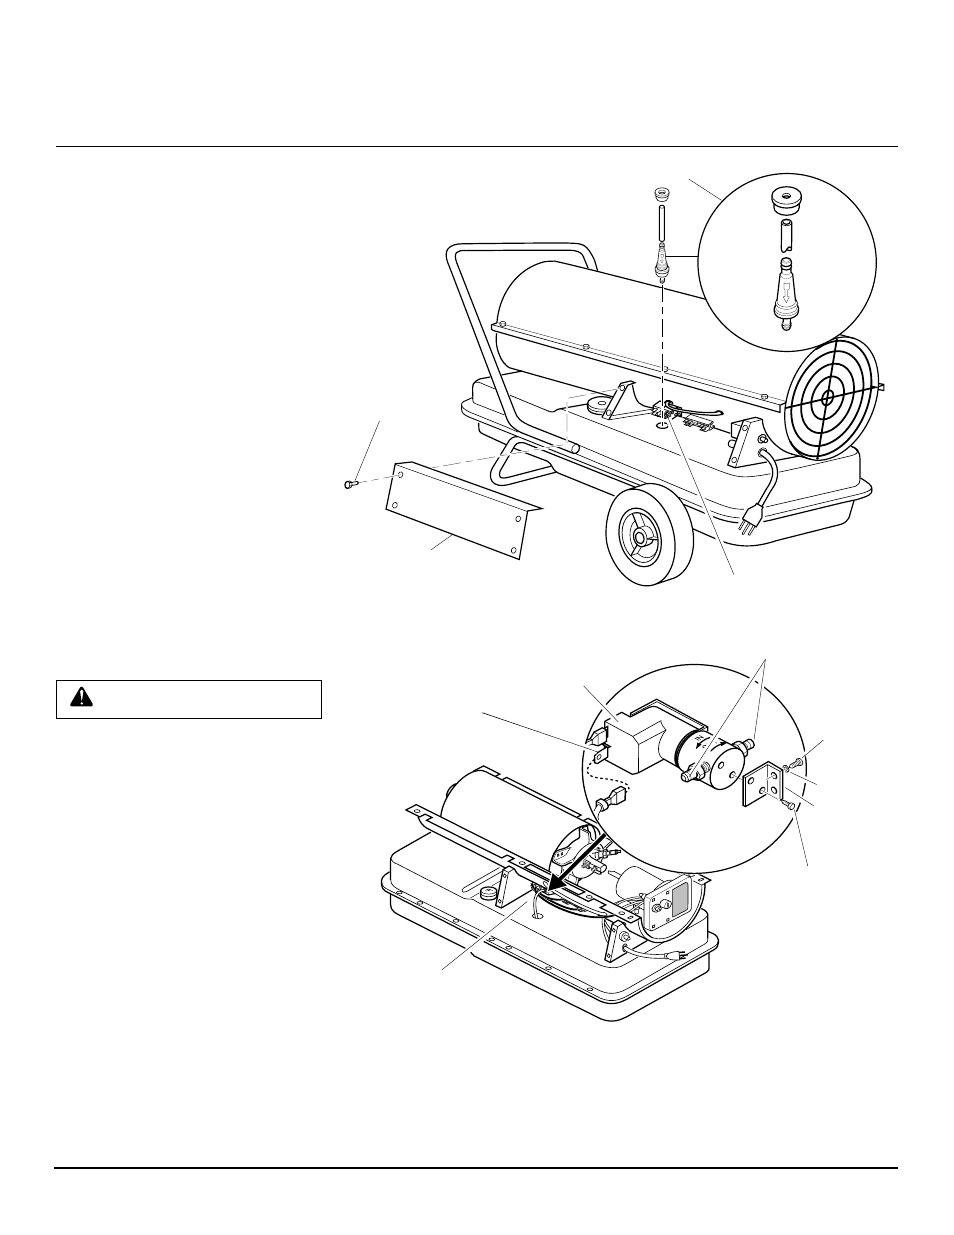
FUEL FILTER
1.
Remove side cover screws using
5/16" nut-driver.
2.
Remove side cover.
3.
Pull lower fuel line off the fuel
valve fitting.
4.
Carefully pry bushing, lower fuel
line, and fuel filter out of fuel tank.
5.
Wash fuel filter with clean fuel and
replace in tank.
6.
Attach lower fuel line to fuel valve
fitting.
7.
Replace side cover.
FUEL VALVE
1.
Remove side cover (see Figure 10),
fan guard, and upper shell (see Fig-
ure 5, page 8) screws using 5/16"
nut-driver.
2.
Remove fan (see Fan, page 8).
3.
Pull lower fuel line off the fuel valve
fitting (see Figure 11).
SERVICE
PROCEDURES
Continued
WARNING: High Voltage
4.
Disconnect red and white wires from
fuel valve. (see Figure 11).
5.
Using 1/4" nut driver remove 2 screws/
lockwashers holding fuel valve and
bracket to lower shell (see Figure 11).
Save these screws/lockwashers.
6.
Using 1/4" nut driver remove 2 screws
holding fuel valve to bracket. Save
these screws.
7.
Attach new fuel valve to bracket with
2 screws.
8.
Install new fuel valve and bracket on
lower shell with 2 screws/lockwashers.
9.
Connect red and white wires (polarity
not important). Connect upper and lower
fuel lines to fuel valve (see Figure 11).
10. Replace fan, fan guard, upper shell, and
side cover.
Side Cover
Bushing, Lower Fuel Line, and Fuel Filter
Figure 10 - Fuel Filter Removal
Fuel Valve Fitting
Figure 11 - Fuel Valve Replacement
Lower Fuel
Line
Electrical Wires
Fuel Valve
Valve
Fittings
Bracket
Screw
Screw
Continued
Screw
Lockwasher