Walltalkers colonial trim & tray User Manual
Page 2
colonial wood trim & tray installation instructions
w
www.walltalkers.com
5. Adhere the wood insert into place. If a low profile hook and loop
fastening system was used while cutting the trim to size, reinstall
the insert by pressing back into place. Otherwise, use a hot glue
gun and apply a few drops of a wood glue stick on the back of
the insert and press into place. Make sure the glue or tape is
recommended for use on wood products.
6. Some walltalkers installations will require a full length marker
tray, terminating at the outside edges of the colonial wood trim.
Outside edges of the tray can be finished on site in a number of
ways. The edges can be left as a blunt end or mitered to a 45°
angle. Terminations should then be finished with a similar stain
and clear coated with a satin, urethane finish.
a division of Koroseal Interior Products, LLC
3875 Embassy Parkway
Fairlawn, OH 44333-8333
Ph: 800.820.9255 • Fax: 330.688.7703
® is a registered trademark of Koroseal Interior Products, LLC
7075WDC1II1 10/14
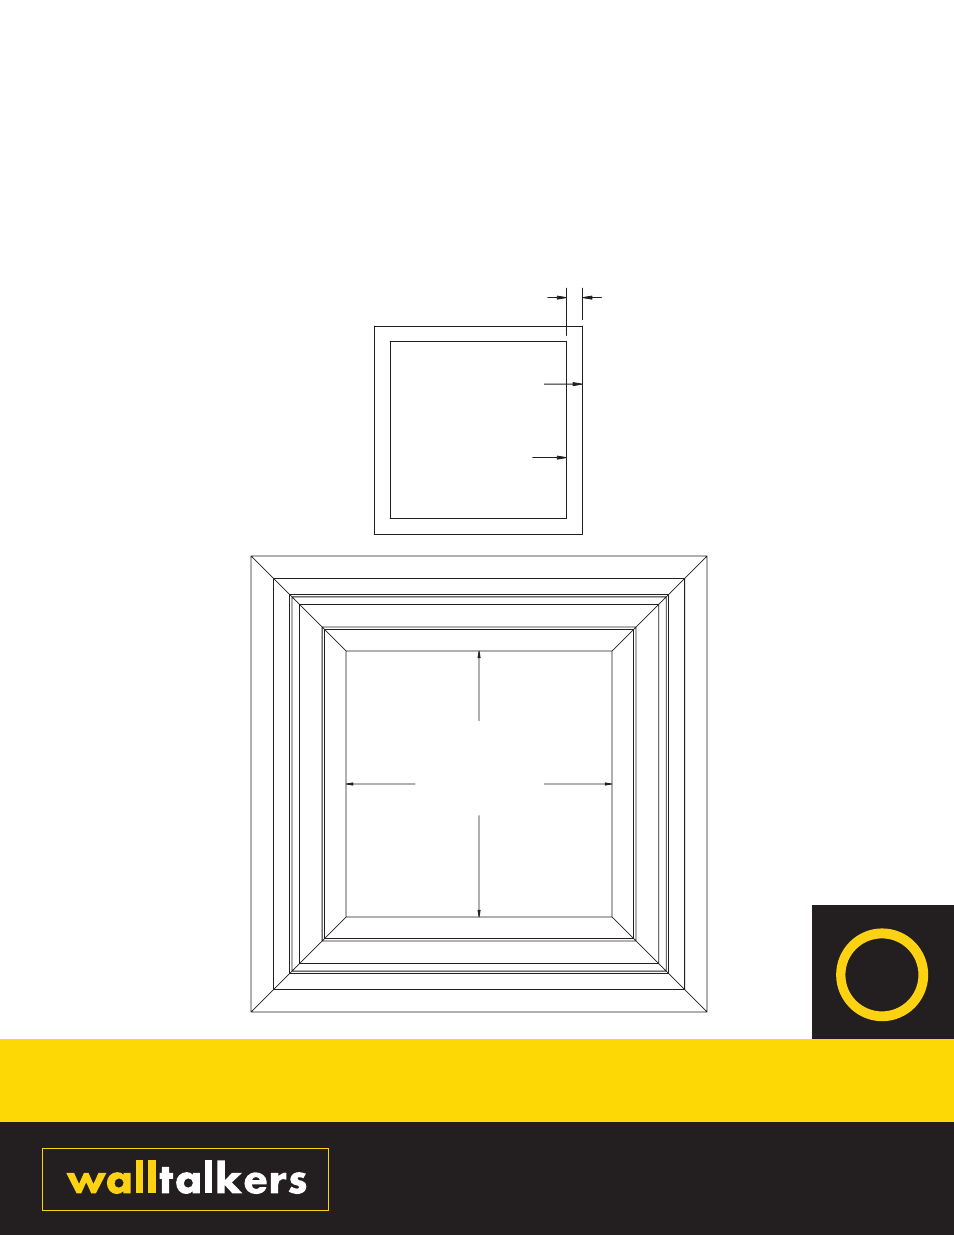
7. Install the tray with #10 X 1" wood screws, as shown in the diagram
on the opposite side of this page. Like the trim installation, predrill
1/8" holes and again use the countersink bit to create small cavities
to hide the screw heads. Install wood screws every 16" on center
slightly offset from the trim installation hardware.
8. If a splice is required for the trim or tray, miter the mating pieces of
wood at a 45° angle. The finished splice will be similar to a wood
baseboard or casing molding splice. Apply a small amount of the
wood glue between the two pieces of trim and finish installing as
recommended above.
1/2" to 3/4"
Exterior of Dry
Erase or
Tackable
Material
Interior of
Colonial Wood
Trim
Interior
of Colonial
Wood Trim