Toyotomi KS-27A User Manual
Page 13
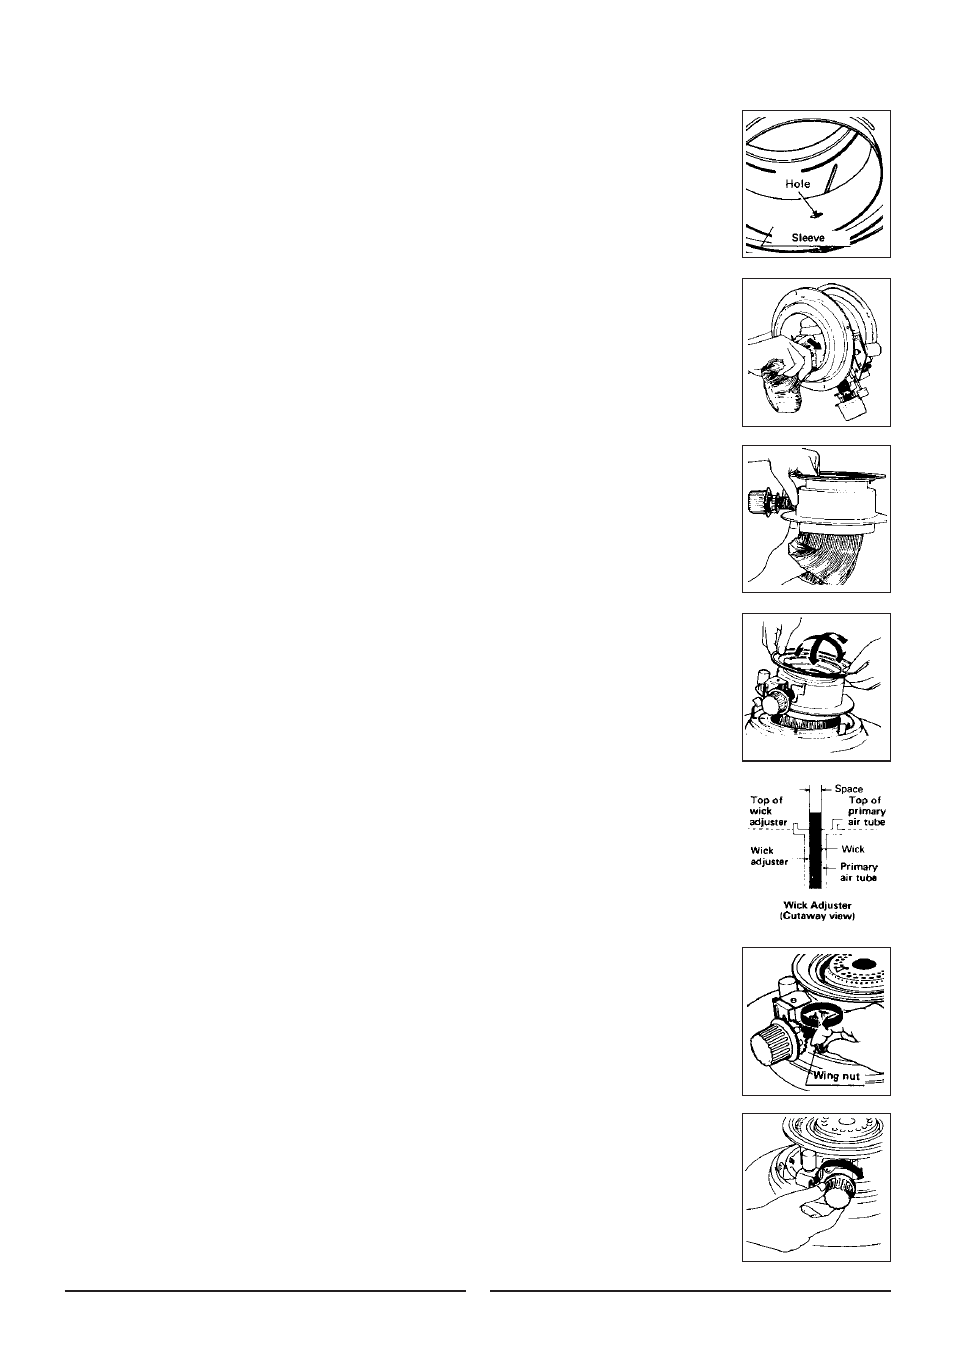
5. Place the wick adjuster on its side. Next, line up the three (3) openings in the
wick adjuster: 1) the holes in the sleeve, 2) the diagonal slots in the fixed part
of the wick adjuster, and 3) the slots in the moving part of the wick adjuster
controlled by the wick adjuster knob.
6. Fold the new wick in quarters and insert it into the wick adjuster from wick
adjuster bottom. Place one of the pins in one of the lined-up openings. lf you
experience difficulty, gently turn the wick adjuster knob clockwise. Then insert
the two other pins, turning the wick adjuster knob if necessary. Do not bend
the sleeve.
7. Finally, gently press the wick, all along its circumference, against the adjuster
to insure that it is firmly in place.
8. Lower the wick adjuster into the fuel tank, guiding the tail of the wick so it fits
over the primary air tube and evenly into place.
Point the wick adjuster knob to the front of the heater. Insure that the wick
adjuster is centered over the studs on the fuel tank.
NOTE: The space between the wick adjuster and the primary air tube should
be even all around.
NOTE: Make certain the top of the wick adjuster and the top of primary air
tube are the same height. lf they are uneven, the flames tend to be
uneven, too.
9. Tighten the three (3) wing nuts around the wick adjuster.
10. Engage the automatic extinguisher by turning the manual shutoff clockwise
into vertical position. Turn the wick adjuster knob to be sure the wick moves
smoothly up and down.
12