Getting started with tweeq, Tting started with tweeq, Ge tting started with tweeq – Oxmoor TWEEQ-WIN User Manual
Page 5: Moving a slug, Setting high- or low-pass filters, Bypass, lock and mute, Opening communications between your pc and a deq, Selecting a preset by number, Titling an active preset, Selecting a preset by title
GE
TTING STARTED WITH TWEEQ
Page 3
Open TWEEQ from Program Manager by double click-
ing on the TWEEQ icon. The screen which will appear
is described on page 2 of this manual.
MOVING A SLUG
Use the mouse to position the cursor inside one of the
filter bands, then press and hold the mouse button. The
“slug” should move to the cursor position.Continue to
depress the mouse button while moving the cursor up
and down within the filter band to drag the “slug”
along with the cursor. This action is analogous to sliding
the filter controls on a conventional graphic equalizer. Re-
lease the mouse button. Move the cursor to the Gain
Band then press and hold the mouse button. The “slug”
should again move to the cursor position. Drag the cursor
up and down the Gain Band and watch the “slug” fol-
low.
Once you have captured a “slug,” if you continue to
press the mouse button you can move the cursor any-
where within the Filter Bands or Gain Band areas with-
out losing control of the captured slug. This allows
you to capture a slug and then move the cursor to the
dB scale located on each side of the filter Bands for
precise positioning of the slug.
SETTING HIGH- OR LOW-PASS FILTERS
Position cursor on either box, then press the mouse
button. A dialog box will open displaying other filter choices.
Click on the desired frequency. Then click on OK. The
frequency you have selected will appear in the rectangular
Filter box.
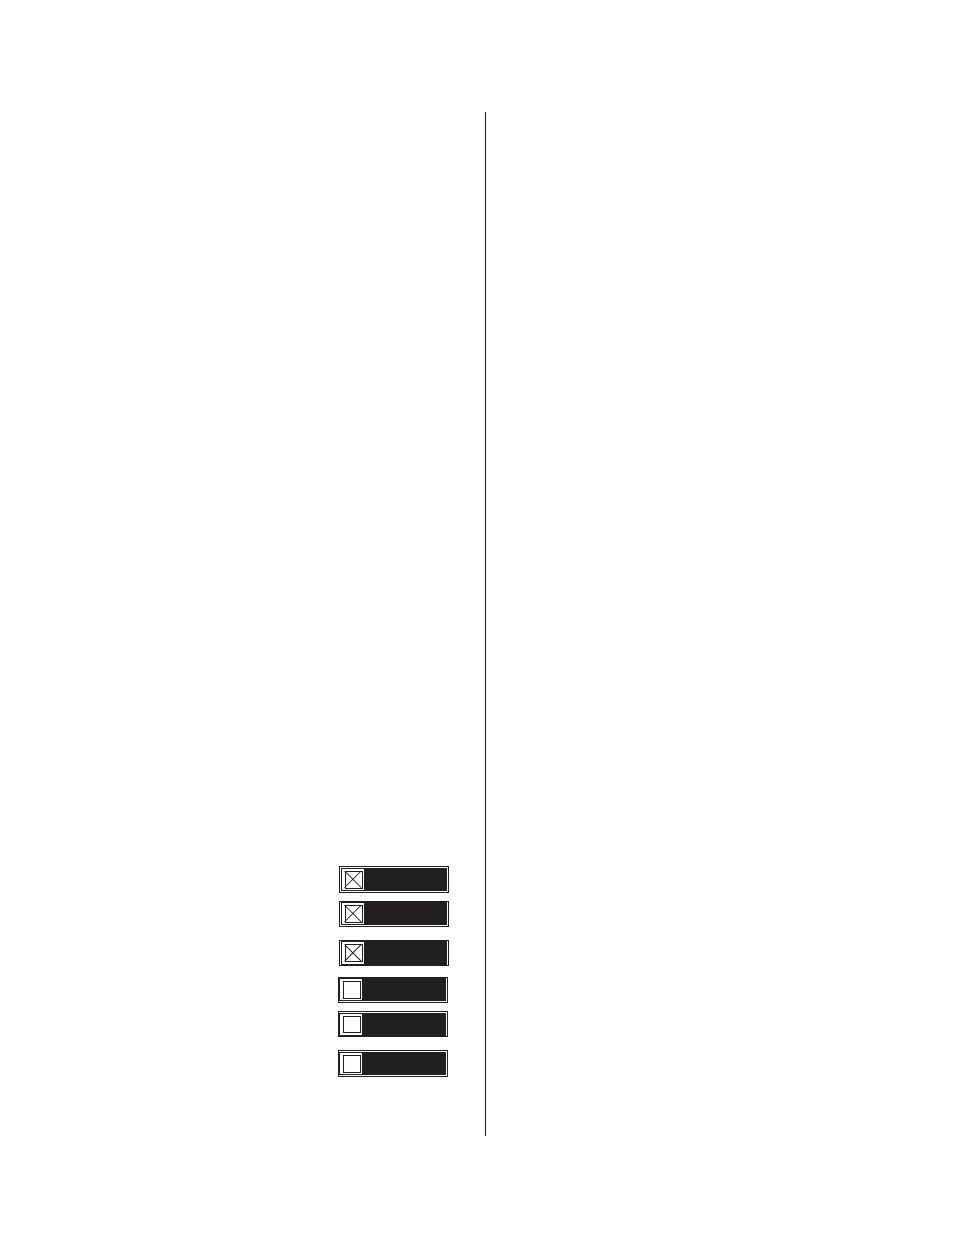
BYPASS, LOCK AND MUTE
To BYPASS/INSERT, LOCK/UNLOCK, MUTE/
UNMUTE, click on the box that corresponds to desired
function. Clicking on each box will toggle the desig-
nated function between its two modes. Each click will
cause an X to appear or disappear, indicating the sta-
tus of the function as follows:
DEQ is out of the system
DEQ is INSERTed into the system
Active Preset is LOCKed
Current Preset is UNLOCKed
DEQ is MUTEd
DEQ is UNMUTEd
NOTE: The spacebar on the keyboard will also MUTE
or UNMUTE the active DEQ. The 0 (zero) key on the
keyboard will also BYPASS or INSERT the active DEQ.
OPENING COMMUNICATIONS BETWEEN
YOUR PC AND A DEQ
If the PC on which TWEEQ is operating is connected to
a DEQ, you may open communications with the DEQ
as follows: Click on the Port menu item. Select the COM
port you will be using. The default is COM2 (indicated by
a check mark). Click on the Connect menu item. The DEQ
address dialog box prompts you to enter the address of the
DEQ. (See DEQ-I and DEQ-II "Installation & Operation
Manual" for information on DEQ addresses.)
NOTE:
If no DEQ’s are connected you will get an error
message when you select a new address.
4. Enter the address of the DEQ and click on the OK
button. The selected number will appear in the Active DEQ
Address box.
TO SELECT ANOTHER DEQ ADDRESS
Click on the Active DEQ Address box. The DEQ address
dialog box will appear. Enter the new address and click
on the OK button. The selected number will appear in the
Active DEQ Address box.
TO NAME AN ACTIVE DEQ
Click on the Active DEQ Name area. A dialog box will
open. Type the desired DEQ name and click on the OK
box. The DEQ Name will appear in the Active DEQ Name
area.
Selecting a Preset By Number
Use the mouse to position the cursor inside the Active
Preset Number box, then click on the Preset number. A
menu will appear listing the Preset numbers available. Now
click on the desired Preset number in the menu. Then
click on OK. The selected number will appear in box.
NOTE: By using the numeric keys (1-8) on the keyboard
the user may also select new Presets.
Titling an Active Preset
Click on the active Preset Title area. A dialog box will open.
Type in the Preset Title. Click on the OK button. The
Preset Title you entered will appear in the Preset Title area.
SELECTING A PRESET BY TITLE
If a DEQ is connected, and Preset Titles have been as-
signed, you may select a Preset by its Title. Click on the
Preset Title area. A dialog box will appear. Click on the
combo box symbol (the symbol that looks like a down
arrow) A list of all eight Preset Titles will appear in the combo
box. Double click on the desired Preset Title.The Preset
and its associated curve will be displayed on the screen.
BYPASS
LOCK
MUTE
BYPASS
LOCK
MUTE