Oklahoma Sound #600 User Manual
Page 3
O
klahOma
S
Ound
C
OrpOratiOn
ARisTOCRAT COnTOuR FLOOR LECTERn: Model 600
6
3
5) now apply Panel C to
the semi assembled
unit. Be sure to align
the cam bolts to the
holes on both Panel
B and Panel E. Be sure
that Panel F is securely
in groove. Tighten
cams. (Diagram D)
6) screw the corner
braces into Panel A
and Panel B. There are
pre-drilled holes to
help guide you.
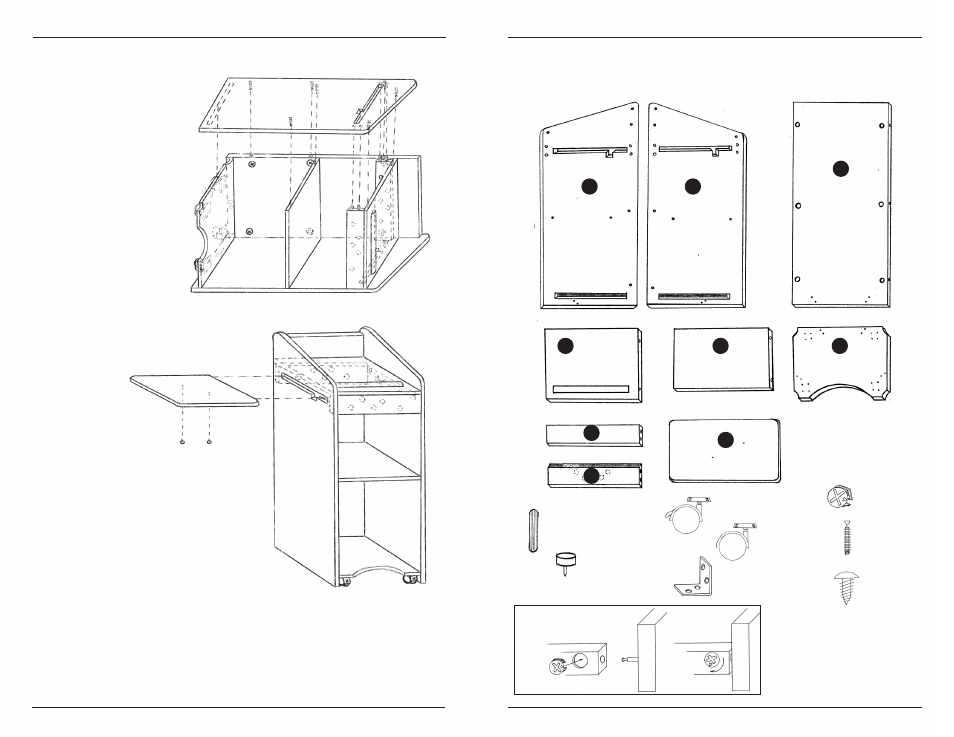
7) slide Panel i into the slots on the
side of unit. Make sure the two
pilot holes (marked with red)
are facing the bottom. Tap the
two plastic glides into the pilot
holes, AFTER THE sHELF is FuLLY
insERTED in THE sLOTs. (Diagram E)
8) Once again go over all the cams and check to make sure the lectern
is sturdy.
Congratulations! You have successfully assembled your lectern, which
if cared for correctly should give you long and satisfactory usage.
Diagram "D"
Diagram "E"
aSSembly partS
tools required
#2 Phillips Head
Screwdriver
Hammer
Cam lock assembly
(8) Wooden Dowels
........................................
(2) Plastic Glides
......................................
(2) Locking Casters
.............................................
(2) non Locking
Casters
.....................................
(2) Corner Braces
........................................
(14) Cams
..........................
(14) Bolts
..........................
(32) #8
1/2" Phillips
Screw
..........................
Side Panel
Side Panel
Front Panel
Top
(Reading
surface)
Shelf
Bottom
Shelf Runner Panels
Sliding Shelf
A
B
C
E
D
F
G
H
I