nMediaPC HTPC 1800B User Manual
Page 2
2
Suggested upgrades
Motherboard with HDMI output port
Onboard Wifi / Video / Audio
Installation Flowchart (Basic Procedures)
Installation Tools
Screw driver / Screws / Tight cables / Installation guides
Step 1: Remove top cover; Install Motherboard; PSU & HDD
1. Take off the top cover; put it aside on a safety place
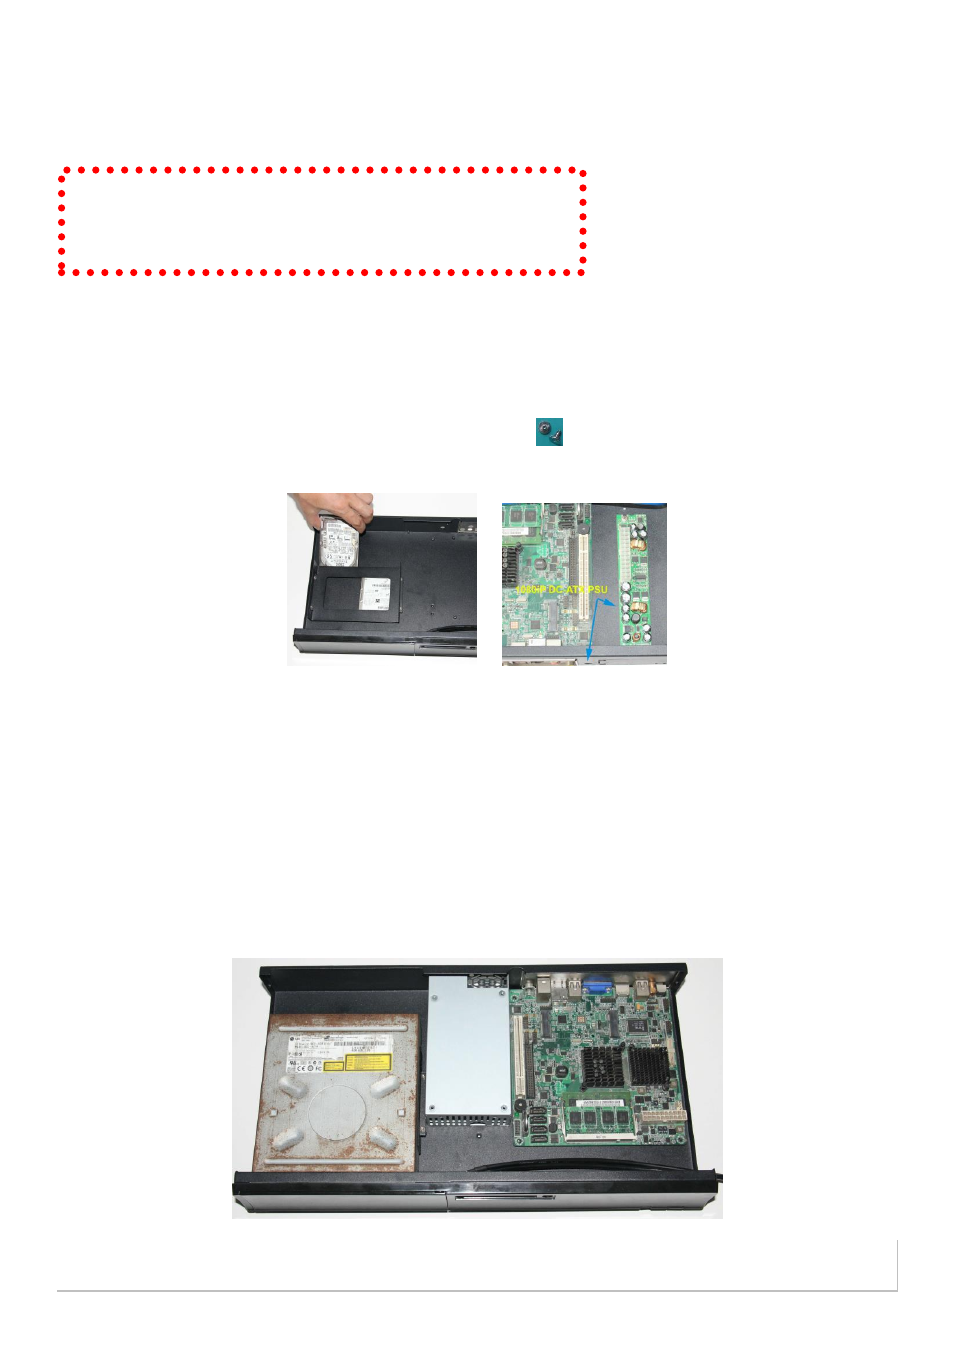
2. Install HDDs with the special noise reduction screws
a.
This case supports 2 X 2.5” SSD or Notebook HDD
b. Slot them in and secure from the bottom of the chassis as Picture 1 below
Pic. 1 Pic. 2
3. Install Motherboard
4. Install Power Supply by taking out the cover for Mini iTX PSU
If you are using the nMediaPC 1080iP 85W DC-ATX PSU, take out the label; install the DC
input port in the designated hole right next to the I/O board as Picture 2 & 3
Step 2: Install Optical Drive & Connect Cables
1. Install Optical Drive
2. Connect front port cables and PSU cables
Step 5: Other Component Installation
For other components, including RAM; CPU & cooler; operating system and power supply
connection etc., follow the motherboard & PSU user manual instruction.
Pic. 3
Open box Read installation guides Install motherboard
Connect front interface cables Install CPU & Cooler Install
DIMM memory module Install hard drives & optical drive Install
power supply Connect power cables Replace top cover