Ar d, 1 attach mount brackets, Attach adapter plate 2 – Crimson S63 User Manual
Page 4: Adjust height of assembly 3, Attach adapter plate 4
4
S63-0001
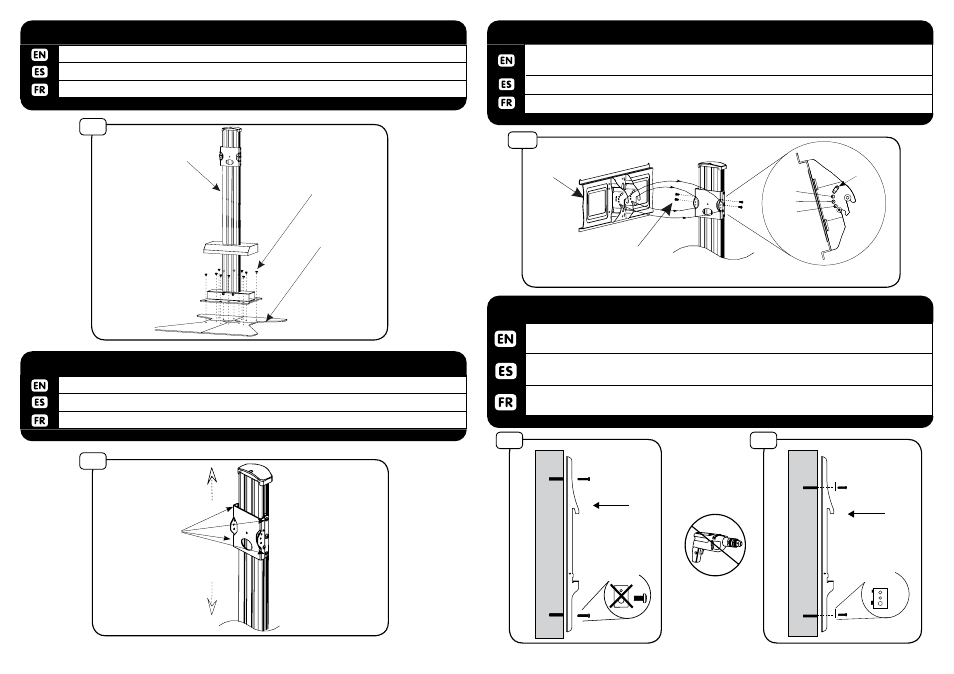
Align mount bracket (C) to holes on back of TV. Fasten using supplied hardware with
a screwdriver. Hand tools only.
Alinear montaje (C) a los agujeros en la parte posterior de la televisión. Fije el uso de hardware
suministrado con un destornillador. Herramientas de mano.
Aligner le support de montage (C) dans les trous à l’arrière du téléviseur. Fixer à l’aide de maté-
riel fourni avec un tournevis. Outils à main seulement.
.
5-1
ATTACH MOUNT BRACKETS
5-2
Multi-washer
(V)
Screws
(F-M)
5-1
Screws
(N-P)
DO NOT USE
Multi-washer
4
R
B
Combine base assembly (D) parts and attach extrusion (A) usings screws (R).
Adjuntar extrusión (A) a la base de montaje (D) con tornillos (R).
Fixez d’extrusion (A) à base d’assemblage (D) en utilisant des vis (R).
ATTACH ADAPTER PLATE
2
2
Loosen screws (BB) and adjust height of assembly to desired position. Retighten screws firmly.
Afloje los tornillos (BB) y ajuste la altura de montaje en la posición deseada. Vuelva a apretar los tornillos.
Desserrer les vis (BB) et ajuster la hauteur de montage à la position désirée. Resserrer les vis fermement.
ADJUST HEIGHT OF ASSEMBLY
3
3
BB
A
R
D
1
5°
0°
10°
2
Hook adapter plate (B) onto mount assembly. Insert set screw (R) into top opening (1). Adjust tilt to
desired position and insert another set screw (R) into corresponding opening (2). Tighten all screws.
Gancho de la placa adaptadora (B) en el montaje. Inserte el tornillo (R) en la apertura de (1) y luego la apertura de (2).
Plaque d’adaptation Hook (B) sur le montage. Insérer la vis (R) dans l’ouverture (1), puis en ouvrant (2).
ATTACH ADAPTER PLATE
4
Note: For 15° tilt, only screw
in position 1 is necessary.