Panel description osd menu edid learning – Atlona AT DIS7 PROHD V2 User Manual
Page 4
4
atlona.com
Toll free: 1-877-536-3976
Local: 1-408-962-0515
POWER
INPUT
SELECT
HDMI
IN
COMPONENT /
VGA IN
DOWN
DC 5V
UP
AT-D
IS7-P
ROH
D
4
3
1
5
2
6
7
8
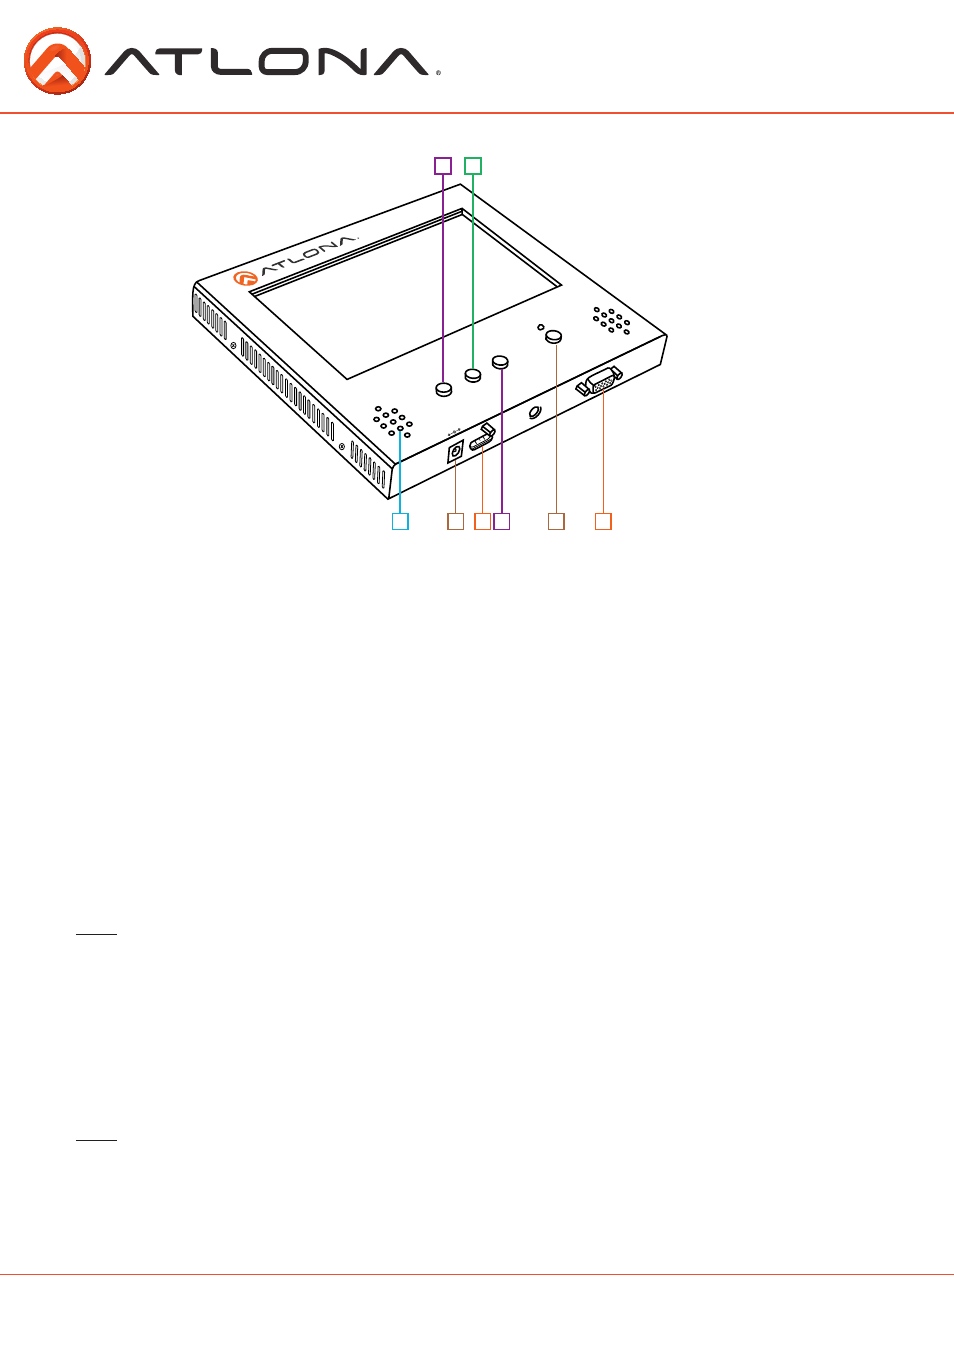
1. DOWN: Press this button to lower the audio volume. Also controls menu and EDID
2. UP: Press this button to raise the audio volume
3. Output Speakers: Built-in 2Channel speakers
4. DC 5V: This input is for 5V power supply. If the optional battery is used, the power supply is
not required
5. HDMI/DVI IN: Source is connected here. If using a DVI source an adapter will be needed.
6. INPUT: Selects input signal type. Press repeatedly until signal is on correct input
7. POWER & LED: This buttons toggles the AT-DIS7-PROHD on and off.
8. VGA/COMPONENT INPUT: Source is connected here. If using a component source, use the
included VGA to component adapter.
The on-screen display menu can be moved so that you may have the input source menu and
AT-DIS7-PROHD menu available the same time. Press the up arrow or down arrow to change the
position of the OSD Menu.
Note: Before plugging in the source, change the OSD Menu position. Once an input is plugged in the arrow buttons
will only change volume.
The AT-DIS7-PROHD has the ability to copy the EDID of any display. Press the up and down arrows
simultaneously to start copying. “Check DDC...” will appear on the display screen while in process.
Once done you will see either a red (indicates the copy failed) or green (indicates the copy was
successful) message.
Note: There is no last memory. If power is lost from unplugging, pressing the power button, or in any other way the
copied EDID and OSD Menu will reset to factory settings.
Panel Description
OSD Menu
EDID Learning