4 adding a music store, Operation - exter nal storage – Naim Audio HDX User Manual
Page 24
22
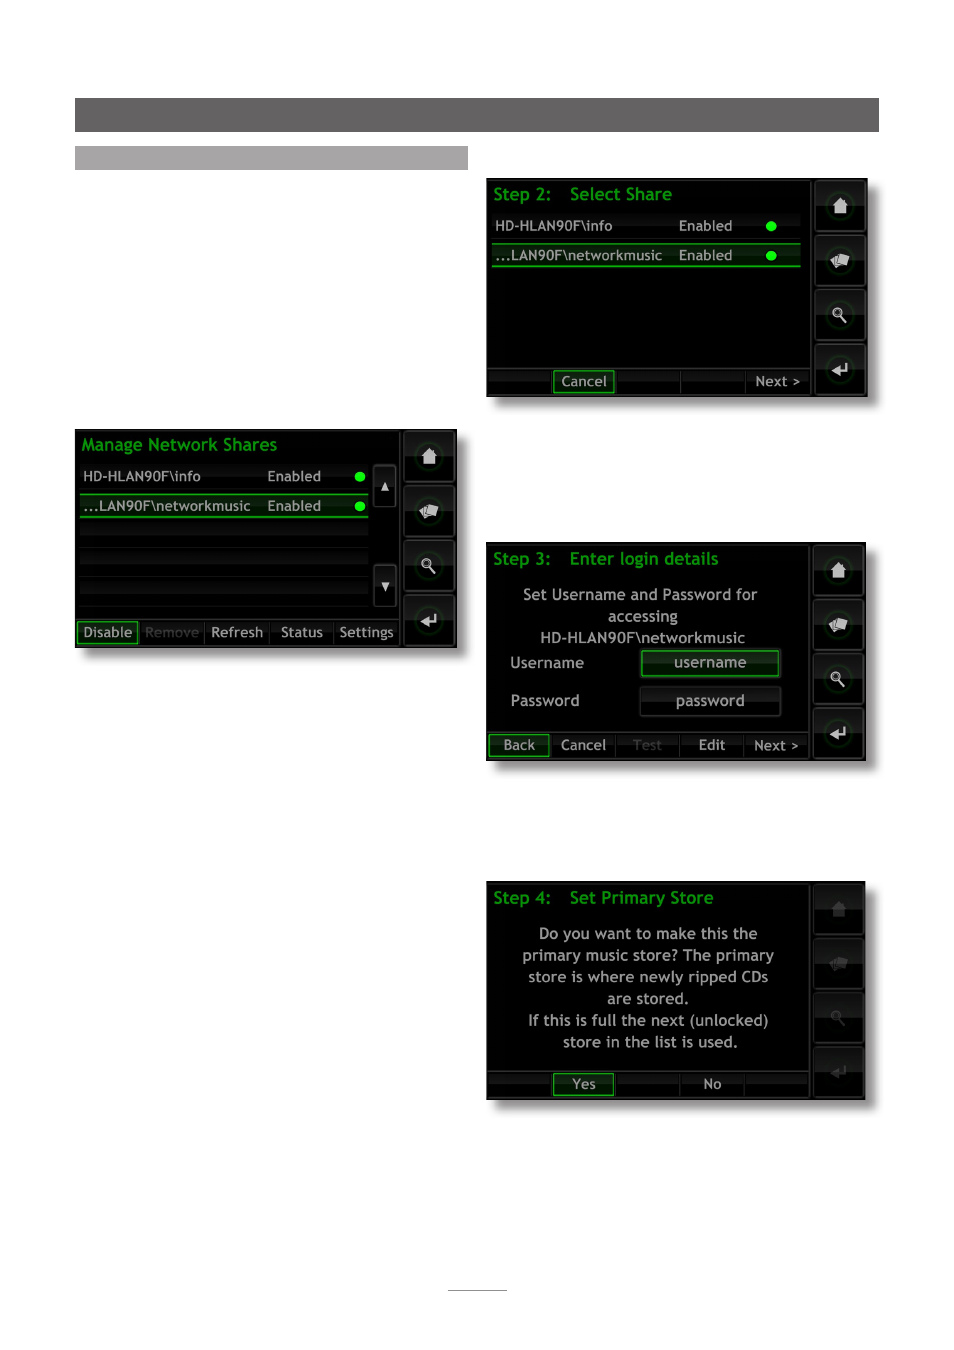
Step 2:
Select the desired Network Share followed by
Next
.
Step 3:
If the Network Share is username and password
protected these must be entered in the appropriate fields.
Selecting the fields in turn opens a text input screen. Select
Next
when the username and password are entered.
Note:
If the Network Share is not protected, the username
and password fields should be left blank.
Step 4:
If the new Music Store is to be the primary store
location where newly ripped CD data is held, select
Yes
at the Step 4 screen. This will complete the Music Store
addition process and the data from any subsequently
ripped CDs will be held by the new Music Store.
Operation - Exter nal Storage
7.4 Adding a Music Store
The following paragraphs and illustrations describe the
process of adding a Network Share, promoting it to Music
Store status and then nominating it as the primary Music
Store where ripped data is stored.
To begin, ensure that the new storage device (or shared
folder on an existing network device) is connected to the
network, switched on and configured to be shared. It may
also be useful to give the device an appropriate name.
In the illustrations following, the Network Share is called
Network Music.
It is important that the Network Share to be converted to a
Music Store contains no existing files.
Note:
Naming the Network Share must be done via the
connected computer operating system. Network Shares
are only enabled automatically if their name contains the
words “music”, “MP3” or “Content”.
The HDX will automatically find appropriately configured
network shares and list them in the
Manage Network
Shares
screen found via
Home Menu
>
System Setup
>
Network Shares
. If the new share does not appear select
Refresh
.
Audio files stored on Network Music will now be available
for browse and playback via the HDX. Select
Home Menu
>
Browse
>
Music Locations
>
All Music
or
Network Music
.
To convert the Network Share to Music Store status take
the following steps:
Note:
Only enabled Network Shares can be converted to
become Music Stores.
Step 1:
Select
Music Stores
from the
System Setup
menu
and then
Add New Store
. Selecting
Next
at the subsequent
information screen opens a list menu showing all the
available Network Shares able to be converted to Music
Store status.