Nac-n 172 xs quick start guide english, 1 installing and connecting – Naim Audio NAC-N 172 XS User Manual
Page 3
NAC-N 172 XS Quick Start Guide
English
1 Installing and Connecting
• Stand your NAC-N 172 XS on an appropriate, stable surface. Make sure the
NAC-N 172 XS is well ventilated.
• Check that the
mains
supply specified on the NAC-N 172 XS rear panel is appropriate
for your territory. Connect the NAC-N 172 XS to the mains using the supplied cable but
do not switch it on until all other connections have been made.
• Identify the
Signal Ground Switch
and select the “chassis” option unless the
NAC-N 172 XS is connected in a hi-fi system incorporating another earthed source
component (all Naim CD players, for example), or mains “hum” is audible through the
loudspeakers when the NAC-N 172 XS is switched on.
• Connect one of the NAC-N 172 XS
preamp outputs
to a power amplifier input. If the
option is available with the power amplifier, DIN sockets should be used in preference
to RCA phono sockets.
• If a subwoofer is to be used, connect it to the NAC-N 172 XS using the second
preamp
output
using a Naim subwoofer cable. Contact your local Naim retailer or distributor if
necessary for more information on subwoofer cables.
• To play audio from a
UPnP™
server or from internet radio stations, the NAC-N 172 XS
network socket
must be connected to a router using an Ethernet cable, or its
Wi-Fi
Antenna
must be fitted. Internet radio also requires a high-speed internet connection.
• If the optional NAC-N 172 XS
DAB/FM
Radio Module
is fitted, a suitable aerial should be
connected to the DAB/FM aerial socket. The DAB/FM radio cannot operate without
an aerial. Contact your local Naim retailer or distributor for advice on selecting and
installing an aerial.
• If the NAC-N 172 XS is to play audio files stored on an
iPod
,
iPhone
or on
USB
memory
hardware, connect it, using an appropriate cable if necessary, to the front panel USB
socket.
• If any external audio sources are to be used with your NAC-N 172 XS, connect them,
using the appropriate cables, to the rear panel
analogue
or
digital
inputs.
Full NAC-N 172 XS installation and operational information can be found in the Reference Manual
available on line at www.naimaudio.com
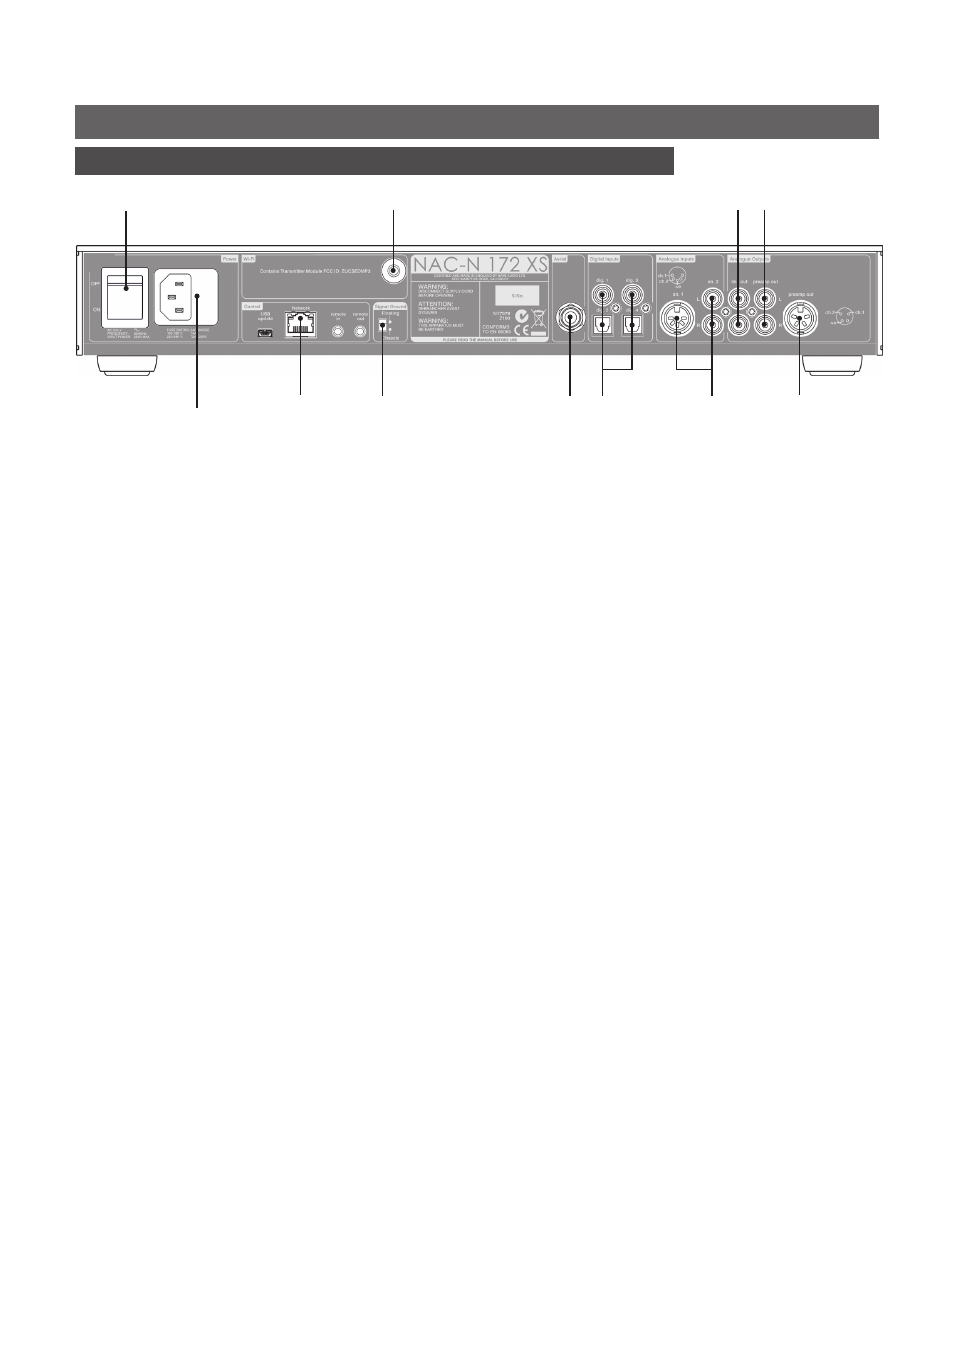
mains input
and fuse
network socket
power switch
line output
preamp output
wireless network
(Wi-Fi) antenna socket
signal ground
switch
DAB/FM aerial
socket (optional)
digital
inputs
analogue
inputs
preamp
output
Note:
Most UMS (Universal
Mass Storage) USB devices
are compatible with the
NAC-N 172 XS USB audio
input. Such devices might
include portable digital music
players, smart-phones, tablet
computers, USB memory sticks
and memory card readers.
Non UMS USB devices such
as older MP3 players may be
connected to the NAC-N 172
XS front panel input using a
3.5mm stereo jack cable from
their headphone sockets.