Operation – Ryobi P300 User Manual
Page 9
9
OPERATiON
WARNiNG:
Do not allow familiarity with tools to make you care-
less. Remember that a careless fraction of a second is
sufficient to inflict serious injury.
WARNiNG:
Always wear safety goggles or safety glasses with side
shields when operating tools. Failure to do so could re-
sult in objects being thrown into your eyes, resulting in
possible serious injury.
WARNiNG:
Do not use any attachments or accessories not recom-
mended by the manufacturer of this tool. The use of at-
tachments or accessories not recommended can result
in serious personal injury.
APPLicATiONS
You may use this tool for the following purposes:
Light-duty stapling or nailing into wood
This product will accept Ryobi One+ 18 V lithium-ion
battery packs and Ryobi One+ 18 V nickel-cadmium battery
packs.
For complete charging instructions, refer to the Operator’s
Manual for the battery packs and chargers listed in the
General Safety Rules.
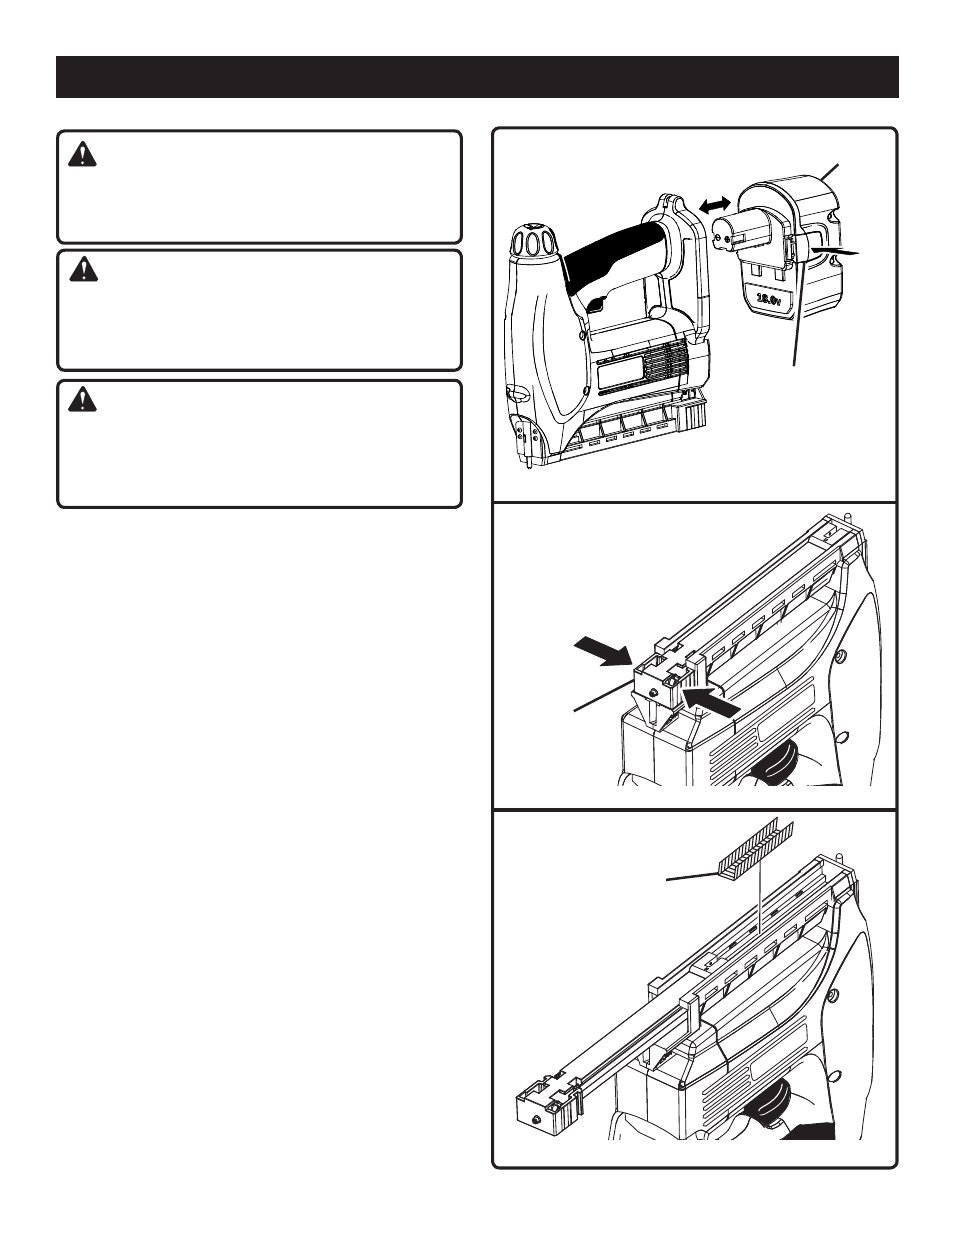
TO iNSTALL bATTERy PAcK
See Figure 2.
Place battery pack in the tool. Align raised rib on battery
pack with groove inside tool.
Make sure the latches on each side of the battery pack
snap in place and battery pack is secured in tool before
beginning operation.
TO REMOvE bATTERy PAcK
See Figure 2.
Locate latches on side of battery pack and depress to
release battery pack from the tool.
Remove battery pack from the tool.
LOAdiNG THE TOOL WiTH STAPLES
See Figures 3 and 4.
Remove battery pack from the tool.
Hold tool upside down; squeeze latch and slide base
open.
Place staples in channel, legs facing upward and close
base.
Make sure the latch is securely locked in place.
Reattach battery pack to tool.
baTTERy
paCk
LaTCHES
DEpRESS LaTCHES To
RELEaSE baTTERy paCk
Fig.
Fig. 3
LaTCH
STapLES
Fig. 4