Batumi, The module explained, Panel controls – Xaoc Devices Batumi User Manual
Page 2: Jumpers, Getting started, Module overview
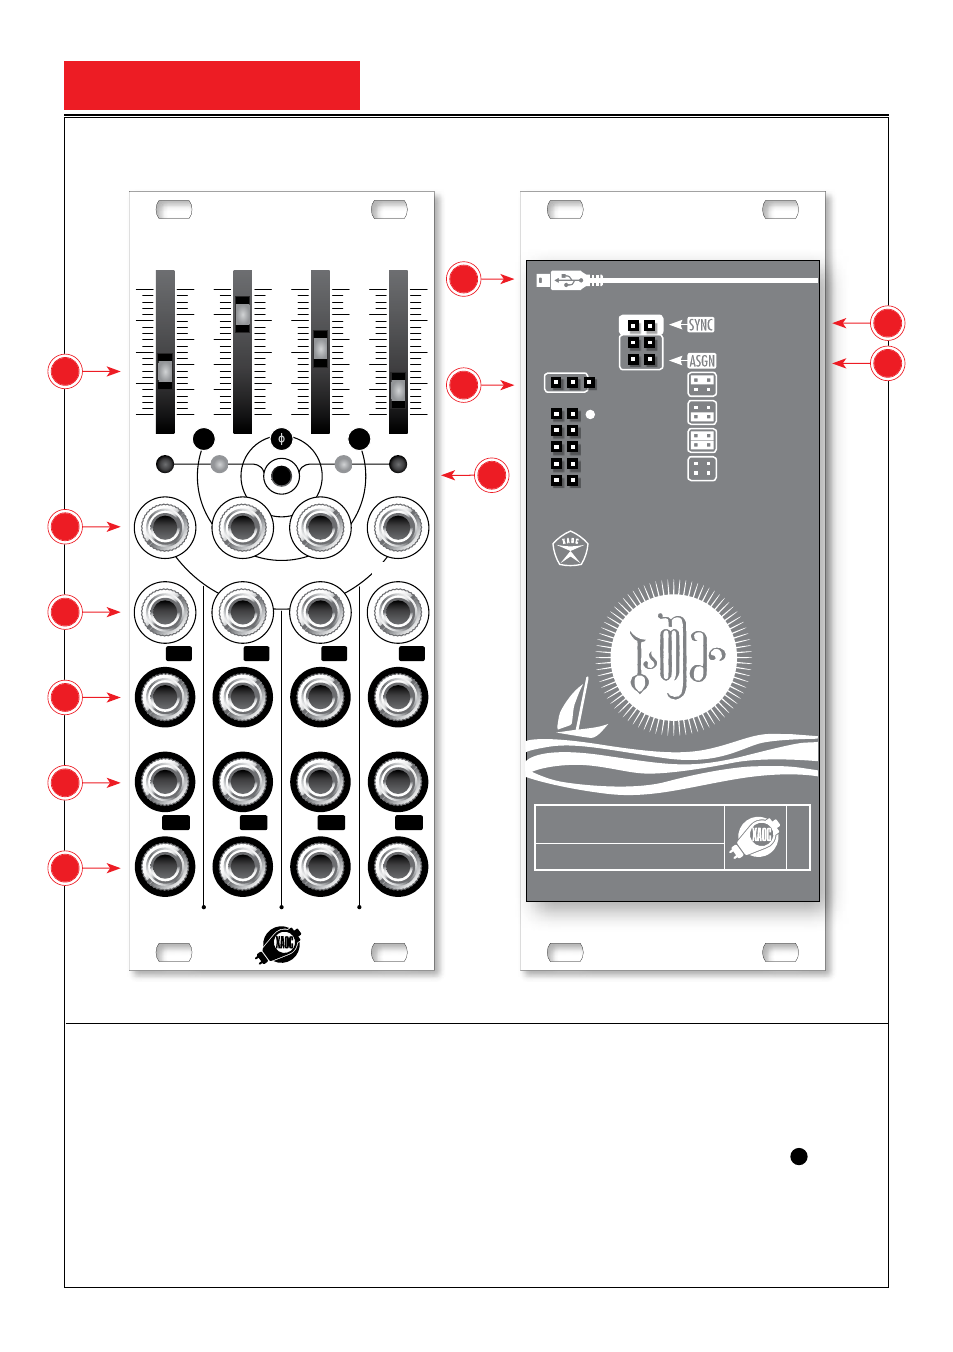
THE MODULE EXPLAINED
MINI USB
CONNECTOR
[RTFM]
UPDATE
WAVEFORM SELECTION
SAW UP
SAW DOWN
TRIANGLE
TRAPEZOID
POWER
CONNECTOR
–
12V
+12V
REV
. 09–20
14
BATUMI
1974 QUAD LOW FREQUENCY OSCILLATOR
TAP TEMPO MODE
FREE
QUAD
PHASE
DIVIDE
HZ
DIV
•BATUMI•
1974 QUADRUPLE LOW FREQUENCY OSCILLATOR
0.01
0.5
15
0.05
2.5
100
32
8
3
16
4
2
0
180
360
90
270
SINE
SQUARE
SINE
SQUARE
SINE
SQUARE
SINE
SQUARE
FRQ
FRQ·PH·DIV
FRQ·PH·DIV
FRQ·PH·DIV
SAW
ASGN
SAW
ASGN
SAW
ASGN
SAW
ASGN
RESET
SYNC
RESET
SYNC
RESET
SYNC
RESET
SYNC
GETTING STARTED
Ensure that you have 10 hp free
space in your eurorack cabinet
and turn the power off. Now, plug
the provided ribbon cable into the
bus board, paying close attention
to its pinout and orientation. The
red stripe (and a white dot) indi-
cate the negative 12 V rail, and is
supposed to point the same on the
busboard as well as the unit. The
module has been secured against
reversed power connection but
it is always a good habit to pay
attention to this. Now, mount the
screws provided and switch your
system back on.
MODULE OVERVIEW
Each LFO section is identical and
consists of the same elements.
The slider potentiometer
1
allows
you to manually adjust one of the
four main parameters, dependent
on the global mode chosen. For the
first—master LFO—it is always the
PANEL CONTROLS
(see text)
JUMPERS
(see text)
1
2
7
9
8
11
10
3
4
5
6