Power supply, Grounding, Extension cords – Weston Pro 3000 Vacuum Sealer User Manual
Page 7: Grounding instructions
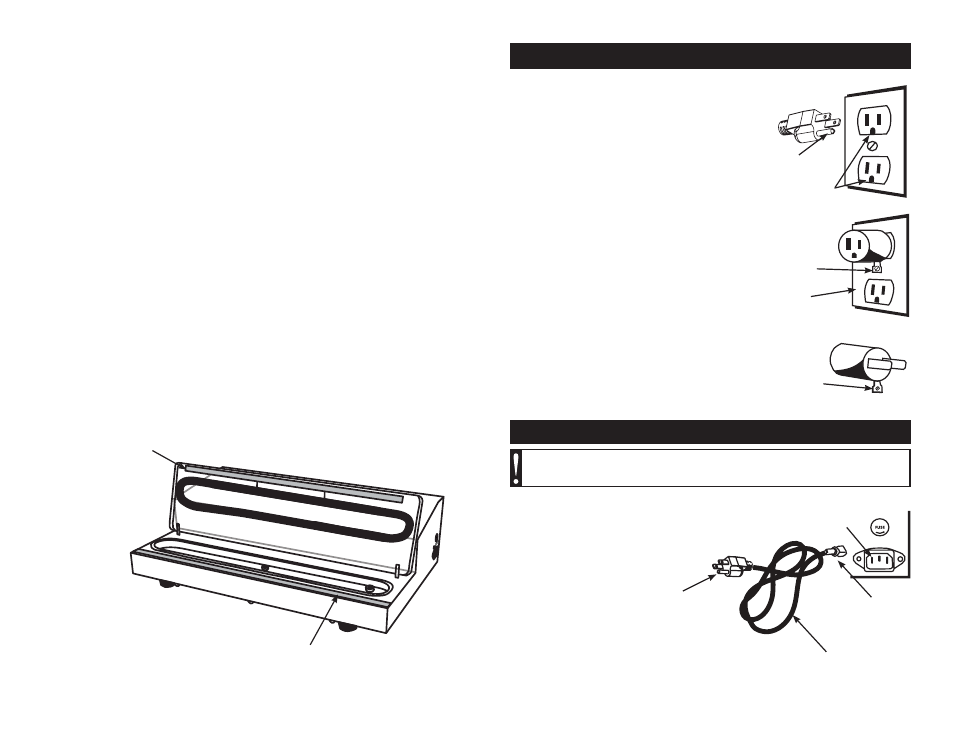
POWER SUPPLY
Insert the connector end of the
Power Cord into
the
Power Cord Port on the right side of the unit.
Insert the
Plug on the Power Cord into a standard
120-volt grounded electrical outlet (Figure 2). DO
NOT modify the plug to fit an unsuitable outlet.
Power Cord
Port
Connector
End
Plug End
GROUNDING
This appliance must be grounded while in use to
protect the operator from electrical shock. The
appliance is equipped with a 3-conductor cord
and a 3-prong grounding type plug to fit the proper
grounding-type receptacle. The appliance has a
plug that looks like Figure A. An adaptor, Figure B,
should be used for connecting Figure A plugs to two-
prong receptacles. The grounding tab which extends
from the adaptor must be connected to a permanent
ground such as a properly grounded outlet box as
shown in Figure C using a metal screw.
EXTENSION CORDS
Use only 3-wire extension cords which have 3-prong
grounding-type plugs and a 3-pole cord connector
that accepts the plug from the appliance. Use
only extension cords having an electrical rating not
less than the rating of the appliance. Do not use
damaged extension cords. Examine extension
cord before using and replace if damaged. Do not
abuse extension cord and do not yank on any cord
to disconnect. Keep cord away from heat and sharp
edges.
Figure A
Figure B
Figure C
Circuit
Grounding
Conductor
Grounding
Prong
Metal
Grounding
Screw
Cover of
Grounded
Outlet Box
Grounding
Means
AA2220
GROUNDING INSTRUCTIONS
Power
Cord
Figure 2
WARNING!
Before cleaning, assembling or disassembling the
Vacuum Sealer, make sure the Vacuum Sealer is OFF and the PLUG IS
REMOVED FROM THE OUTLET/POWER SOURCE!
REPLACING THE SEAL BAR TAPE:
*NOTE one extra piece of Seal Bar Tape is included with the original unit as a spare.
1. Turn “OFF” the
Vacuum Sealer and remove the Power Cord from the electrical
outlet.
2. Make sure the unit is completely cool.
3. Open the
Vacuum Lid.
4. Pick at either end of the
Seal Bar Tape covering the Seal Bar Heating Element
until it lifts slightly. Grasp the loose end and slowly pull the
Seal Bar Tape back over
itself until fully removed (Figure 9).
5. Repeat step 4 for the
Seal Bar Tape covering Vacuum Lid Seal. DO NOT remove
the
Seal.
6. Remove the backing from a new wide strip of
Seal Bar Tape for the Seal Bar Heating
Element. Be careful not to allow the Seal Bar Tape to contact anything including itself
while the adhesive side is exposed.
7. Hold one end of the
Seal Bar Tape in each hand. Stick the left end of the Seal Bar
Tape to the flat area on the Plastic Vacuum Chamber just left of the Seal Bar Heating
Element. Apply the Seal Bar Tape from left to right over the Seal Bar Heating Element
until done. Make sure there are no wrinkles or folds in the
Seal Bar Tape once applied.
The
Seal Bar Tape should fully cover the Seal Bar Heating Element.
8. Remove the backing from a new narrow strip of
Seal Bar Tape for the Vacuum Lid
Seal. Stick the left end of the Seal Bar Tape onto the left end of the Seal. The Seal Bar
Tape and Seal ends should be flush. Apply the Seal Bar Tape from left to right over the
Vacuum Lid Seal until done. Make sure there are no wrinkles or folds in the Seal Bar
Tape once applied. The Seal Bar Tape should fully cover the Vacuum Lid Seal.
Upper Seal Bar Tape
Figure 9
Lower Seal Bar Tape
-7-
-14-