Getting started, Register with livesecurity® service, Connect your watchguard ssl 100 – WatchGuard SSL 100 User Manual
Page 2: Run the quick setup wizard
Register with LiveSecurity® Service
• Find the serial number on your device and record it.
• Go to http://www.watchguard.com/activate
• Log in.
NOTE: If you are new to WatchGuard, follow the instructions to create a profile.
• Follow the instructions on the screen.
• It is a good idea to download and extract your WatchGuard SSL
feature key during activation. Extract the feature key on to the
computer you will use to configure your WatchGuard SSL 100.
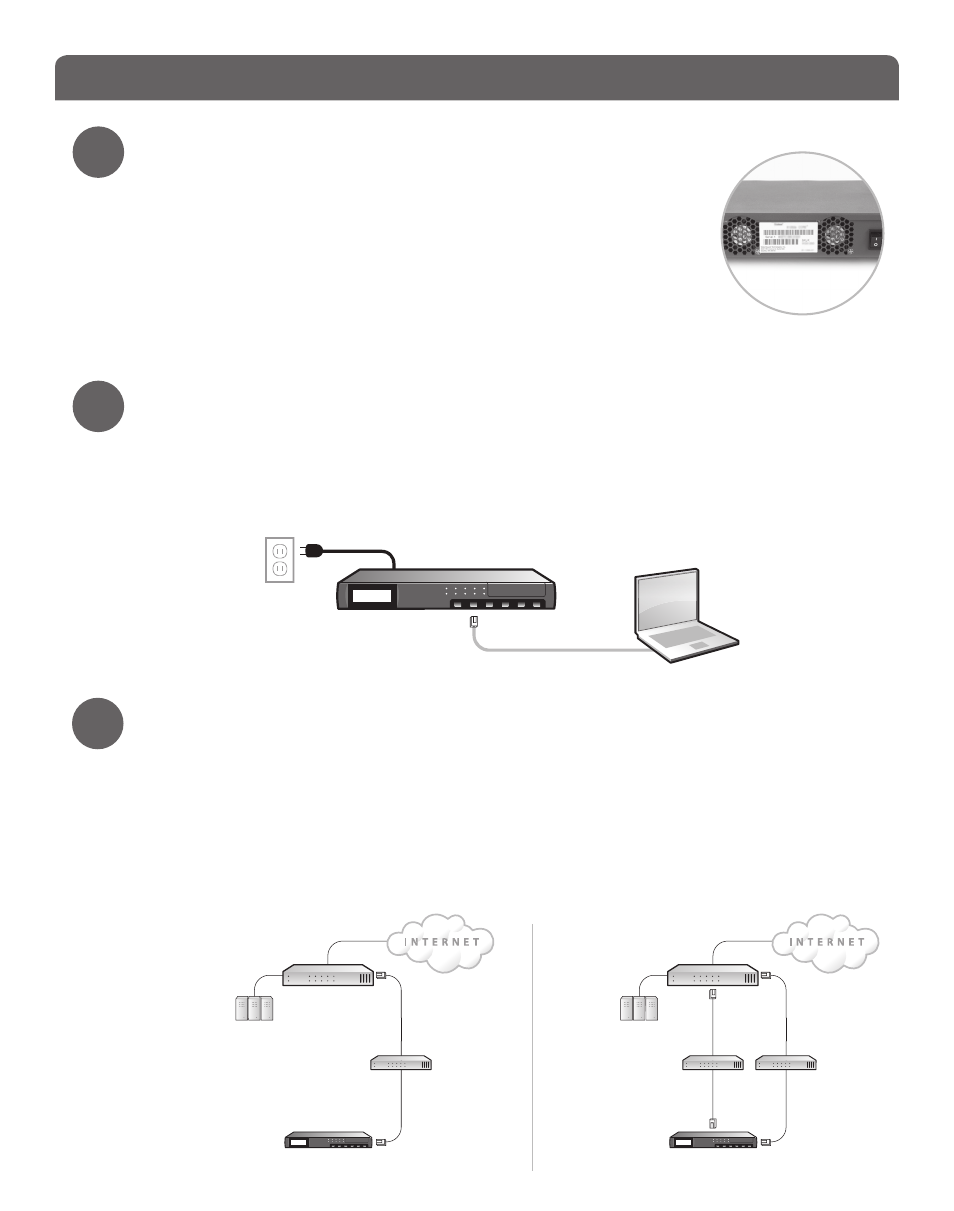
Connect your WatchGuard SSL 100
•
Make sure your computer is configured with a static IP address on the
192.168.111.0/24 network.
NOTE: The default IP address on the WatchGuard SSL 100 is 192.168.111.1.
•
Connect the Ethernet interface on your computer to Eth1 on your WatchGuard SSL
device.
Getting Started
1
2
3
•
Power on the WatchGuard SSL 100.
Run the Quick Setup Wizard
•
Open a web browser and type: https://192.168.111.1:8443. Follow the directions in the
wizard to set up your WatchGuard SSL device.
NOTE: Because the WatchGuard SSL 100 uses a self-signed certificate, you may see a certificate warning in
your browser. It is safe to ignore the warning (Internet Explorer) or to add a certificate exception (Mozilla
Firefox).
• In the wizard, you must decide on the configuration mode that bests suits your
network. These diagrams show the two configuration modes:
Eth 1
green
Single
Interface
Mode
Dual
Interface
Mode
Firewall
DMZ 1
DMZ 2
Eth 0
Eth 1
switch
switch
Trusted Resources
WatchGuard SSL 100
Firewall
DMZ 1
Eth 0
switch
WatchGuard SSL 100
Trusted Resources