Installation instructions for dx1/200-swc160/rh, Figure 4: dx1/200-swc160/rh isolator board details – StorCase Technology DX1/200-SW160/RH & DX1/200-SWC160/RH Ultra User Manual
Page 4
DE100/DE200 Ultra160 Hot Swap/Repeater Isolator Board
D89-0000-0125 Rev. C00
StorCase Technology, Inc.
Installation Instructions for DX1/200-SWC160/RH
1.
Remove jumpers on J3 Pins 7 & 8, and Pins 9 & 10 from the DE100i-SWC160 (or
DE200i-SWC160, S20A102, S20A108) receiving frame motherboard (Figure 5).
NOTE:
Save these jumpers! These jumpers are required when the isolator board
is not installed.
2.
Remove the two (2) screws on the receiving frame motherboard.
NOTE:
Save these screws for Step 5!
3.
Attach two (2) stand-offs (included) to the mounting holes on the receiving frame
motherboard (Figure 6).
4.
Carefully align the connectors of the isolator board with the connectors on the
receiving frame motherboard and gently push the board into position. Make certain
that all connectors are properly mated.
5.
Secure the board to the receiving frame stand-offs with the same two (2) screws
from Step 2 (Figure 6).
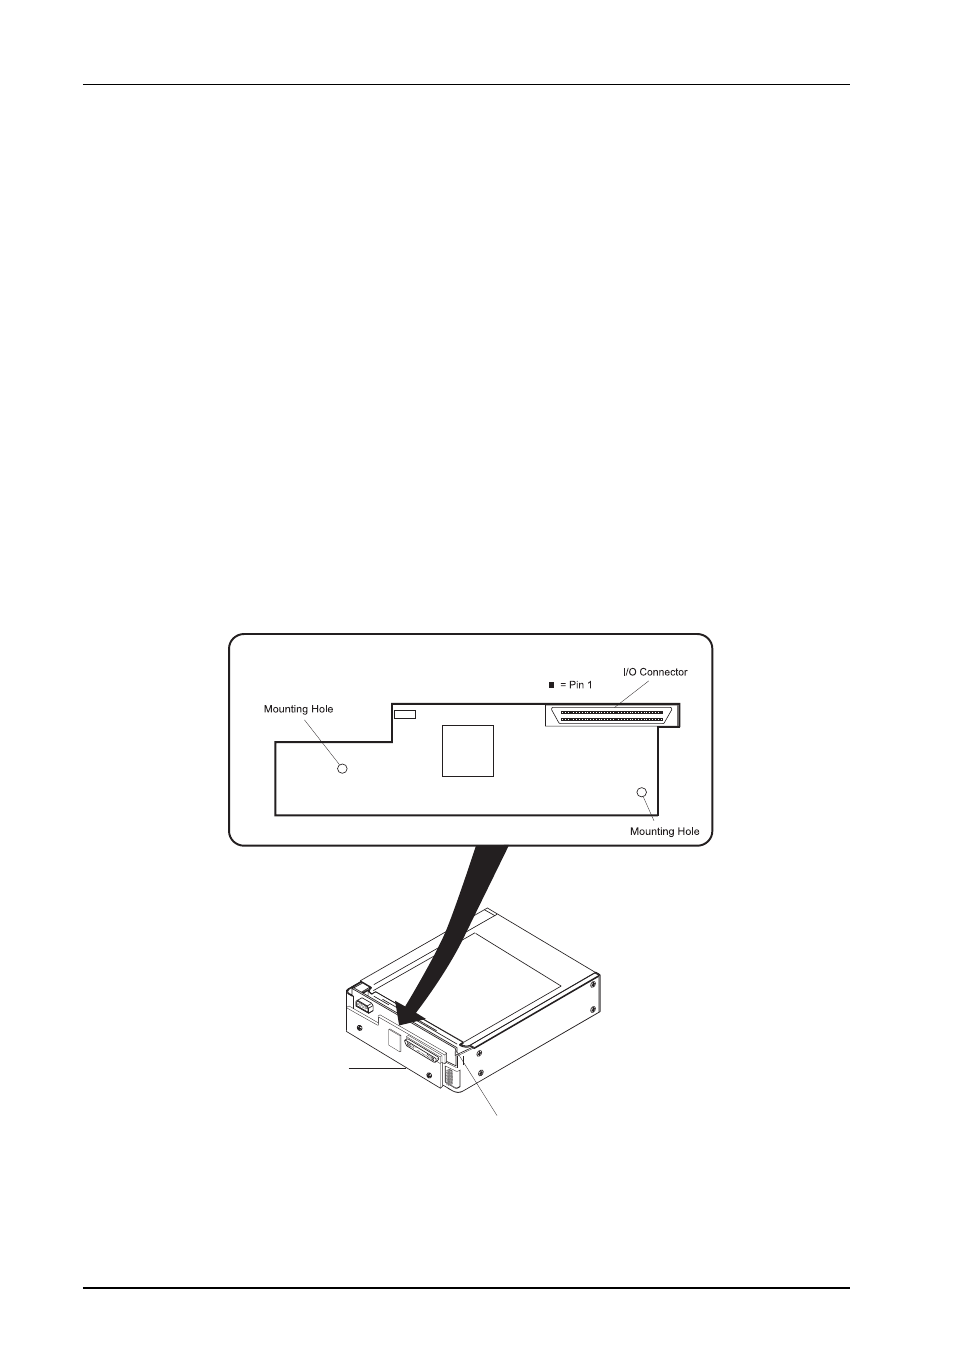
Figure 4: DX1/200-SWC160/RH Isolator Board Details
DX1/200-SWC160/RH
Isolator Board
DX1/200-SWC160/RH
Isolator Board Detail
DE100 or DE200
(Ultra160 Only)
Receiving Frame
Motherboard
0501b