Sioux Tools CN9L User Manual
Page 2
2
Changing Heads.
1. Add a nut or short screw to the head assembly to retain the internal parts.
2. Loosen and remove the ring 44031A. (Left hand thread.)
3. Remove the head assembly and the hex drive bit.
4. Install the new head assembly making sure the hex bit is seated in the drive spindle and the fastener head. Remember that all
stud-type tools use the same bit, but each nut-type head uses a bit matched to the arbor size.
5. Replace and tighten the ring.
6. Remove the retaining nut or screw before operating the tool.
DECLARATION OF CONFORMITY
We, Sioux Tools Inc., 250 Snap-on Drive, P.O. Box 1596, Murphy, NC, 28906, USA, declare under our sole responsibility that the products
CN9P-4, CN9P-7, CN9P-12, CN9P-20, CN9P-25, CN9L-4, CN9L-7, CN9L-12, CN9L-20, CN9L-25
Including all suffixes
to which this declaration relates are in conformity with the following standard or standards or other normative document or documents:
EN 792, EN 12100-1, -2, ISO 8662, Pneurop PN8NTC1
following the provisions of
89/392/EEC as amended by 91/368/EEC & 93/44/EC Directives.
Signature of issuer
June 1, 2005
Murphy, North Carolina, USA
Date and place of issues
Mark S. Pezzoni
President
Power and Specialty Tools
Name and position of issuer
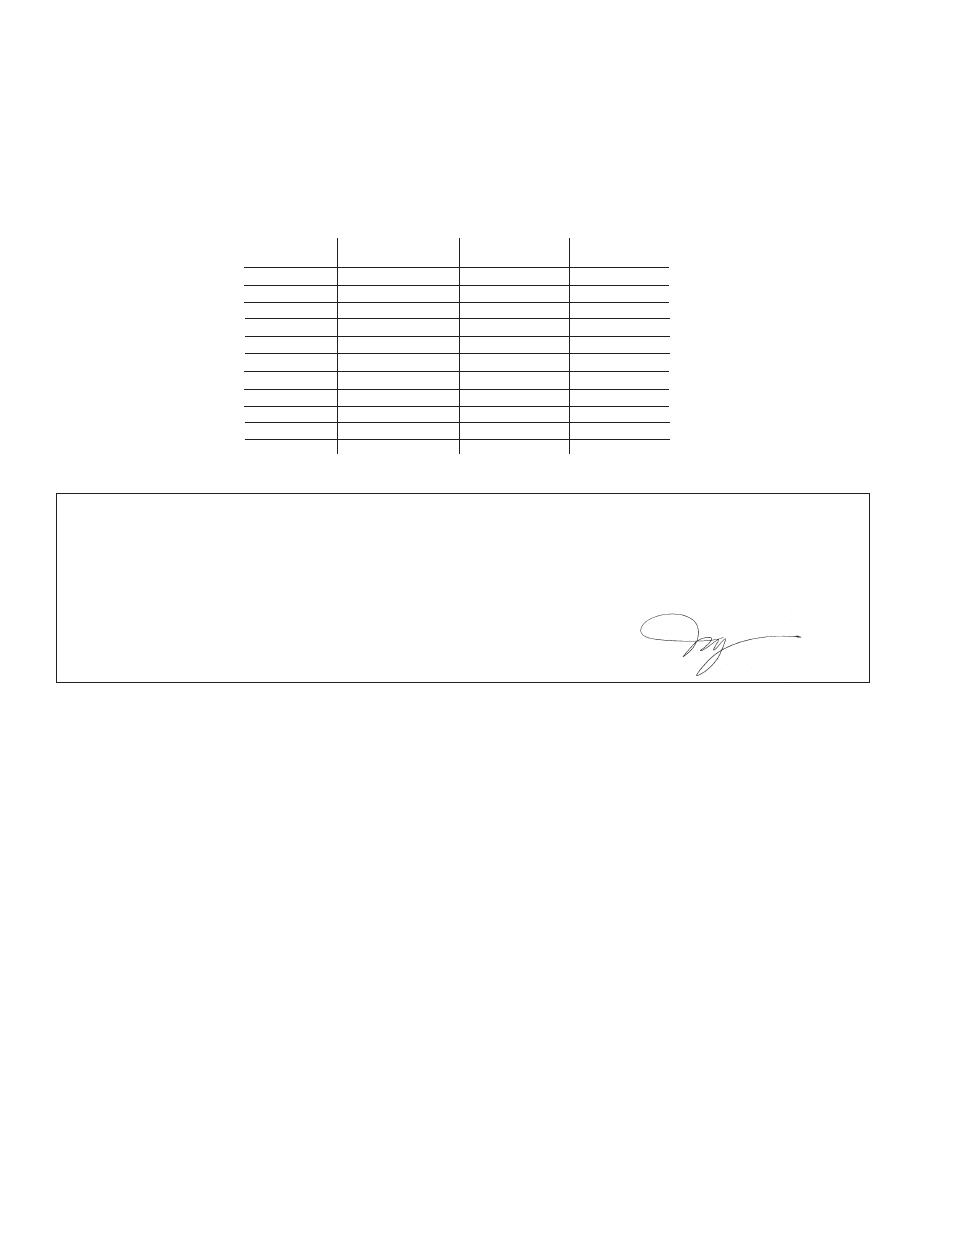
*Sound Pressure
*Sound Power
*Vibration
Catalog No.
dBA
dBA
m/s
2
CN9P-4**
77.9
89.5
Less than 2.5
CN9P-7**
77.9
89.5
Less than 2.5
CN9P-12**
77.9
89.5
Less than 2.5
CN9P-20**
77.9
89.5
Less than 2.5
CN9P-25**
77.9
89.5
Less than 2.5
CN9L-4**
82.1
94.8
Less than 2.5
CN9L-7**
82.1
94.8
Less than 2.5
CN9L-12**
82.1
94.8
Less than 2.5
CN9L-20**
82.1
94.8
Less than 2.5
CN9L-25**
82.1
94.8
Less than 2.5
*per PN8NTC1
*per PN8NTC1
*per ISO 8662
**Including all suffixes
SOUND AND VIBRATION READINGS