Step 4 - placing chassis, Step 5 - secure window shutter – Daewoo DWA-151C User Manual
Page 7
7
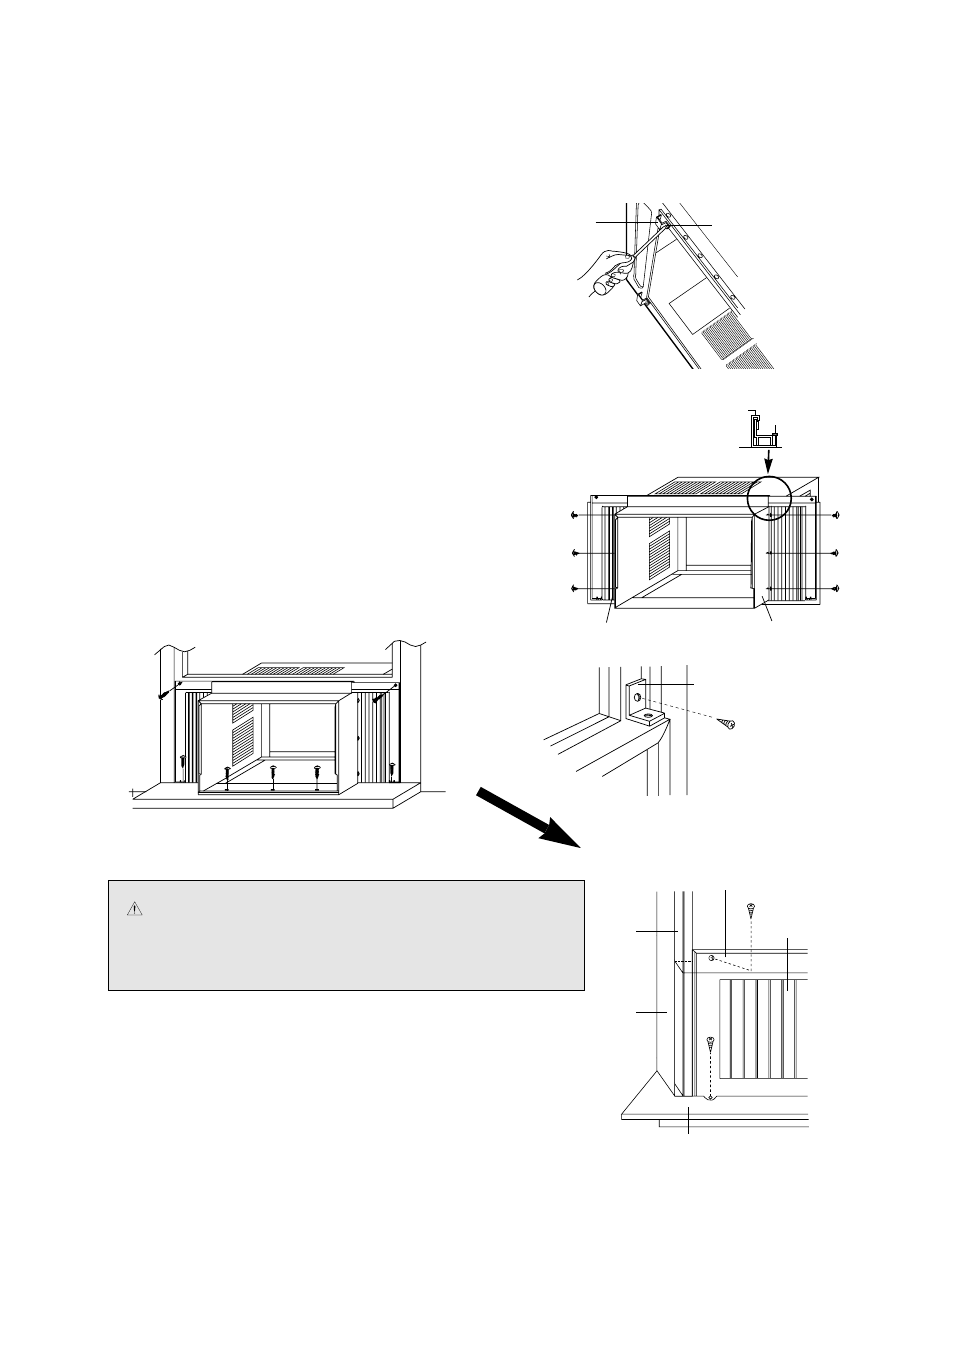
• Step 4 - Placing Chassis
1. Insert narrow side of ‘Frame Guide Lower’ to rectangle holes
located in bottom of chassis, and fasten it with Screw (Type E).
2. Insert Window Kit Frames to Top Guide and Lower Guide.
3. Fasten Shutter to side holes of Chassis with six Screws (Type E).
4. Place the chassis on the window sill and align it with Sill Bracket
and sill with Lower Frame Guide and locate window sash to Top
Frame Guide. (check the end of chassis for about 1/2 inches
(12mm) distance below the level.)
5. Attach the Window seal B to Frame Guide Top.
6. Fasten Front Chassis Bracket to sill with three Screws
(Type C).
7. Fasten Sash Bracket with Screw (Type C) to top of
indoor window sash or directly into side of window sash
or directly into side of window frame. This will prevent
raising of the window from the outside. If you have a hard
wood or metal window frame, a 1/8 inch pilot hole may
be needed in order to drive the screws.
8. Attach the Window Seal A to window (see the picture
shown in step 8, page 8)
• Step 5 - Secure Window Shutter
To provide a proper seal, pull each expandable side Window Shutter
out and up until it is tight against the window frame. Using the hole in
the top and bottom of each Window Kit Frame as a guide, secure
Window Kit Frame in window sash and on the window sill.
Screw (Type E, both side)
FRAME
Guide Lower
Frame Guide Top
Window Seal B
Screw (Type C)
Screw (Type E)
Screw
(Type C)
SASH BRACKET
CAUTION
Do not drill into window sash until window has
been inspected to make sure drilling or screw will
not damage any locking or lifting mechanism
located in the frame.
WINDOW
SHUTTER
WINDOW
KIT FRAME
INNER WINDOW SILL
WINDOW
SASH
WINDOW
FRAME
Screw (Type C)
Screw
(Type C)