Rear panel connections – Simaudio Neo 260D CD Transport / DAC User Manual
Page 10
260
D CD Transport w/ Optional DAC
____________________________________________________________________________________
10
Rear Panel Connections
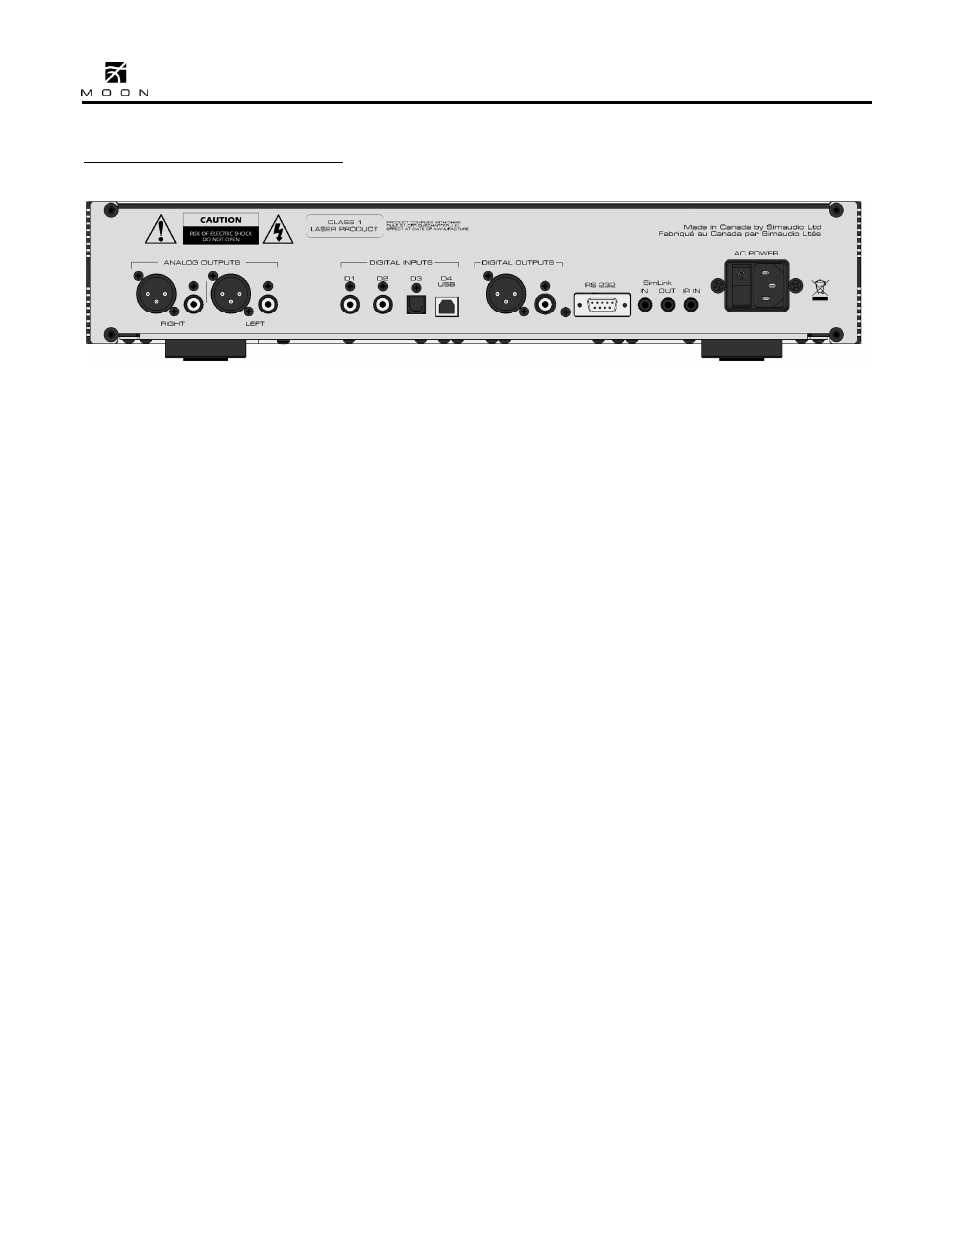
Figure 2: Nēo 260D Rear panel
The rear panel will look similar to Figure 2 (above).
The analog outputs are on the left side; There are
two pairs, “Right” and “Left”, each with a single-
ended RCA and balanced XLR connector. These are
“Fixed Level” outputs, intended to be connected to a
line-level input on either your preamplifier or
integrated amplifier. We strongly recommend that
you use the balanced XLR connectors on your 260D
to maximize its level of performance. Both pairs of
analog outputs can be used simultaneously if
required. Don’t hesitate to use high quality
interconnect cables*. Poor quality interconnect
cables can degrade the overall sonic performance of
your system.
Next is a group of four (4) “Digital Inputs” labelled
“D1” thru “D4”. Inputs “D1” and “D2” are S/PDIF on
RCA connectors, benefitting most from cables with
an impedance of 75
Ω. Input “D3” is Optical and
uses a Toslink connector. Finally, input “D4” is USB
type-B connector. Next, are two digital outputs;
AES/EBU on a XLR connector (that benefits most
from a 110
Ω digital audio cable terminated with XLR
connectors) and SPDIF on an RCA connector. Don’t
hesitate to use high quality digital interconnect
cables*.
The right side of the rear panel has various
connectors for external communications. The Nēo
260D is equipped with full-function bi-directional
RS-232 port control and status for custom
integration or automation, as well as future software
updates. Next to the RS-232 port are two (2)
“SimLink™” connectors labeled “in” and “out” on
1/8” mini jacks. Please refer to the next section
entitled SimLink™ for more details. Then there is a
1/8” mini-jack input for use with aftermarket
infrared remote control receivers.
Finally on the far right side is the main power switch
(“0”=off, “1”=on), the IEC receptacle, labeled “AC
Input” for the included AC power cord, and the “AC
Fuse” socket cover. Connect the supplied AC power
cable to the IEC receptacle. Ensure that the AC wall
outlet you use has a functioning ground. For the
best sonic performance, it is preferable that you
plug your 260D directly into a dedicated AC outlet
and avoid using an extension cord.
* Please speak with your MOON Authorized Retailer about
the benefits of high quality cables for your system.