En transmitter and receiver binding, Before flight, Installing flight battery – ParkZone PKZU1380 User Manual
Page 6
6
EN
Transmitter and Receiver Binding
Binding is the process of programming the receiver of the control unit to recognize the GUID
(Globally Unique Identifi er) code of a single specifi c transmitter. You need to ‘bind’ your chosen
Spektrum DSM® technology equipped aircraft transmitter to the receiver for proper operation.
Binding Procedure
1. Refer to your transmitter’s unique instructions for binding to a receiver.
2. Make sure the fl ight battery is disconnected from the aircraft.
3. Power off the transmitter and move the transmitter more than 2 feet (50 cm) from the aircraft.
Keep away from large metal objects (vehicles, etc.) while binding.
4. Connect the fl ight battery in the aircraft. The receiver LED will begin to fl ash rapidly. (Typically
after 5 seconds).
Note: Receiver LED is visible in the fuselage when the nose cone is removed.
5. Make sure transmitter controls are neutral and throttle and throttle trim are in low position.
6. Put your transmitter into bind mode. Refer to your transmitter’s manual for binding button or
switch instructions.
7. After 5 to 10 seconds, the receiver status LED will become solid, indicating the receiver is bound
to the transmitter.
Note: If the LED does not go to a solid light, refer to Troubleshooting Guide at back of manual.
Note: For a list of compatible DSM transmitters, please visit www.bindnfl y.com.
Note: When using a Futaba transmitter with a Spektrum DSM module, you will need to reverse
the throttle channel.
Before Flight
Note: Always disconnect the Li-Po from the receiver/ESC of the aircraft when not fl ying. Failure
to do so will render the battery unusable.
CAUTION: When armed, the motors will turn the propellers in response to any throttle
movement. When the aircraft does not respond, you may need to bind.
1
2
3
Lower throttle and throttle
trim to lowest settings
Connect fl ight battery and
attach to hook and
loop strip.
Continuous LED
Power on
Transmitter
Wait 5
Seconds
1
3
2
Note: Always disconnect the Li-Po
from the receiver/ESC of the airplane
when not fl ying. Failure to do so will
render the battery unusable.
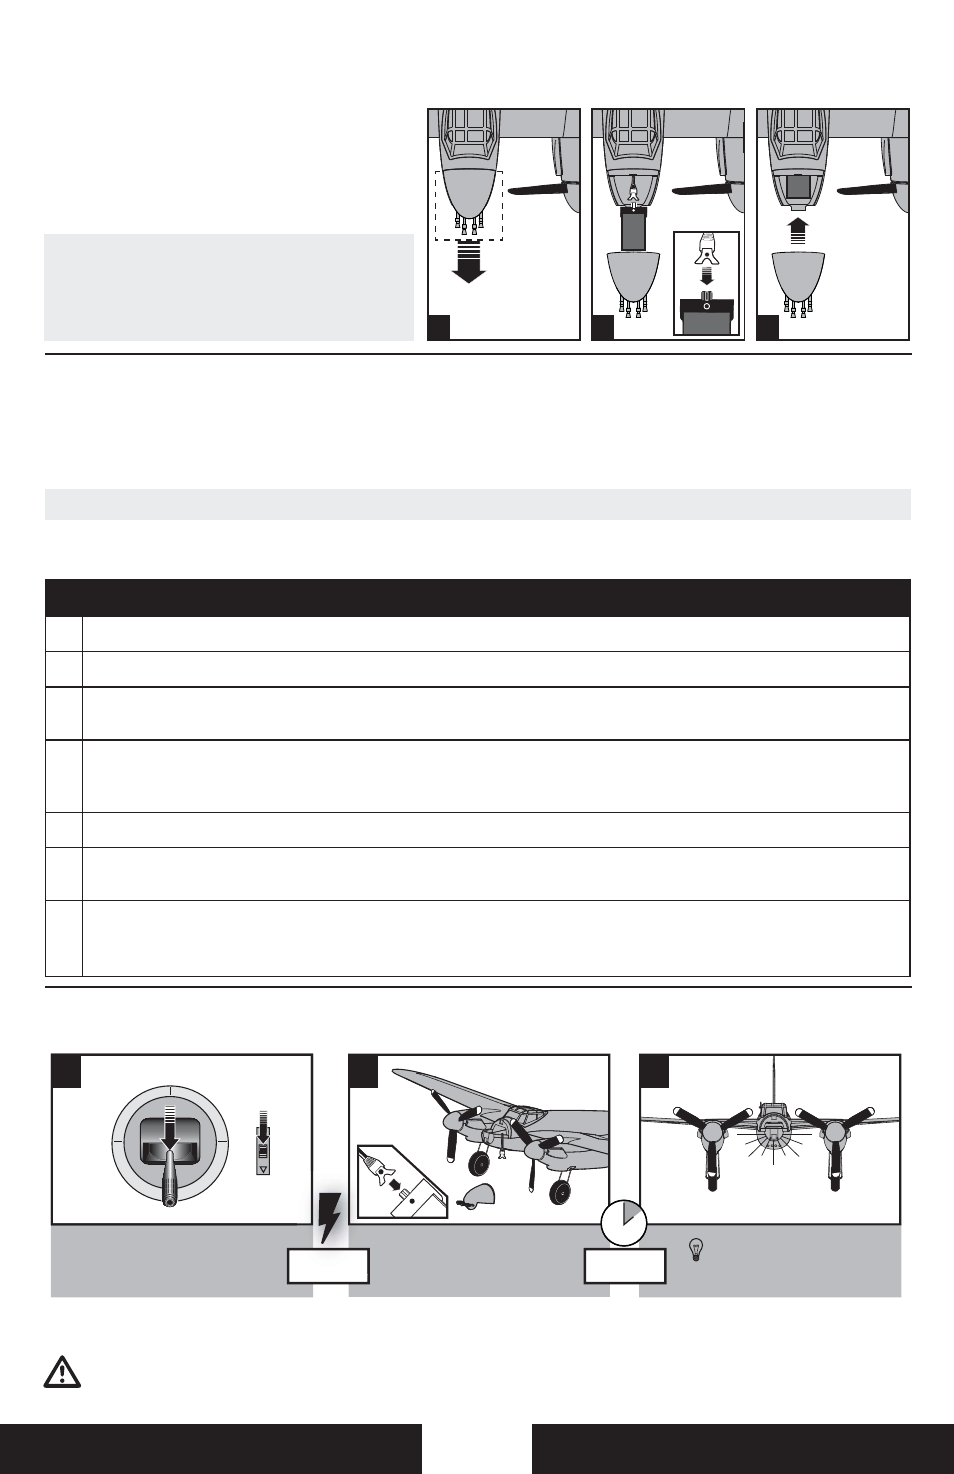
Installing Flight Battery
1. Remove
hatch.
2. Correctly align red dots and
attach power connector to battery.
3. Install battery in model using hook-
and-loop strips then install hatch.