Tent setup – NEMO Equipment NANO ELIT User Manual
Page 3
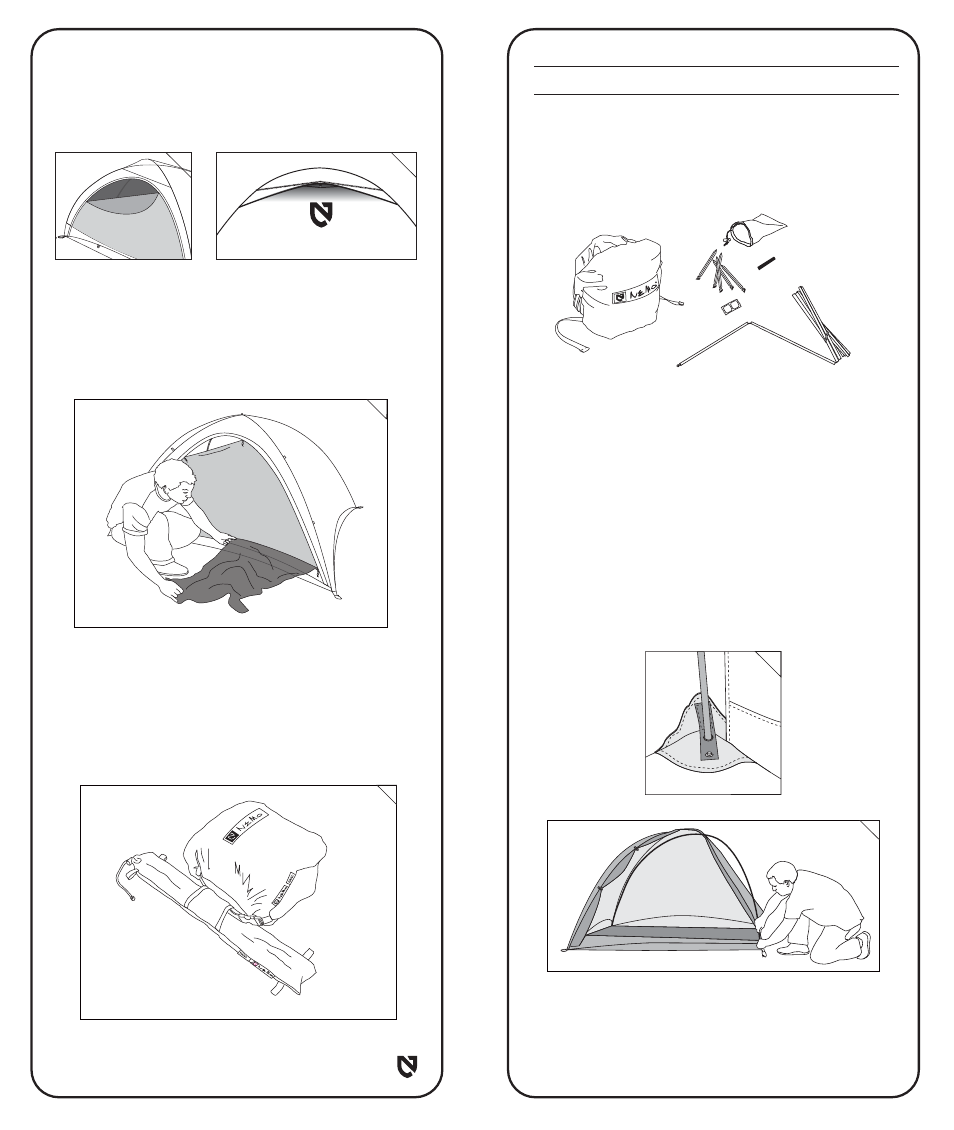
Tent Setup
1. Lay out the contents of Nano Elite™ and make sure that
you received all of the following items: tent, stuff sack, two
poles, five stakes, guy lines, pole repair sleeve, Tear-Aid® fabric
patches.
2. When choosing a location to pitch your tent, select a flat area
free of fragile undergrowth and sharp objects. Nano Elite™ is a
freestanding tent which means it will still function without being
staked out. For full strength, anchor the corners of your tent to
the ground with the included stakes. If the ground is too hard to
place stakes, tie the corners of your tent to heavy objects like
rocks. If you are forced to set up your tent on an incline, make
sure your head is positioned uphill.
3. To install Nano Elite™ poles, place the end of one pole into a
far corner. Insert the opposite end into the diagonal corner near
the door. Make sure the pole ends sit in the metal buttons.
Repeat with the second pole. It is easiest to insert the poles
before staking the tent.
3
3
3. Removable Mesh Front Door: The mesh front door panel on
Nano Elite™ can be unzipped and removed from the tent. The
panel weighs 3.1oz, so if you know you’re headed somewhere
where you don’t need protection from insects, you can save the
extra weight.
4. Watertight Dry Bag: Many of the NEMO tents include
watertight dry bags, including the Nano Elite™. Having your tent
in a watertight stuff sack means it won’t take on water weight if it’s
in your backpack while you’re hiking in the rain, or if it’s in your
kayak when you roll your boat. Alternatively, if you have to pack
your tent wet, it will help keep the rest of the gear in your pack dry.
3
4
2
2