Quick install guide xms-1024p, Xms-1024p installation, Installing the xms-1024p in a rack – Luxul XMS-1024P User Manual
Page 6: Desktop setup, Network connections
Quick Install Guide
XMS-1024P
14203 Minuteman Drive, Suite 201, Draper, UT 84020-1685 | luxul.com | 801-822-5450
LUX-QIG-XMS-1024P 093140913
6
XMS-1024P INSTALLATION
Installing the XMS-1024P in a Rack
The XMS-1024P can easily be installed in a standard 19” rack. The XMS-1024P includes
two mounting ears for installing and stabilizing the switch. For attaching the mounting
ears and installing the switch within a rack, please refer to the following illustration:
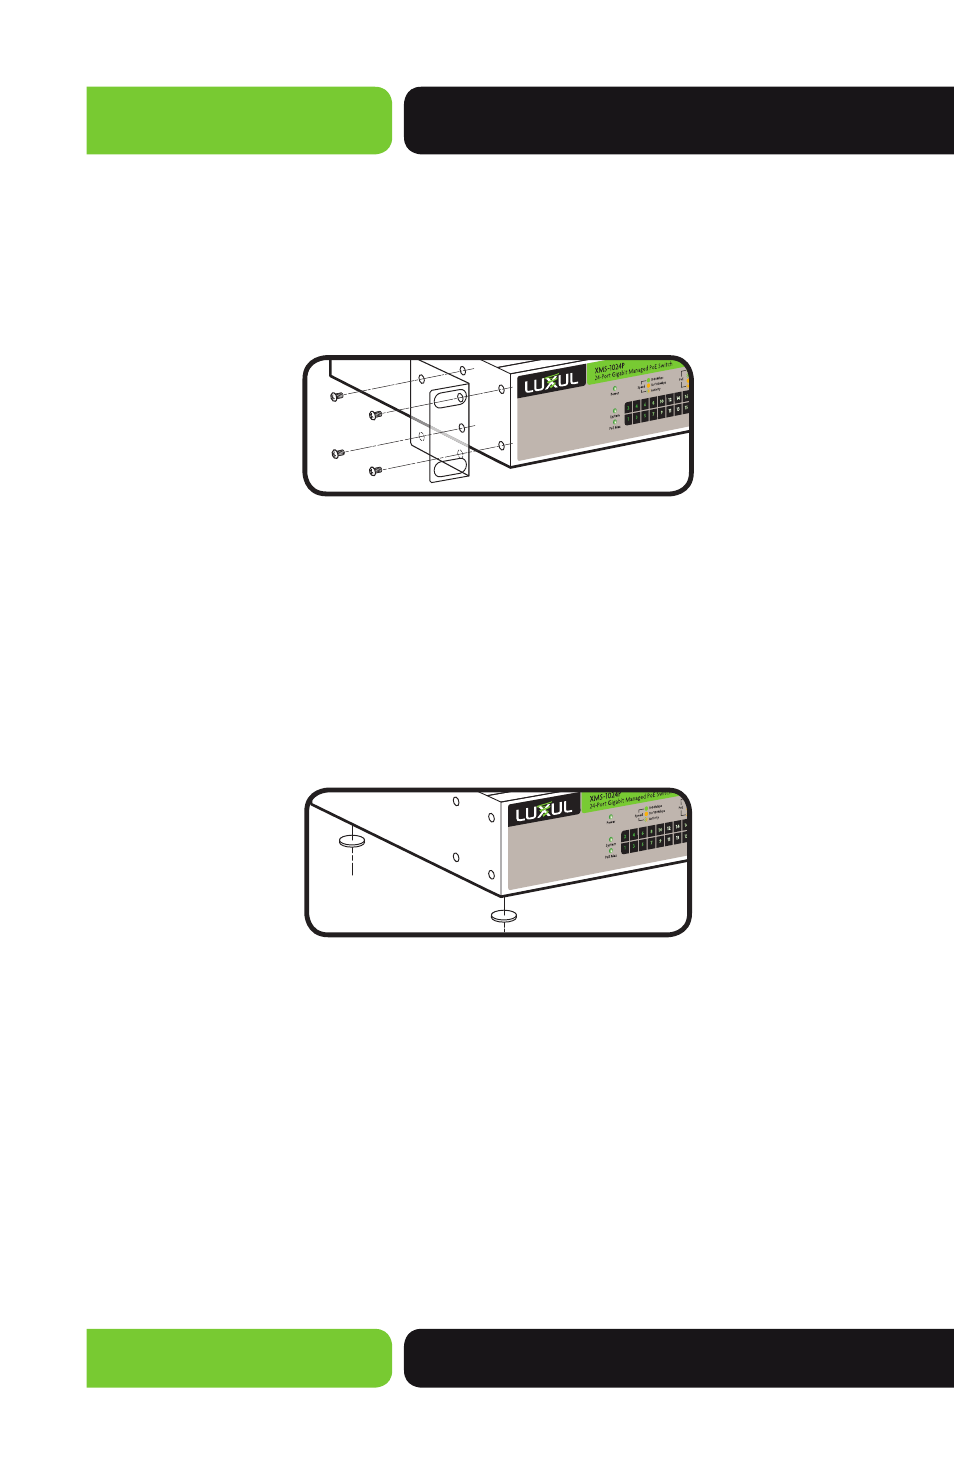
Rack-Mounting the XMS-1024P
Using the included screws, attach the mounting ears to each side of the switch.
Mount the switch in the rack with the LEDs facing outwards. Be sure the switch is
level and properly secured within the rack.
Desktop Setup
For use as a desktop device, position and apply the included rubber feet to the
bottom of the XMS-1024P.
Attaching the Rubber Feet to the XMS-1024P
Network Connections:
The XMS-1024P supports 10/100/1000 Mbps Ethernet; 10/100 Mbps half/full-
duplex mode and 1000 Mbps full-duplex mode. All RJ-45 ports support Auto MDI/
MDIX and can be used as ordinary ports or as Uplink ports. Any RJ-45 port can be
used to connect the XMS-1024P to an Ethernet enabled device (including servers,
routers, and other switches) without a crossover cable.
The XMS-1024P offers 4 shared SFP optical module expansion ports. Once the
Gigabit SFP optical modules are inserted, these interfaces can support optical fi ber
cables to extend the Gigabit network—enabling the network to reach beyond the
300 foot limitation of twisted pair Ethernet.