Simply connected, Connecting to the power source – Luxul XAP-1040 User Manual
Page 9
Simply Connected
© 2015 Luxul. All Rights Reserved.
Other trademarks and registered trademarks are the property of their respective owners
9
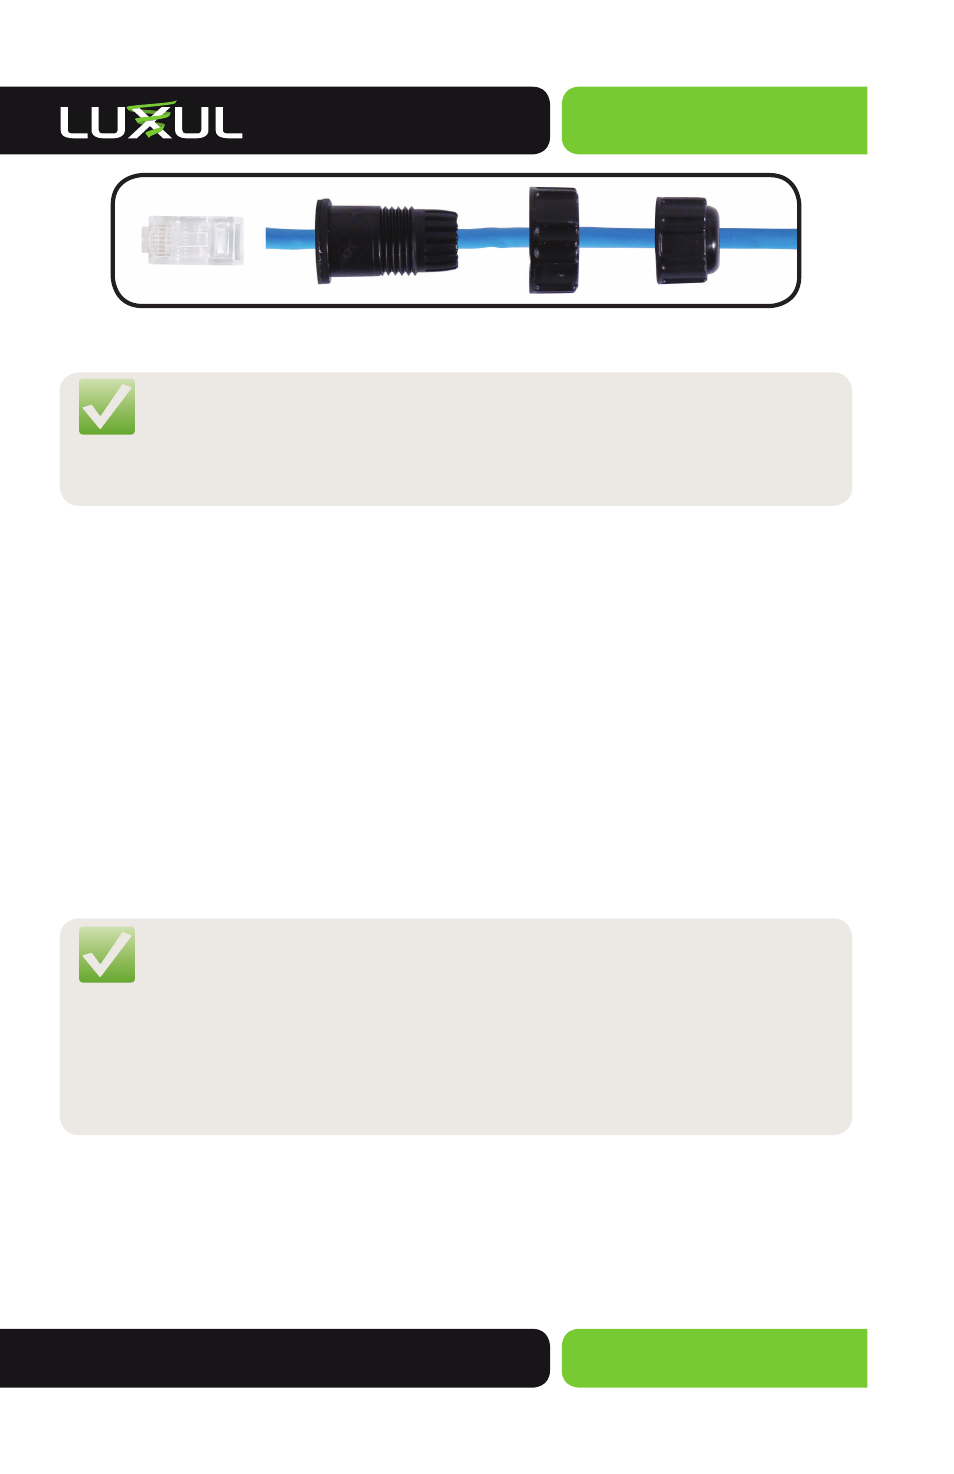
RJ-45 Connector Weather Resistant Gland assembly
NOTE: Category-5, super Category-5 or Category-6 unshielded twisted
pair (CAT5/CAT5e/CAT6 UTP) cables can be used. For best
results, it is recommended that Category-6 shielded twisted pair
be used to ensure stable data transmission at highest data rates.
Once the RJ45 Connector Gland has been assembled and the Ethernet Cable has
been terminated, the cable can now be plugged into the XAP-1040. You can now at-
tach the RJ-45 Connector Gland by placing it over the cable connector and turning
it clockwise until it is fi rmly secured. At this time, also tighten the gland around the
cable by turning it clockwise and thus creating a water-tight seal.
Connecting to the Power Source
The XAP-1040 is POE ready and supports Legacy (48v 1a), 802.3af, and 802.3at POE
injectors. A POE injector kit, including power supply and noise suppressor are
included with the device. To apply power, simply connect the opposite end of the
Ethernet cable to which the access point is already connected to the provided POE
injector or other POE switch or injector. An Ethernet cable length of up to 300 feet
can be used. DO NOT yet apply power to the POE injector or switch.
NOTE: To ensure FCC compliance and minimize high frequency noise, a
Ferrite Noise Suppresser is included with the POE injector kit. It
should be placed on the Ethernet cable at or near the connector
on the end of the Ethernet cable that plugs into the POE device.
To install it, simply unsnap the plastic fasteners, place it on the
Ethernet cable as demonstrated below and re-snap the plastic
fasteners to secure it in place.