Quick start tutorial, Quick start tutorial 16, Network setup – Lab.gruppen PLM 20K44 User Manual
Page 16: Network connections / topology, Network configuration
13. Quick Start Tutorial
16
PLM+ SERIES Quick Start Guide rev 1.0.0
13. Quick Start Tutorial
This section will describe how to get started with associated software and set up a basic system for operation.
13.1. Network setup
13.1.1. Network connections / topology
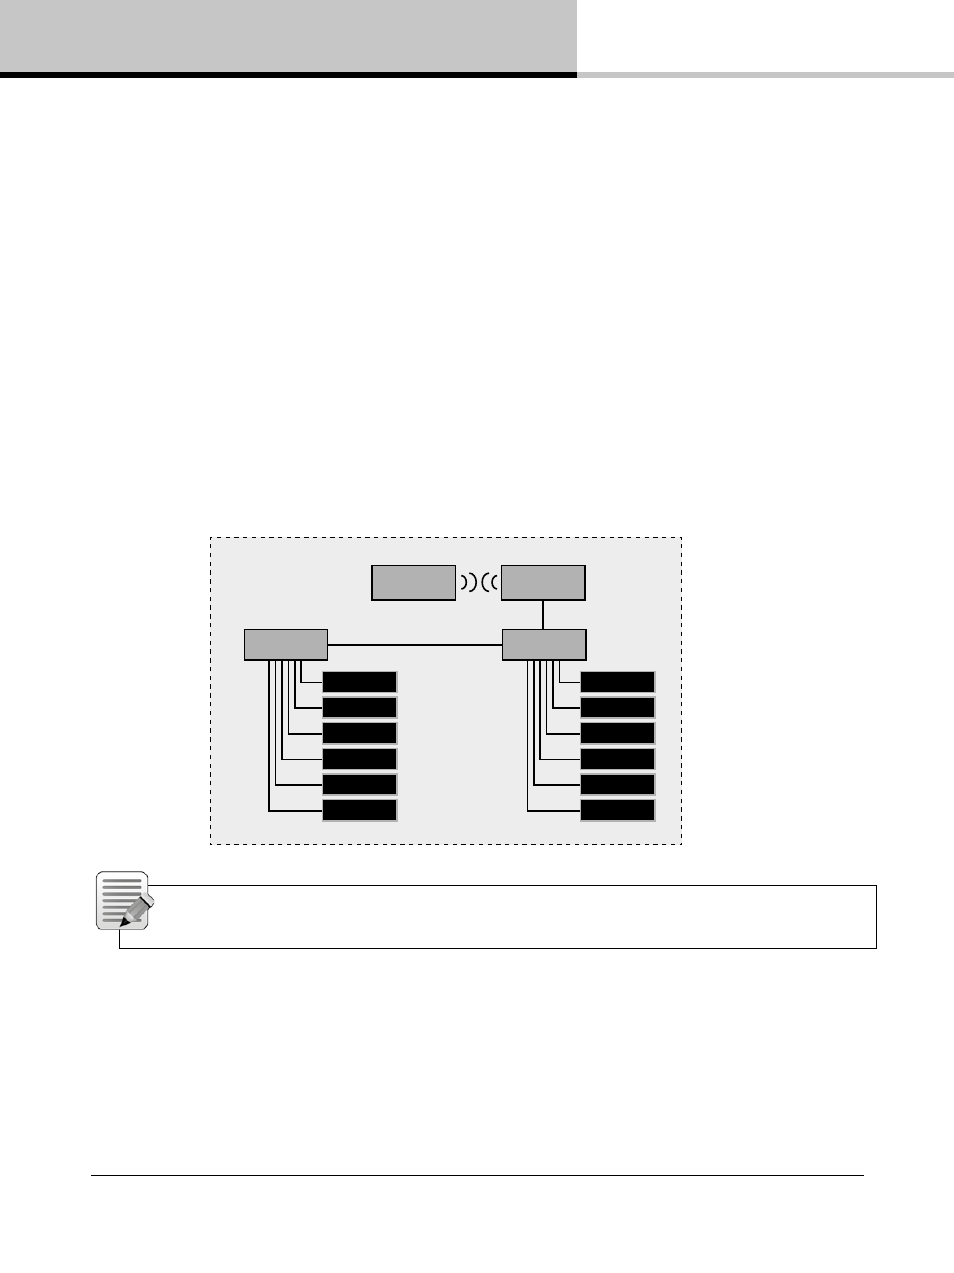
Each frame has two network ports; a primary and a secondary. See the below diagram for a typical network
topology using the primary ports.
By default, the secondary ports are configured in dual redundancy mode to support a second redundant network.
The alternate configuration for the two ports is a switch mode which allows daisy-chaining devices in a single
network. Daisy chain mode is not recommended for more than a few devices, and for not more than two if running
Dante audio along with control data.
Note: If using Dante audio in the network, the audio traffic needs to be filtered from reaching the
wireless links.
13.1.2. Network configuration
Frames are configured by default to obtain IP addresses automatically. The frame will assign itself an IP address
in the link local range (169.254.1.0 through 169.254.254.255). If a computer is configured the same way
(which should be default on modern operating systems), it will reside in the same subnet as the devices and
communication can be established. Alternate configurations would be DHCP for a managed network or fixed IP.
To connect to the secondary network in dual redundancy mode the computer shall be configured with an IP
address in the 172.31.0.0 - 172.31.255.255 range.
Computer
PLM+ Series
PLM+ Series
PLM+ Series
PLM+ Series
PLM+ Series
PLM+ Series
PLM+ Series
PLM+ Series
PLM+ Series
PLM+ Series
PLM+ Series
PLM+ Series
Switch
Wireless
Access Point
Switch