Assembly assembling dust hood, Assembling jointer fence, Moving start-stop switch to the up position – Delta 37-360 User Manual
Page 10
10
ASSEMBLY
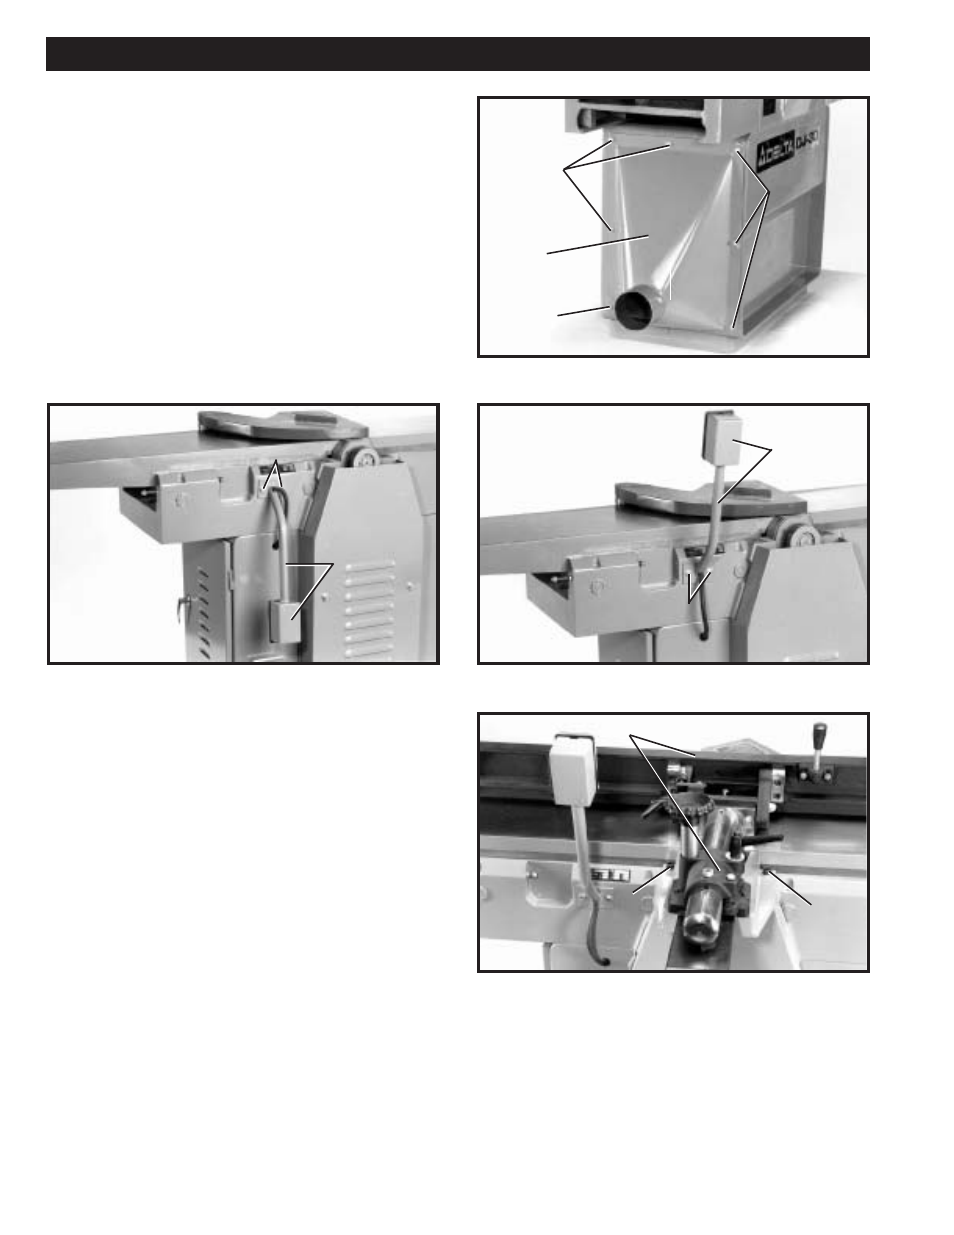
ASSEMBLING DUST HOOD
1.
Assemble the dust hood (A) Fig. 8, to the outfeed
end of the jointer base using the seven 5/8
″ long button
head screws (B) as shown.
Fig. 11
Fig. 8
Fig. 9
Fig. 10
ASSEMBLING
JOINTER FENCE
1.
Assemble the jointer fence assembly (A) Fig. 11, to
the machine cabinet, as shown, using the two 1-1/8
″ long
screws (B) and flat washers supplied.
MOVING START-STOP
SWITCH TO THE UP POSITION
1.
For shipping purposes, the start-stop switch and
switch arm (A) is shipped in the down position, as shown
in Fig. 9. Simply remove the two screws (B) Fig. 9, rotate
switch and switch arm (A) 180 degrees, as shown in
Fig. 10, and replace the two screws (B).
A
B
B
B
A
B
A
B
B
B
A