Step 2, Step 3, Step 4 step 5 – HITEC eHawkeye User Manual
Page 5: Step 6
5
Step 2: Attaching Control Linkages
Slide the control linkages through the middle hole in the control horns and then slide the locks over the
end of the linkage as shown above.
Step 2
Step 3: Main Wing Assembly
Slide the wing through the fuselage until prop-
erly positioned.
Step 3
While not necessary, you can apply
a small amount of CA glue to hold
the pieces permanently in place.
Step 4: Receiver Installation
Using the double sided tape, install the receiver
into the fuselage and plug the servo and ESC
leads into the appropriate channels.
Step 4: Battery Installation
Using the included Velcro strip, install the battery
into the front of the fuselage.
Step 4
Step 5
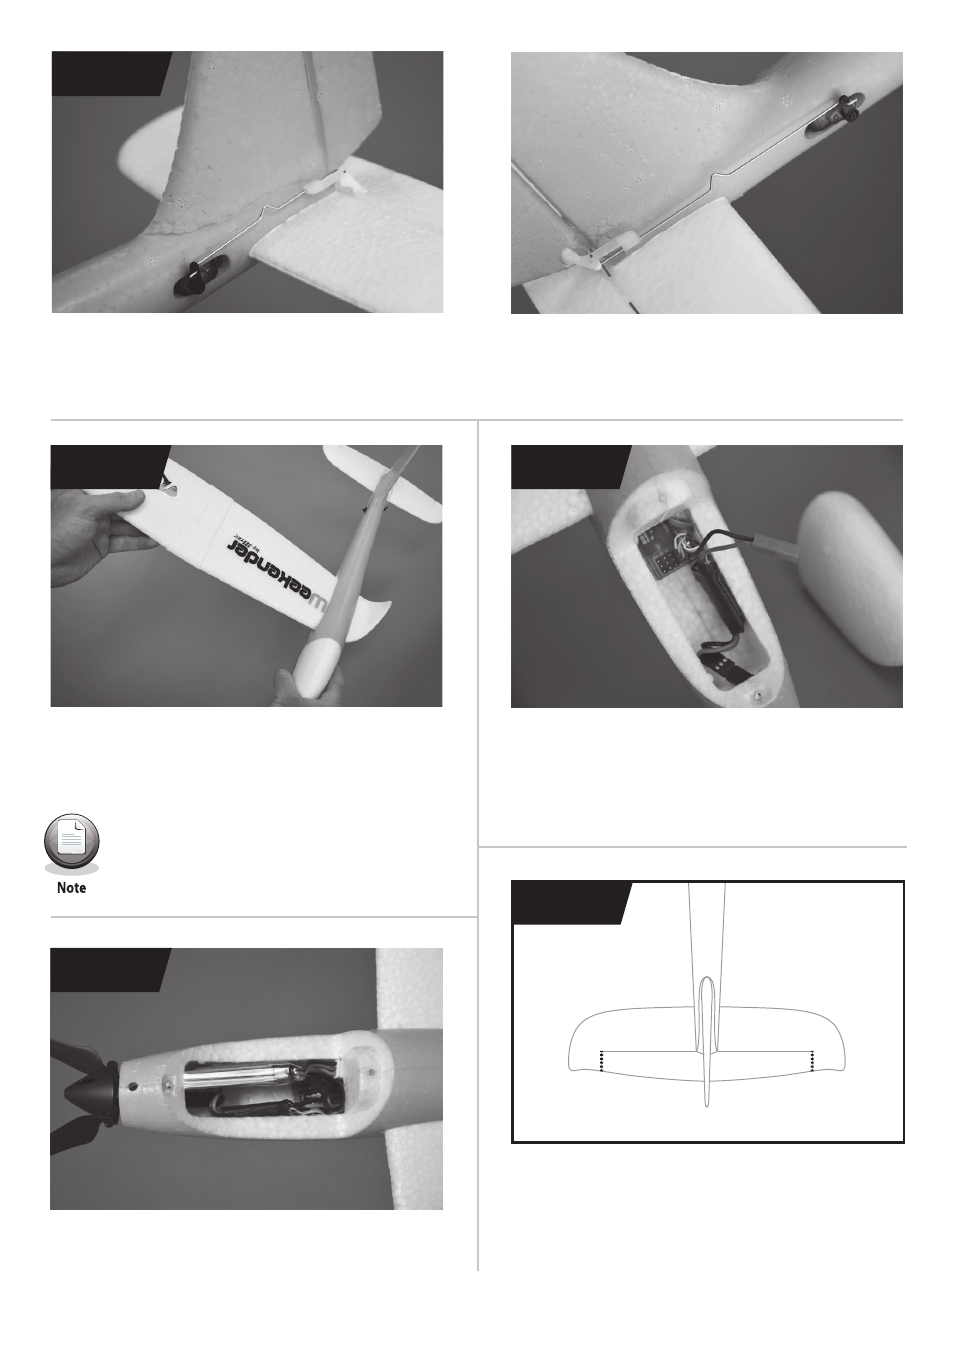
Step 5: Cutting the Control Surfaces
Before flying, you will need to cut the control
surface so they can move freely. Using a sharp
razor knife, cut only where indicated with
dashed lines in the above illustration.
Step 6
- MD10 (32 pages)
- S60 (39 pages)
- Hawkeye (2 pages)
- Sky Scout (KIT) (28 pages)
- Sky Scout (2GO) (32 pages)
- Extra 300S (12 pages)
- Warbirds - F4U Corsair (16 pages)
- Zipper (8 pages)
- Blizzard (16 pages)
- DogFighter (40 pages)
- Easy Glider Pro (52 pages)
- Easy Glider Pro (RR) (2 pages)
- Easy Star II (56 pages)
- FunCub (16 pages)
- Funman (52 pages)
- FunJet Ultra (32 pages)
- Gemini (40 pages)
- ParkMaster 3D (40 pages)
- Pilatus PC-6 Turbo Porter (12 pages)
- Razzor (56 pages)
- Shark (48 pages)
- Solius (60 pages)
- StuntMaster (24 pages)
- Tucan (64 pages)
- Twin Star II (40 pages)
- EasyCub (44 pages)
- Easy Star (32 pages)
- Easy Star (RR) (2 pages)
- Easy Star (Ready to Fly) (44 pages)
- FunCopter (64 pages)
- FunCopter V2 (64 pages)
- FunJet (32 pages)
- Mentor (48 pages)
- Mentor (RR) (2 pages)
- Merlin (40 pages)
- MiniMag (RR) (52 pages)
- Twister (32 pages)
- Xeno (32 pages)
- Q-Cop 450 (16 pages)
- Aurora 9X (144 pages)
- Flash 7 (102 pages)
- Eclipse 7 Pro (66 pages)
- Optic 6 Sport 2.4 (30 pages)
- Optic 5 2.4 (24 pages)