Instructions, Kit contents – EMP Tek EMS User Manual
Page 2
Instructions
Step 1.
Attach the Bottom Post (BP) to the Base with the Long Joining Screw (LJS) and Allen Key (AK)
supplied. NOTE: Please make sure that the wire management hole faces to the back of the base.
(see diagram 1)
Step 2.
Attach the Rubber Bumpers (RB) to the underside of the base. (see diagram 1)
Step 3.
Insert the Top Post (TP) into the Bottom Post (BP). Make sure that the Wire Management Hole
is to the top. (see diagram 2)
Step 4.
Install the Locking Screw (LS) into the threaded hole in the top of the Bottom Post (BP), and
tighten. (see diagram 2)
Step 5.
Attach the Mounting Bracket (MB) to the Top Post (TP) using the Short Joining Screws (SJS)
and Allen Key (AK), make sure the back of the mounting bracket faces the wire management
hole. (see diagram 3).
OPTIONAL: Attach the Mounting Plate (MP) to the Top Post (TP) using the Counter Sink
Screws (CS) and Allen Key (AK). Use the Double-Sided Tape to prevent the speaker from
sliding by adhering the tape in between the mounting plate and the speaker. Using the tape is
optional as it may not be removable later.
Step 6.
Attach the speakers to the Mounting Bracket (MB) using the appropriate Mounting Screw
(MS) and Washer (W) for your speaker. Tighten firmly, using the Allen key (AK) supplied. (see
diagram 3)
Step 7.
Adjust the stand height by loosening the Locking Screw (LS), adjusting the height of the
speaker to the desired height and then re-tightening the Locking Screw (LS) fully. Feed the
speaker wire through the post and connect to the system. (see diagram 4)
Step 8.
Repeat steps 1 through 7 for other stand.
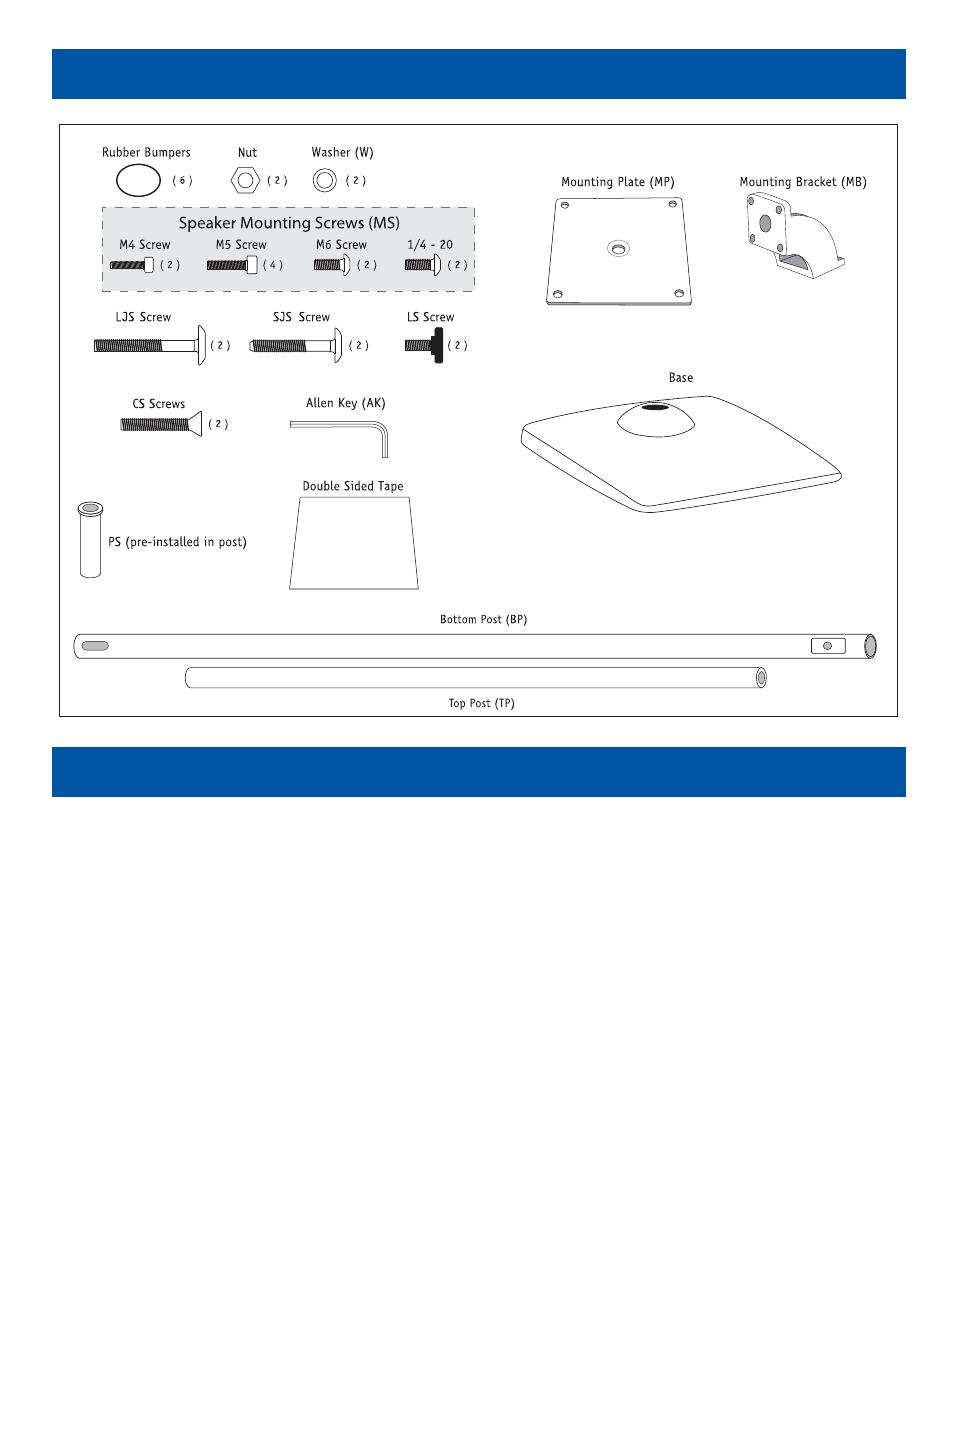
Kit Contents