Important, Warning, Caution – EarthQuake WE43E User Manual
Page 9: Assembly
9
Check for parts online at
www.getearthquake.com or call 800-345-6007 M-F 8-5
Operator’s Manual
WE43 Series Walk-Behind Edger
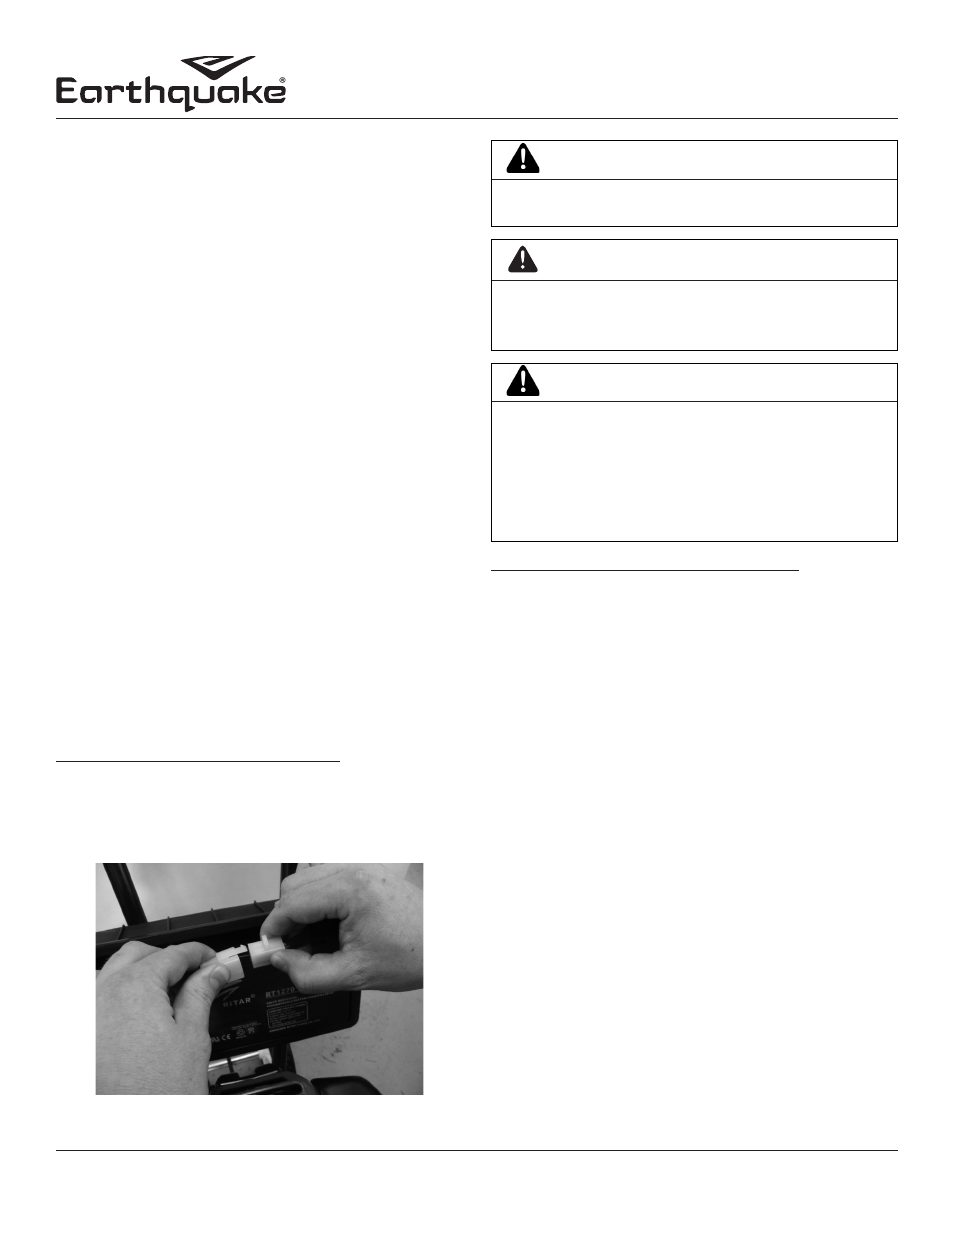
Figure 1
ASSEMBLY
UNPACKING
1. Set aside the operator’s manual and parts bag. Carefully lift
the edger out of the box, remove any packing material and cut
any ties holding the handlebar pieces to the edger assembly
ASSEMBLY INSTRUCTIONS
1. Stand the edger assembly upright with wheels on a level
surface. DO NOT place the edger on a high surface where
it can fall and cause property damage or personal injury.
2. Unscrew knob from height adjustment bar. Slide height
adjuster bar through slots in wheel mount bracket with wheel
placed towards edger blade guard. Place knob with bolt
through hole at top of height adjuster bar from engine side
and secure with nut. Adjust the height of the unit and place
detent pin (or knob with threaded stud) through matching
holes in height adjuster bar and wheel mount bracket. Refer to
photos in the “Parts Breakdown” section for proper placement.
3. Using two tee handle nuts (4640), two bolts (4642), and two
curved washers (4641), assemble the middle handlebar (4693)
to the handlebar and wheel mount weldment (400008) that is
already attached to the edger assembly. The middle handlebar
can be installed in two positions one high and one low. DO
NOT overtighten the tee handle nuts.
4. Attach the upper right and left handlebars (4689 and 4690)
to the middle handlebar using the two remaining tee handle
nuts, bolts, and curved washers. DO NOT overtighten the
tee handle nuts.
5. Secure cable to handlebar with provided cable tie.
NOTE: Untie knot in recoil rope before use.
For the Electric Start Edger Model WE43E, remove the battery
box cover and plug the white plastic connector from the battery
into the mating white plastic connector in the battery box. See
Figure 1. Make sure the ignition key is removed from the
ignition before connecting the wiring for the battery.
FOR MODEL WE43E ELECTRIC START
CHARGING THE BATTERY
To charge the battery, check that the battery wiring is properly
connected and plug the battery charger (4681) into the side
of the battery box (4656) with matching three-prong plug.
Plug the other end of the battery charger into a standard 120V
outlet receptacle. Battery is fully charged when the LED light
turns GREEN on the external charger. The electric start edger
(WE43E) will maintain a charge in the battery when the engine
is running.
Batteries may take as long as 8 hours to fully charge depending
on the original charge level of the battery.
NOTE: For long-term storage protection, be sure that
the battery is fully charged and the white plastic battery
connector is disconnected. Place the battery box cover onto
the battery box and store in a dry place out of direct sunlight.
NOTE: Rechargeable batteries have a limited number of
charge cycles and may eventually need to be replaced.
Battery life and number of charge cycles vary by use. If
you are questioning whether your charger is functioning
properly, test the charger by measuring the voltage using
a multi-meter. The voltage across the pins should be 12-14
volts when the charger is plugged into a wall socket.
IMPORTANT
DO NOT SPRAY WATER ON OR NEAR THE ELECTRON-
ICS OF THE EDGER AS THIS MAY RESULT IN DAMAGE
TO THE ELECTRICAL COMPONENTS.
DO NOT TRY TO START ENGINE WHILE THE BATTERY
CHARGER IS CONNECTED. THIS COULD DAMAGE THE
ENGINE AND BATTERY.
WARNING
AVOID ELECTRICAL SHOCK! DO NOT USE BATTERY
CHARGER AROUND WATER OR IN WET CONDITIONS.
CAUTION
BATTERIES MUST BE REMOVED FROM MACHINE AND
STORED IN A WARM LOCATION WHEN AMBIENT TEM-
PERATURE FALLS BELOW FREEZING.