EarthQuake CS3814B User Manual
Page 6
6
Operator's Manual
CS3814B, CS4116B Chainsaws
Check for parts online at www.getearthquake.com or call 800-345-6007 M-F 8-5
•
Never use the guide bar as a means to lift, pry, move
or split objects.
•
Never mount the chainsaw on a fixed stand.
•
If the guide bar and saw chain become pinched in a
cut, do not race the engine or pull the saw out of the
cut by force. Use a wedge or lever to open the cut
and pull the saw free.
Felling a Tree
•
Felling refers to the process of cutting down a
standing tree. Numerous factors must be taken into
consideration when felling a tree. First consider the
environmental factors which will determine the fell-
ing direction:
•
Wind is a major determining factor of felling direction.
•
Location and number of heavy branches and the lean
of the tree.
•
Ease of bucking and clean-up after felling
•
Nearby standing timber in which the felled tree could
hang up.
•
Location of power, telephone and data utilities, build-
ings, roads, bodies of water, property lines, etc.
•
Wood structure and condition (i.e. rotten heartwood
or core).
•
Keep all bystanders at least 2-1/2 tree lengths away
from the base of the tree to be cut. This area is con-
sidered a danger zone and must be avoided before
and during the felling operation.
Retreat Path
•
Plan two (2) retreat paths away from the felling
direction of the tree. Do not retreat in the opposite
direction from the falling tree. Instead, retreat at a
45-degree angle to either side.
•
Clear the retreat paths of all obstacles.
•
Place all excess tools and equipment a safe distance
from the tree, but not in the retreat paths.
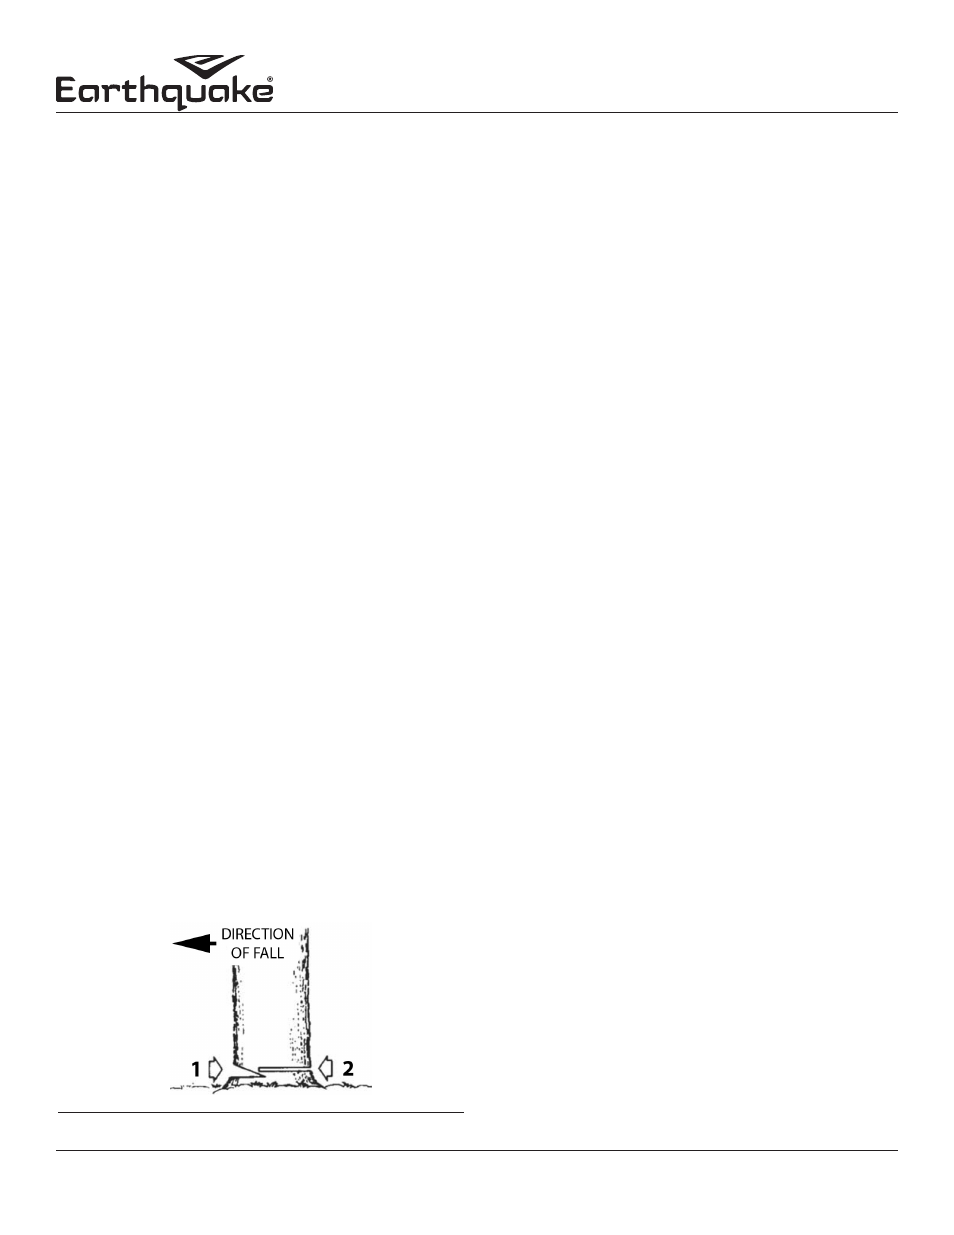
Felling Notch
The felling notch (1) is the first cut when felling a tree. SEE FIGURE
2. The notch will act as a hinge and will direct the tree to fall in
the desired direction.
1. Begin the felling notch (1) by lining up the guide bar
perpendicular to the desired felling direction.
2. Make a downward cut at 45-degress to a depth of about
1/5 to 1/4 of the overall diameter of the tree.
3. Finish the notch by making a horizontal cut
perpendicular to the desired felling direction.
4. Remove the resultant piece.
Felling Cut
Alert others in the area of imminent danger of the falling tree.
Double check that no one has entered the area in the felling
direction. SEE FIGURE 2.
1. Begin the felling cut (2) by making a horizontal cut
perpendicular to the intended felling direction and
approximately 1-2 inches above the bottom of the felling
notch.
2. Leave approximately 1/10 of the tree’s diameter uncut.
This will form the hinge.
3. Drive plastic or wooden wedges into the felling cut to
control the fall.
4. As the tree begins to fall, alert others and immediately
evacuate the area around the tree.
Limbing a Felled Tree
“Limbing” refers to removing the limbs from a fallen tree. There is an
extremely high danger of kickback during the limbing operation. Do
not work with the nose of the guide bar, as this could cause a kickback.
Use extreme caution and avoid contact between the nose of the bar
and the log or other limbs. Do not stand on the log while limbing it as
the log may roll as limbs are removed and the center of gravity shifts.
Start limbing by removing limbs from the top side of the log,
leaving limbs on the bottom to support the log up off the ground.
Limbs under tension may pinch the guide bar and saw chain.
Shut off the engine and lift the limb to remove the bar safely.
Bucking a Log
“Bucking” is the cross-cut operation of cutting a log into usable
sections. Do not stand on the log while bucking as it may
roll. When bucking on a slope, stand uphill of the log in case it
begins to roll unexpectedly. Cut only one log at a time.
•
When bucking small logs, place them in a “V” shaped
bucking horse to keep them at a working level. Never
allow a bystander to hold the log. Never hold the log
with your leg or foot.
FIGURE 2